Setup Azure Devops 2022 on a Windows 2022 server virtual machine
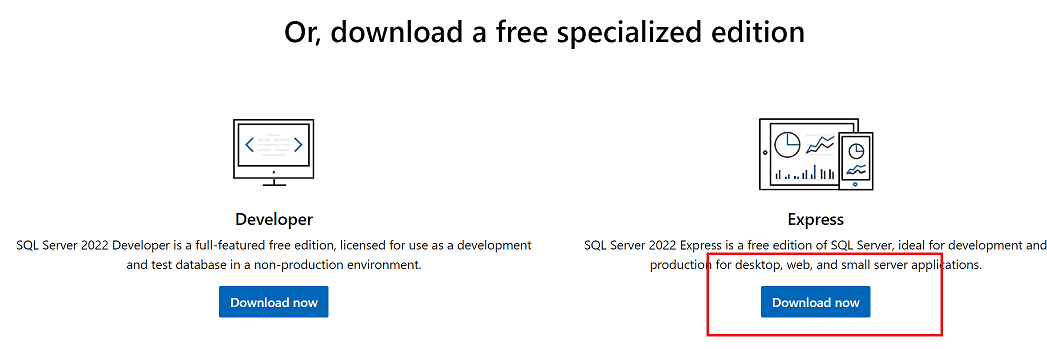
Download Sql 2022 express edition from below link and Azure Devops Server 2022. We will use Sql express for our test environment but you can install another sql edition according to your infrastructure design. You just need to choose Database Engine whilst you install. That is enough sql feature for Azure Devops 2022. I assume that you already know how to install Windows Server 2022, that’s why I didn’t show it here.
Sql Express Edition Download :
https://www.microsoft.com/en-gb/sql-server/sql-server-downloads
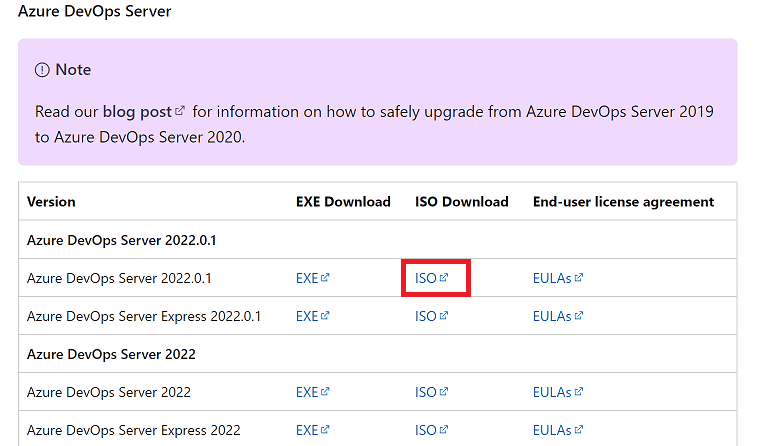
Azure Devops Server Download :
https://learn.microsoft.com/en-us/azure/devops/server/download/azuredevopsserver?view=azure-devops
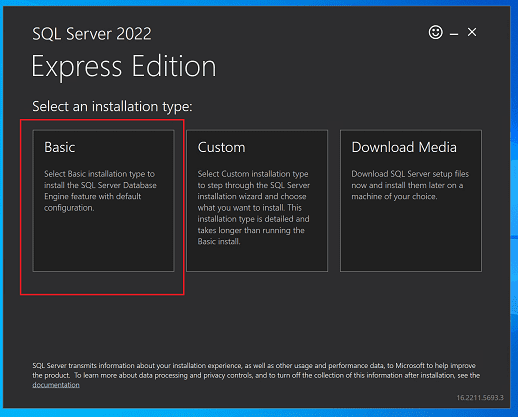
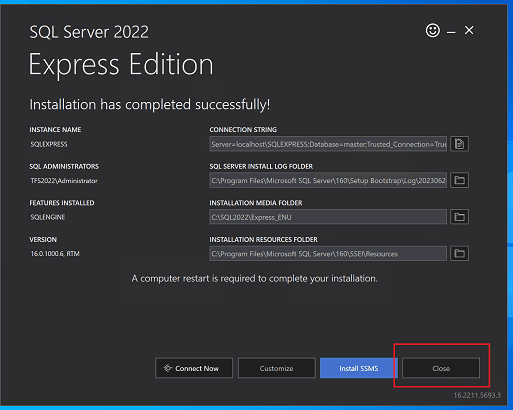
Choose Basic option to install sql express. It is pretty good enough for Azure Devops Server 2022. After Setup finished, you need to restart server.

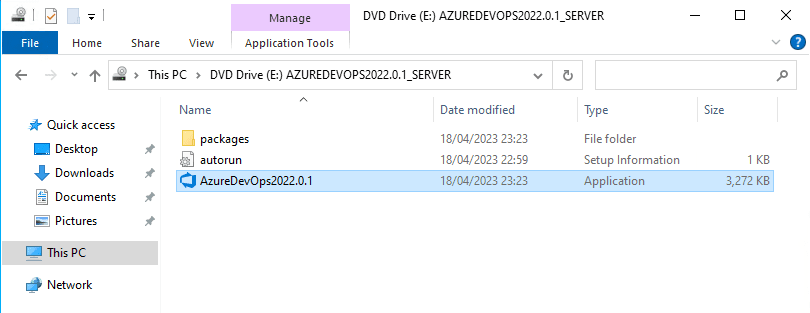
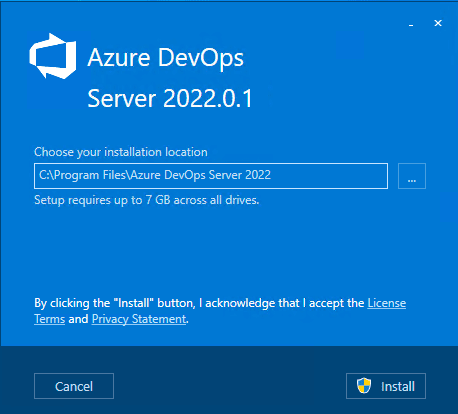
Now, let us run Azure Devops 2022 installation. Run AzureDevOps2022.0.1 application and click on Install and restart computer after installation finished.

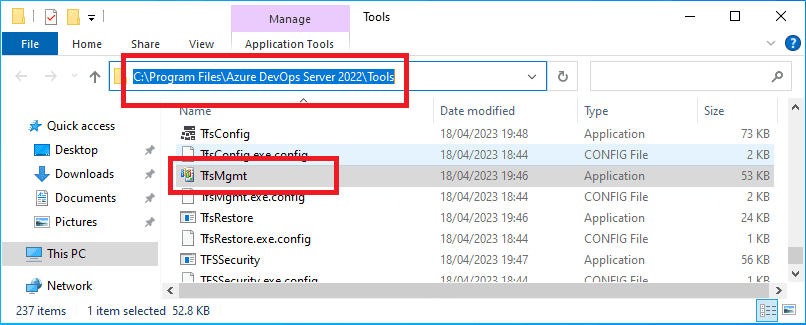
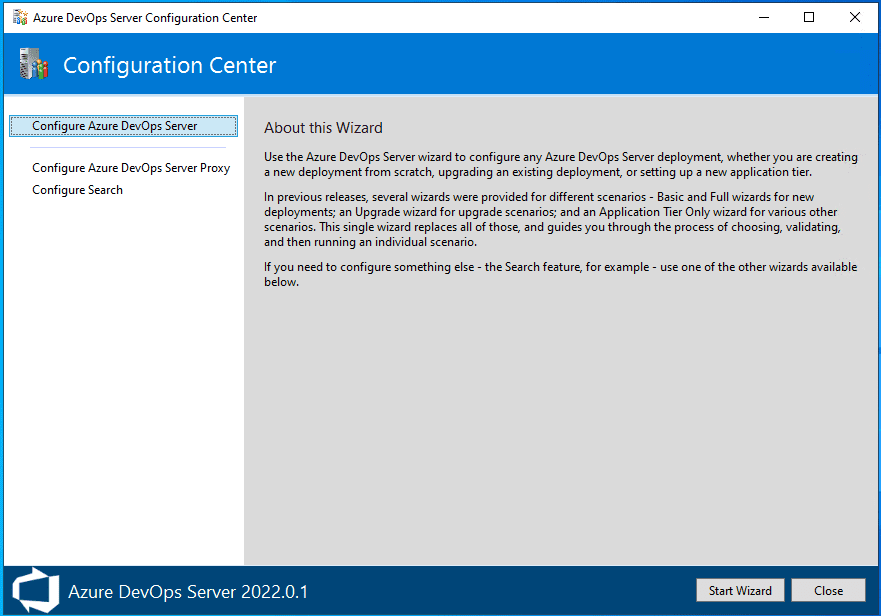
We are ready to configure Azure Devops to make it get ready to use. Configuration Wizard screen will open up automatically when you logged in server after restarted. With somehow if it doesn’t open then you can run it manually under installation folder.
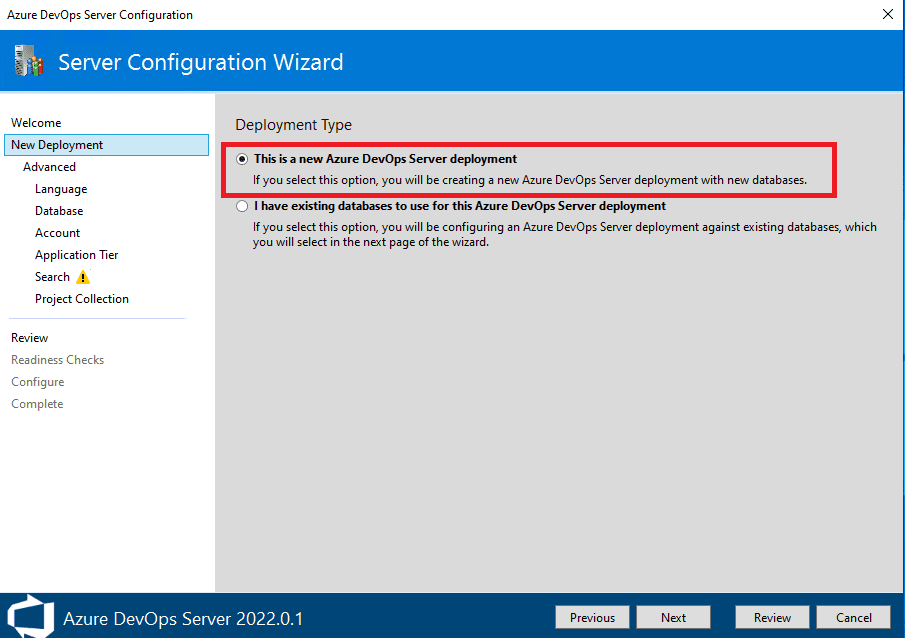
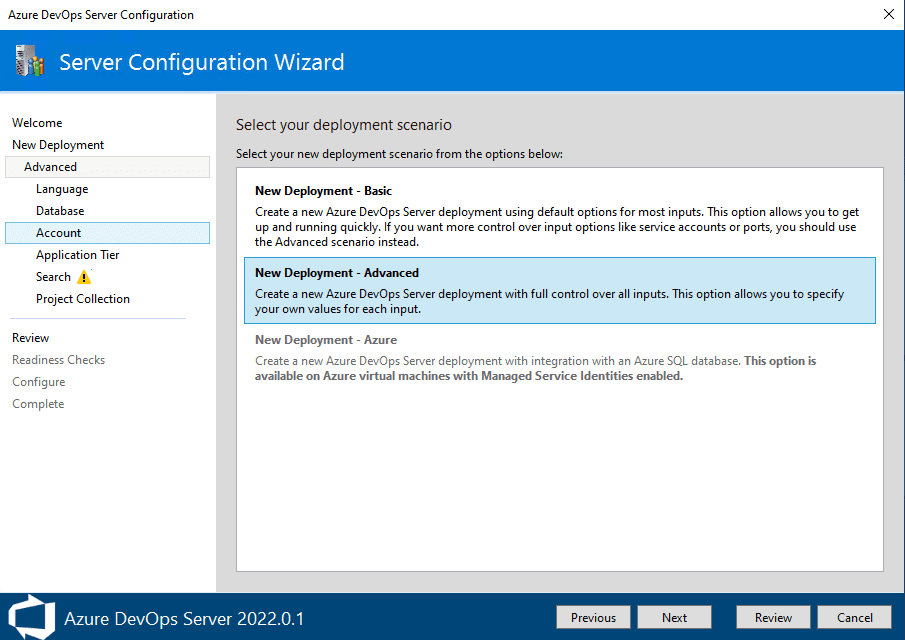
Choose “This is a new Azure DevOps Server Deployment” option to install a fresh tfs deployment and then “New Deployment Advanced” option to configure url and ports to access tfs user interface via internet browsers. If you choose Basic deployment then setup will configure url as default with only http access. That’s why we will choose advanced to configure our desired url according to our infrastructure design.
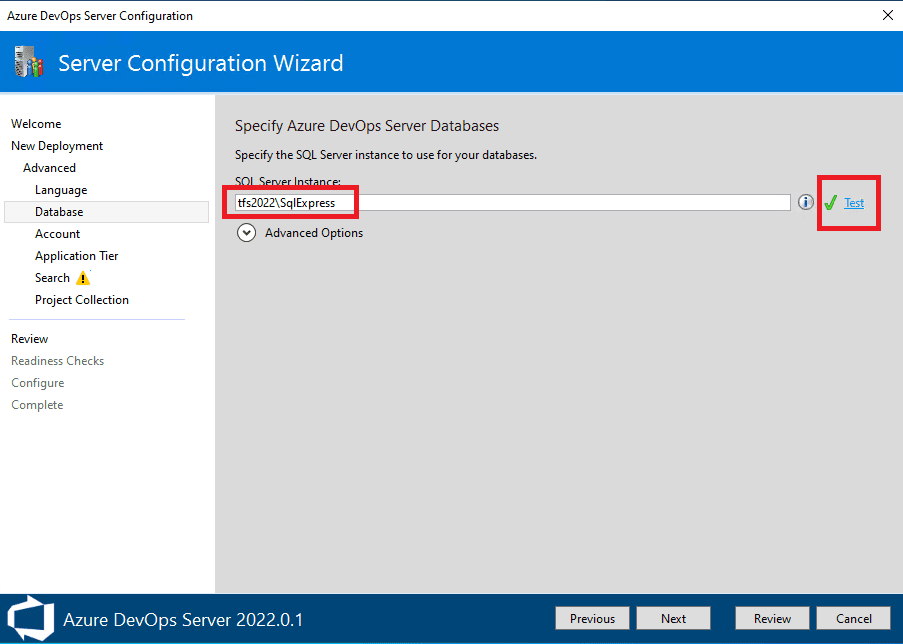
We installed Sql express edition on our tfs server so we will choose it and clik on Test to test connection. If you want to use another database server then you need to write its connection settings in this screen. Tfs2022 is our server name and SqlExpress is sql instance name created during sql installation.
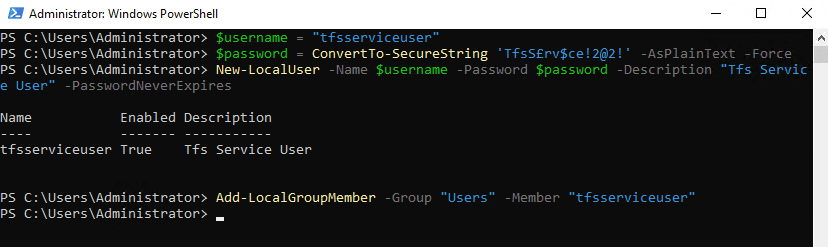
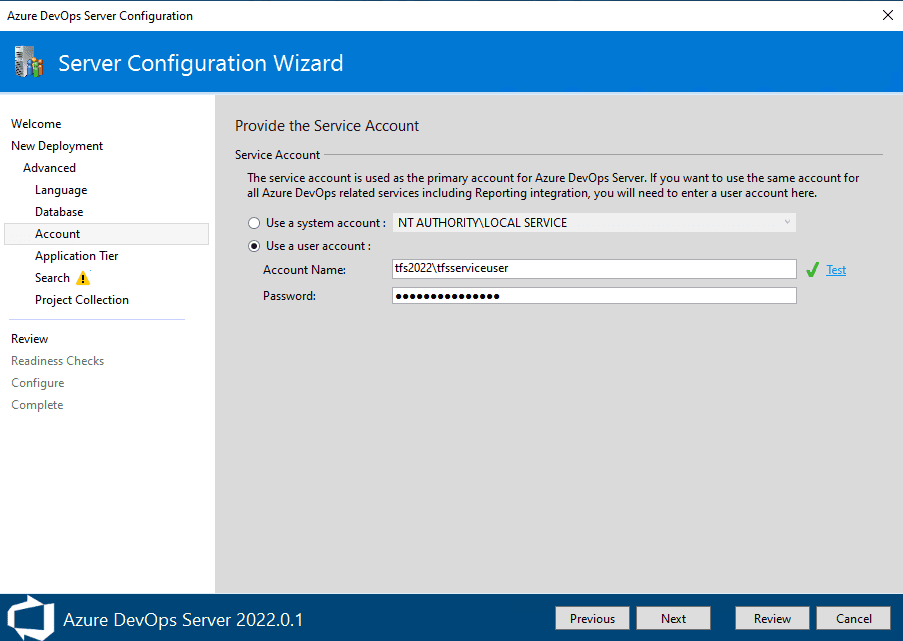
Let us create a local user for Azure Devops services to make it more secure. You can create an active directory user as well if tfs server is a member of your domain. In our case it is workgroup server that’s why we will create a local user. I suggest you never use default authority account for tfs services. Here is powershell commands to create a new local user with never expired password. Remember to change password within Azure Configuration as well if you change it for security purpose later in future.
$username = “tfsserviceuser”
$password = ConvertTo-SecureString “YourOwnTfsUserPassword” -AsPlainText -Force
New-LocalUser -Name $username -Password $password -Description “Tfs Service User” -PasswordNeverExpires
Add-LocalGroupMember -Group “Users” -Member “tfsserviceuser”
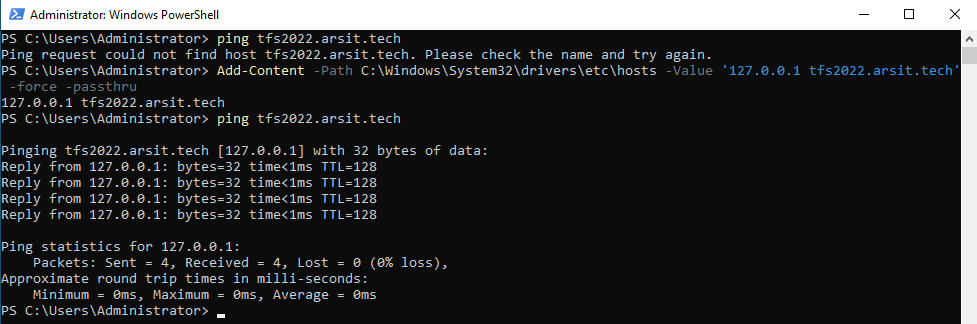
We also need to add domain name to windows host file to resolve public url in tfs server. Other wise tfs will not know where our public url is. Remember we will write this url on Application Tier screen so define url to write in host file accordingly .
Add-Content -Path C:\Windows\System32\drivers\etc\hosts -Value ‘127.0.0.1 tfs2022.arsit.tech’ -force -passthru
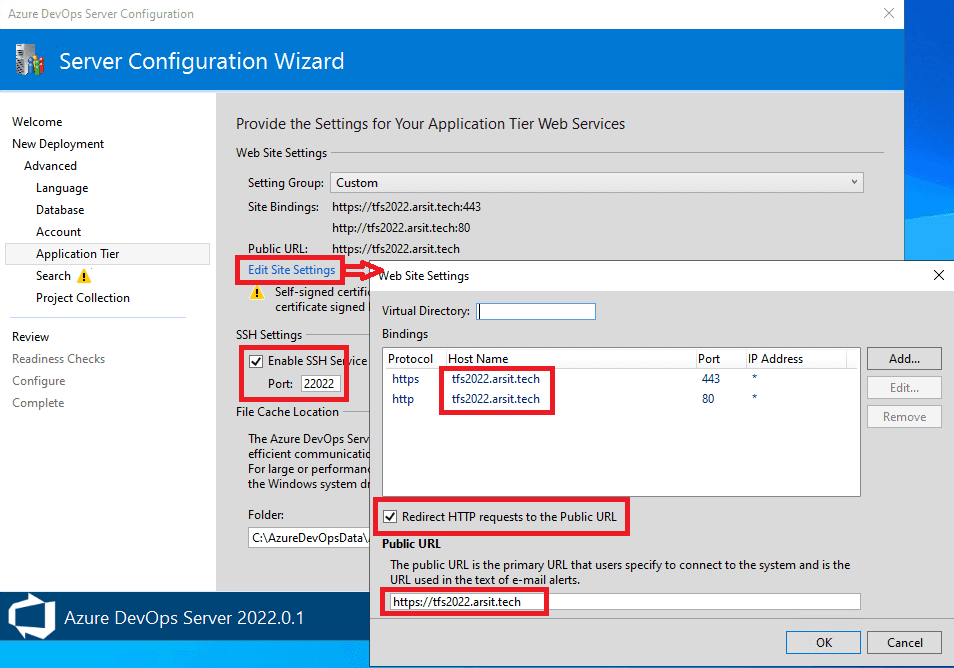
Click on “Edit Site Settings” to configure http and https urls and ports. We added tfs2022.arsit.tech domain into host file with powershell command. If we didn’t do that, tfs setup couldn’t resolve where this domain is. Choose a different ssh port rather than default for more security if you plan to access via ssh to tfs server internally or externally. If you want to change your domain name and certificate file later, you can do it via IIS manager on tfs server.
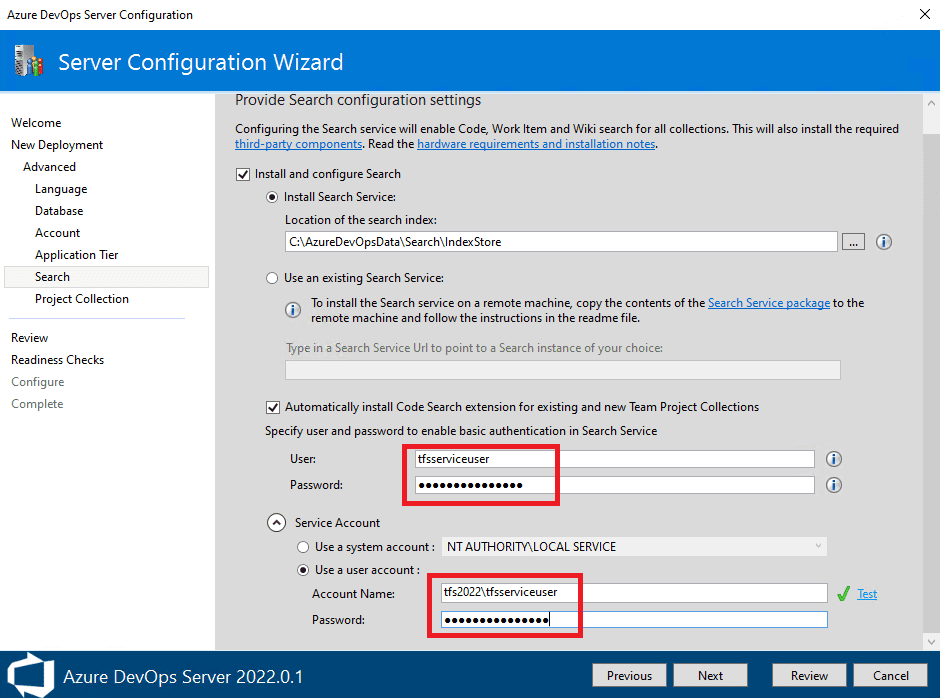
Write local tfsserviceuser to search service and service account as we created with powershell before for tfs services.
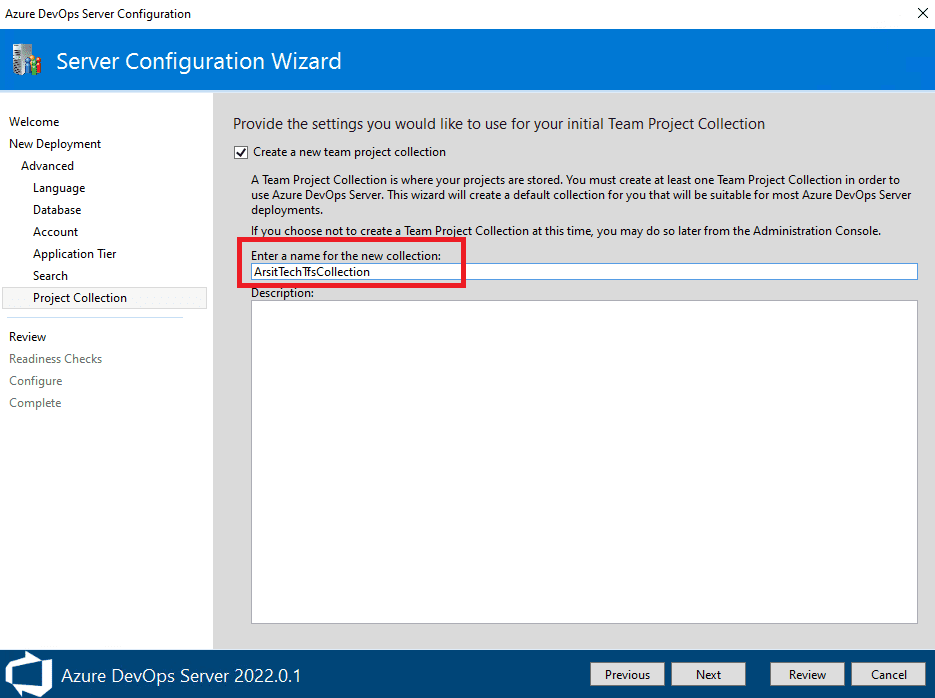
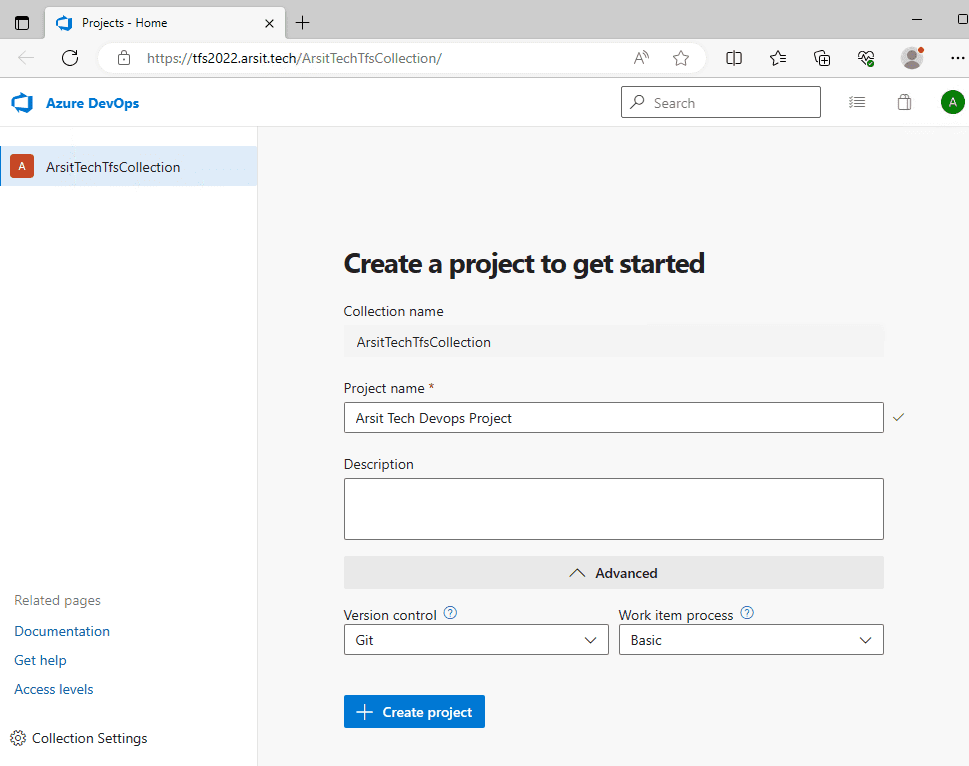
Write a Project Collection name as you desired according to your design and you can also write a description for your project.
Now it is review time for our configuration 😊

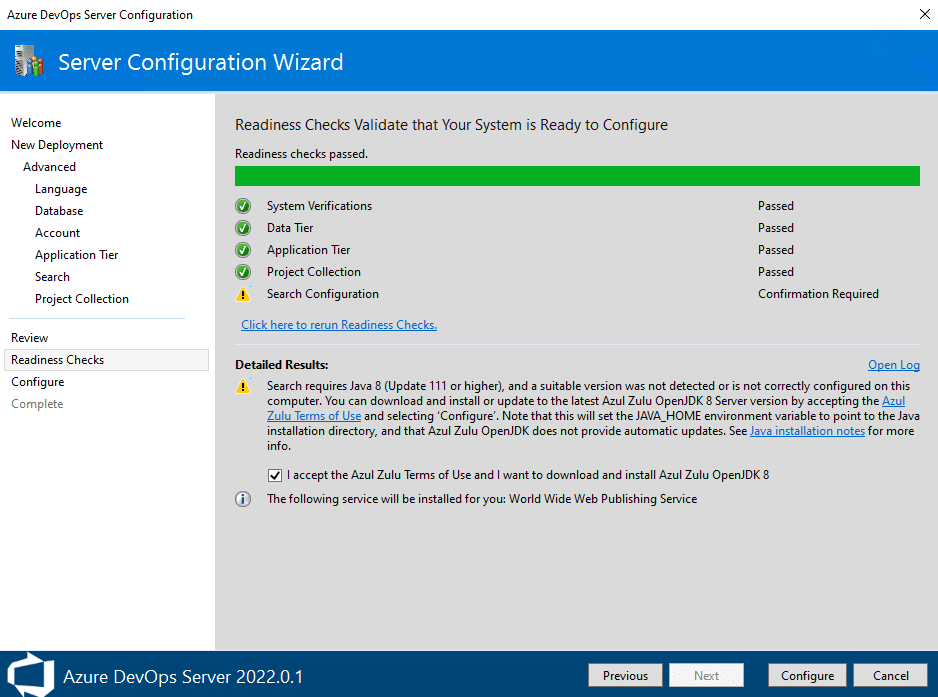
Tick on “I accept Azul Zulu” checkbox to let tfs setup install Azul Zulu OpenJDK automatically for you. Then click on Configure to finish setup.
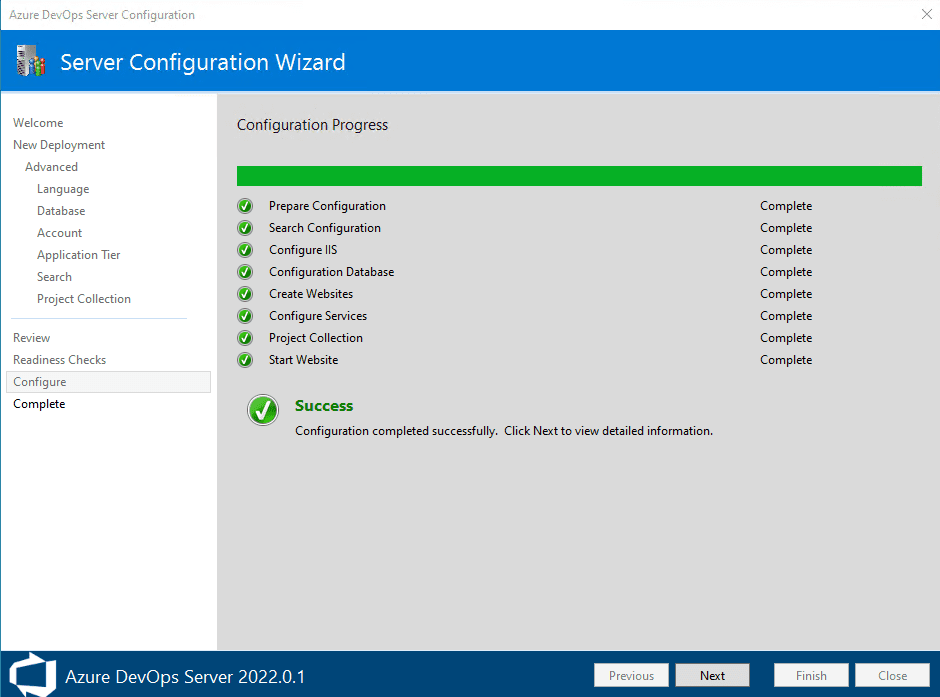
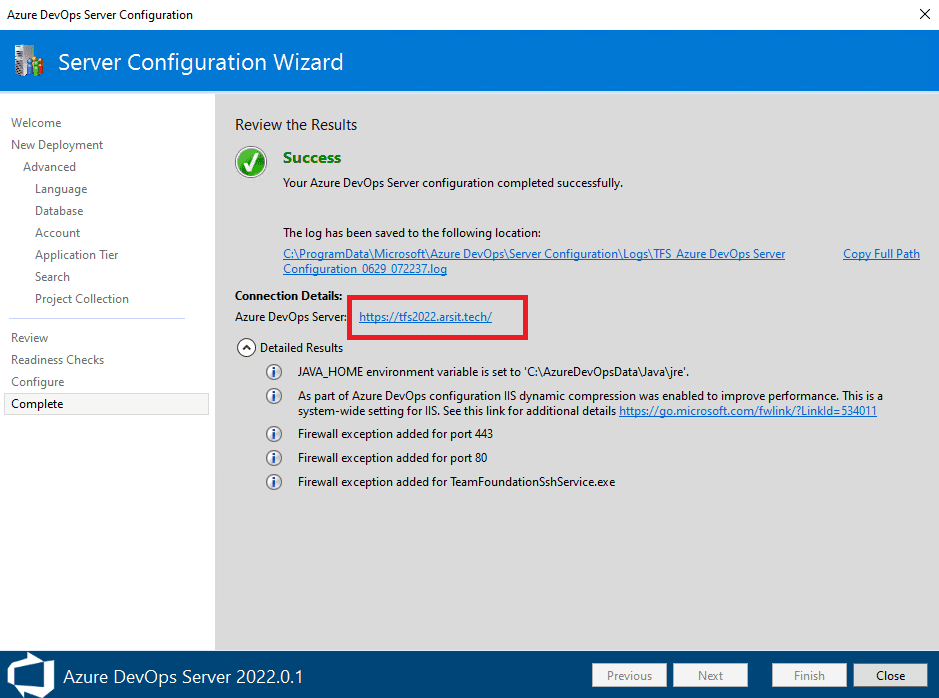
And congrats! You installed Azure Devops 2022. Click on Next to go to Complete screen and then Close to finish setup. You can click on Url to login Azure Devops 2022 user interface on your internet browser.
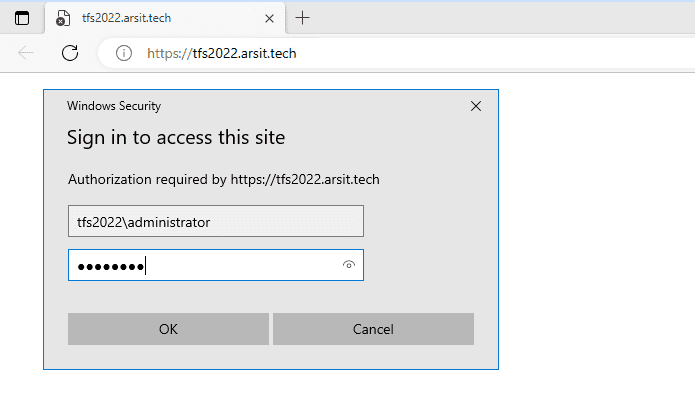
Once browser opened after you clicked on Url then tfs will ask you to provide credentials to login. Write your user credentials that you run Azure Devops Installation with. If you run installation with username “tfsuser” then you just need to write tfsuser and its password to login. This tfsuser will be tfs admin to manage. You can assign another admin user later with Management Console. In our case, we run setup with local administrator user so we will write its credentials to login.
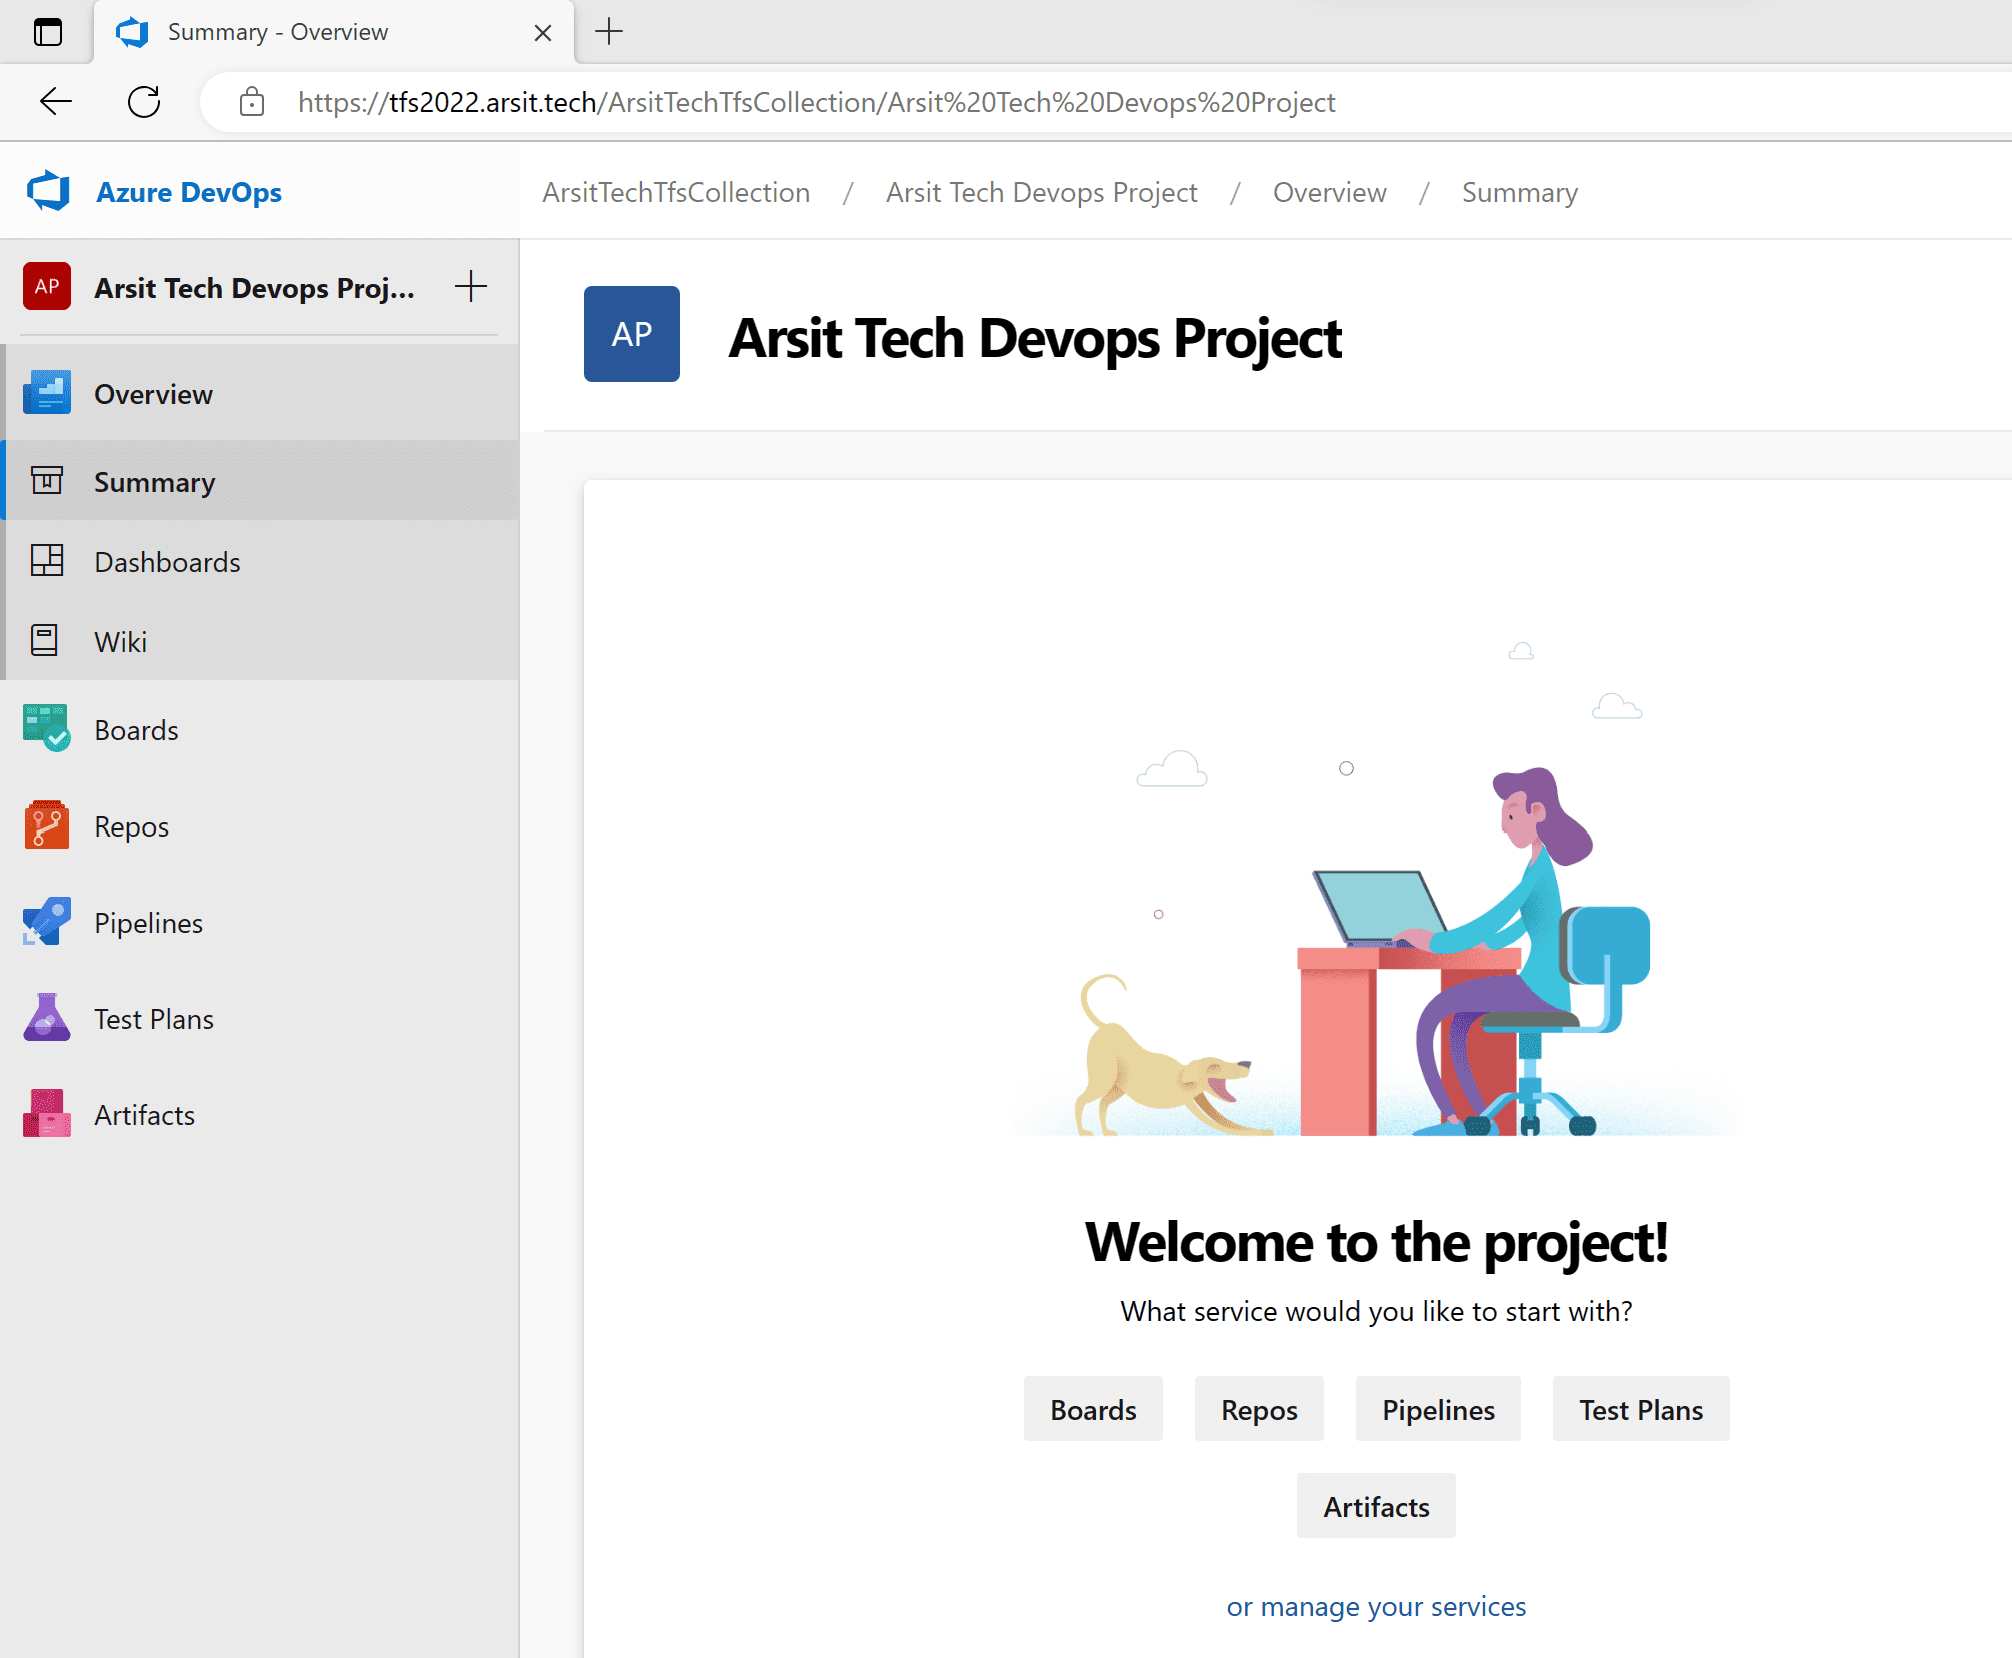
After you logged in write a project name as you desired according to your design, then click to Create Project. Your Azure Devops is ready to use now.
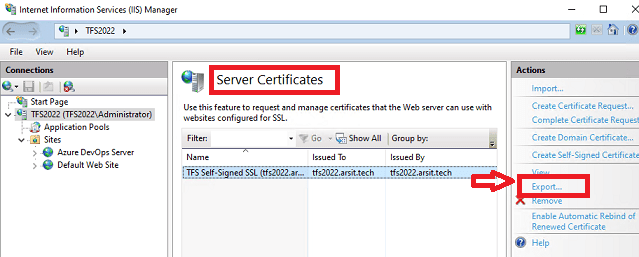
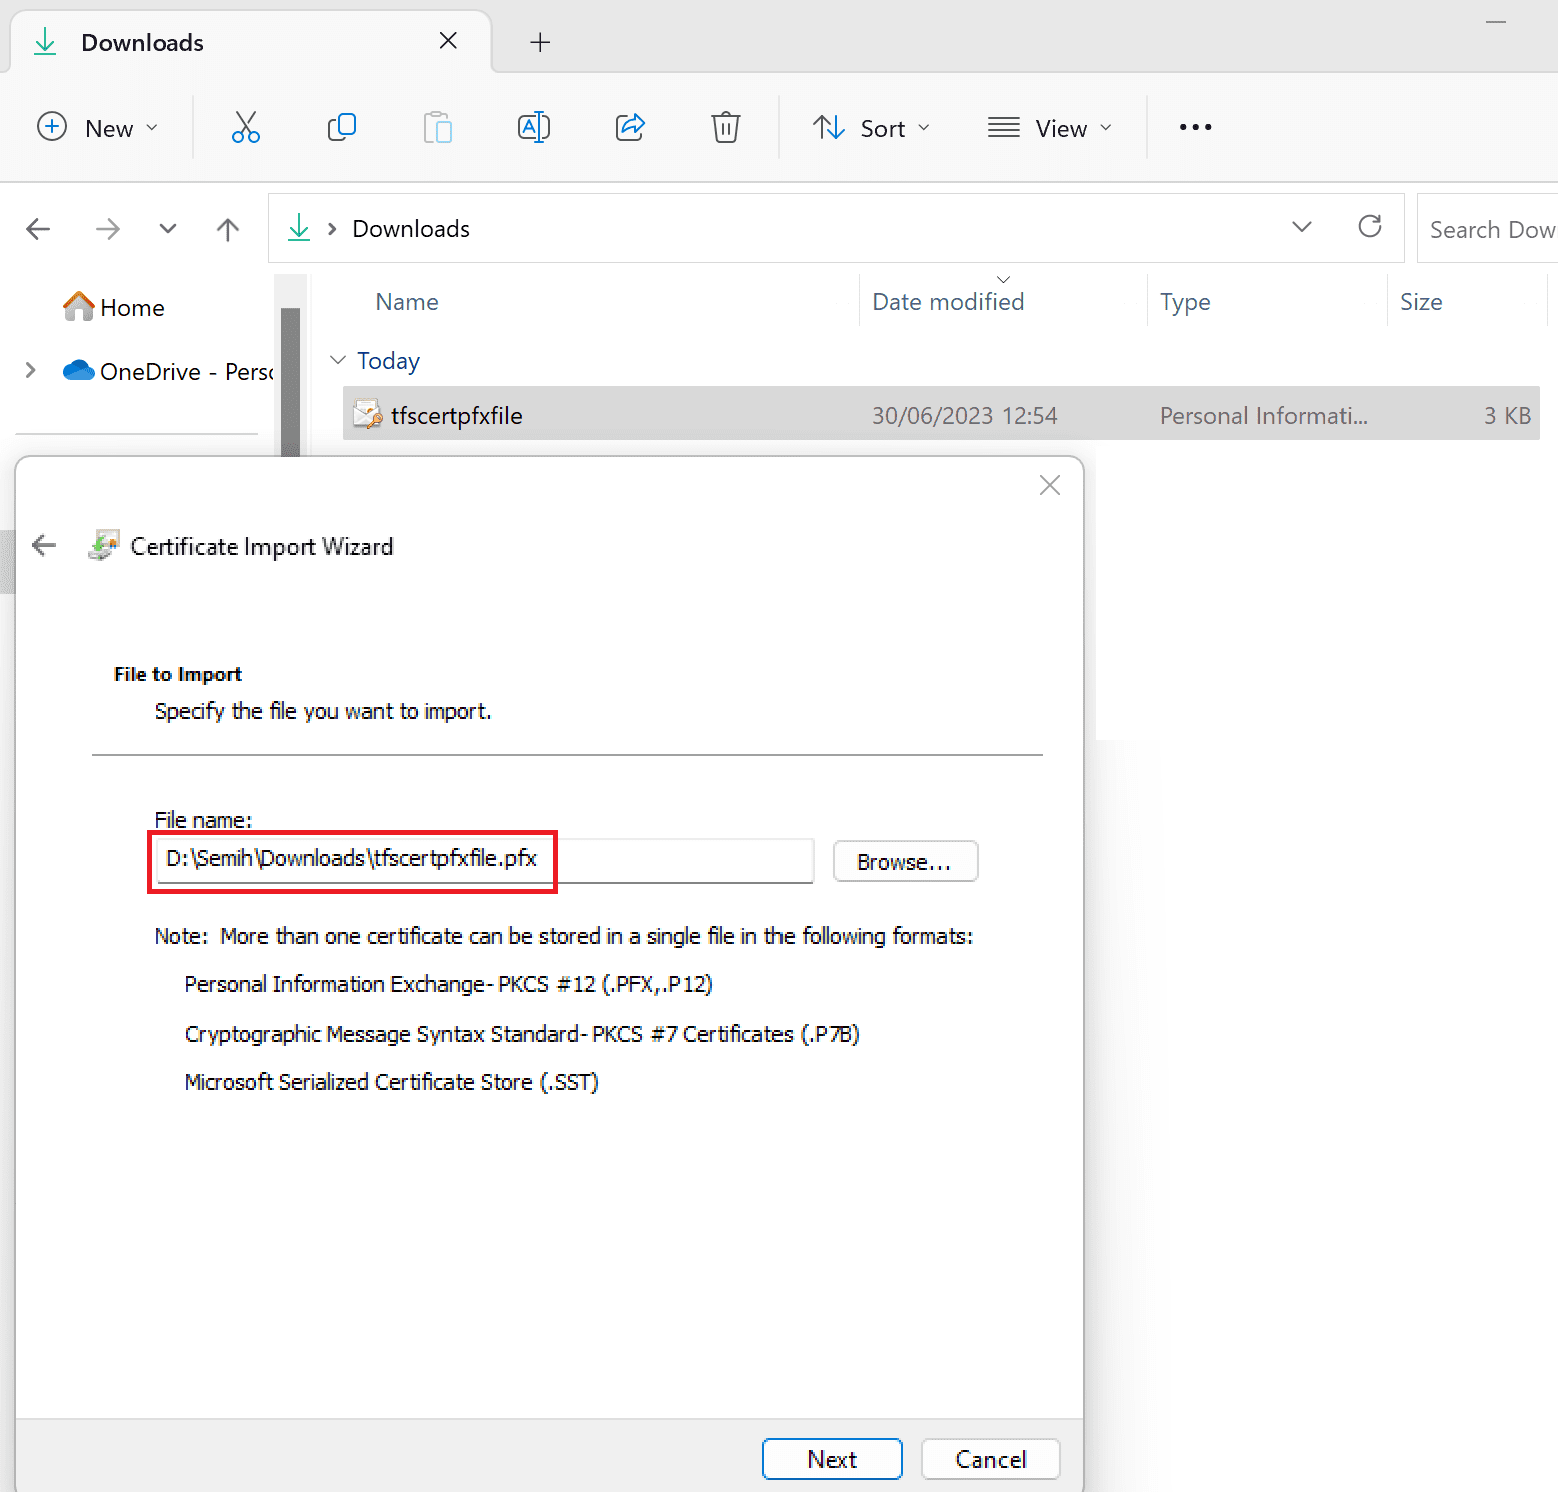
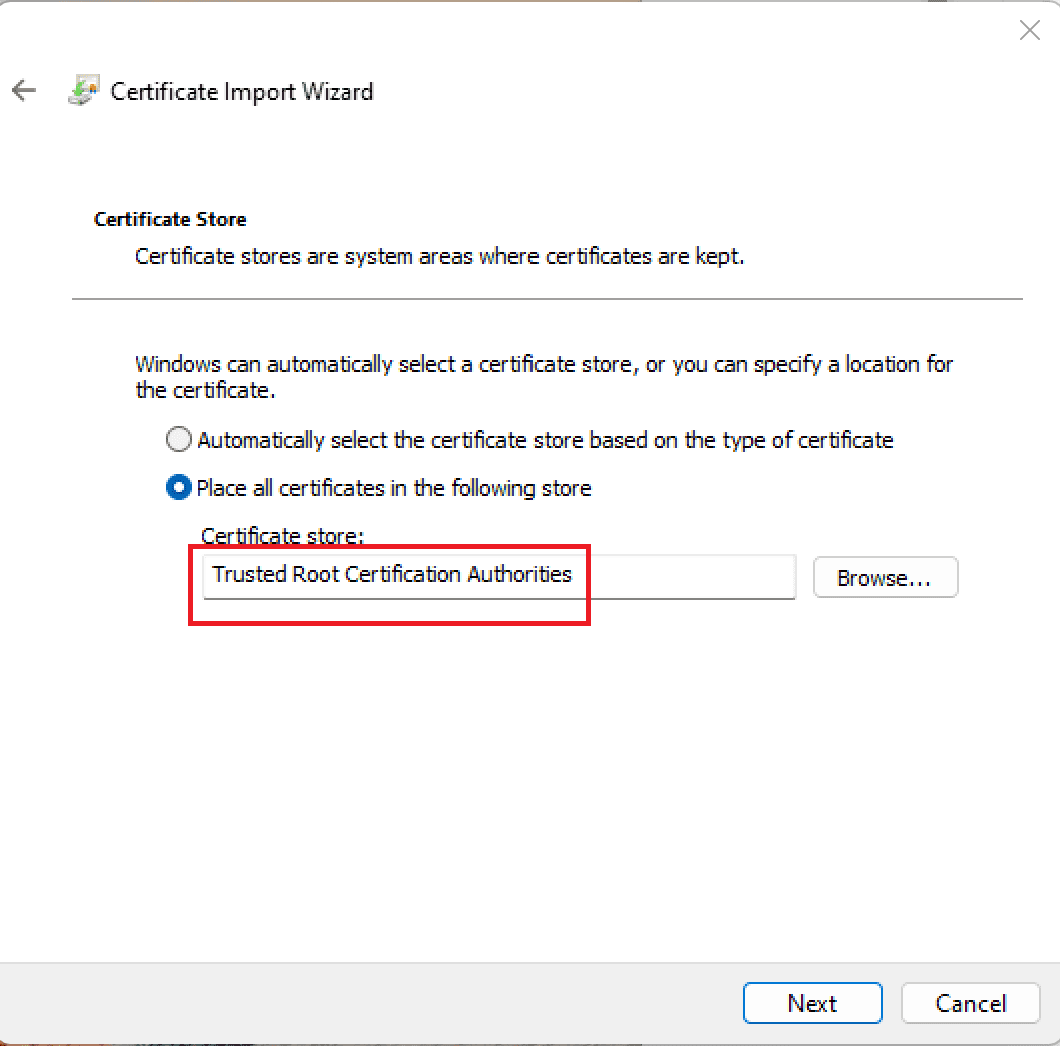
We installed Azure Devops 2022 on our server and accessed it via browser in the same server. Now we need to copy cert file to our computers to be able access tfs via our computers. Run Internet Information Service on tfs server and export cert file. Copy file to your computer and install it to Local Machine Certificate store.
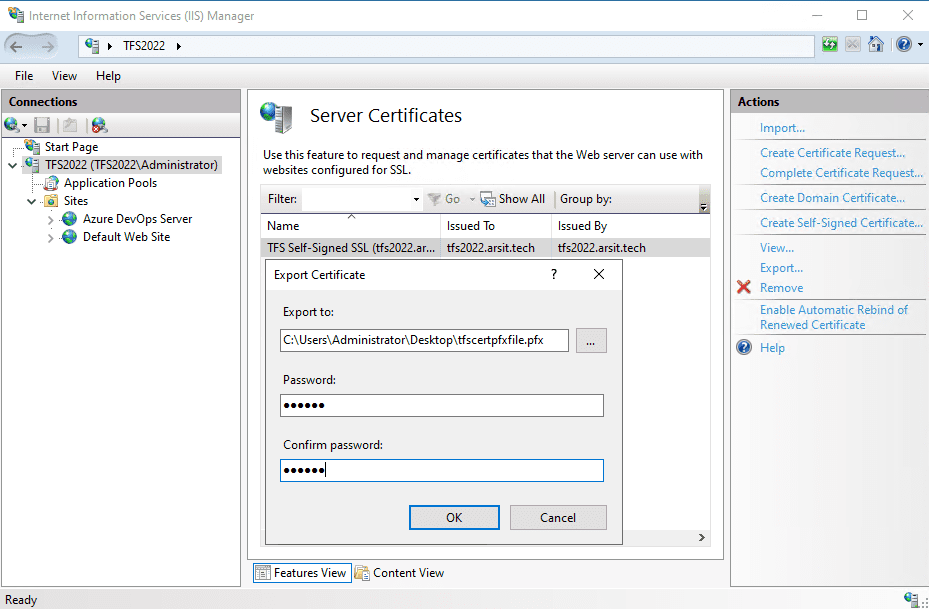
Download this pfx cert file to your computer and double click on it to install. Chose Local Machine store to install. Then write same password when you export it on the tfs server IIS manager.
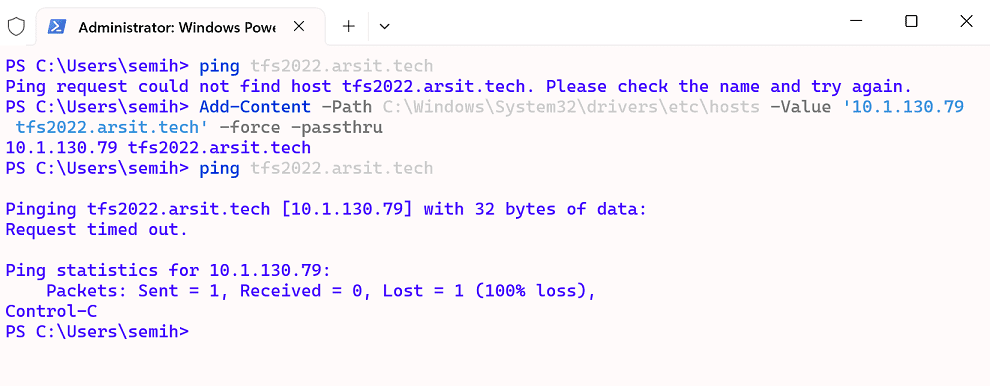
Now we need to enter azure devops server domain record to our windows host record so that we can access it because we still didn’t add global domain record for tfs2022.arsit.tech. Open powershell and enter below command. Make sure ip address and domain record belong to your azure devops server 😊
Add-Content -Path C:\Windows\System32\drivers\etc\hosts -Value ‘10.1.130.79 tfs2022.arsit.tech’ -force -passthru
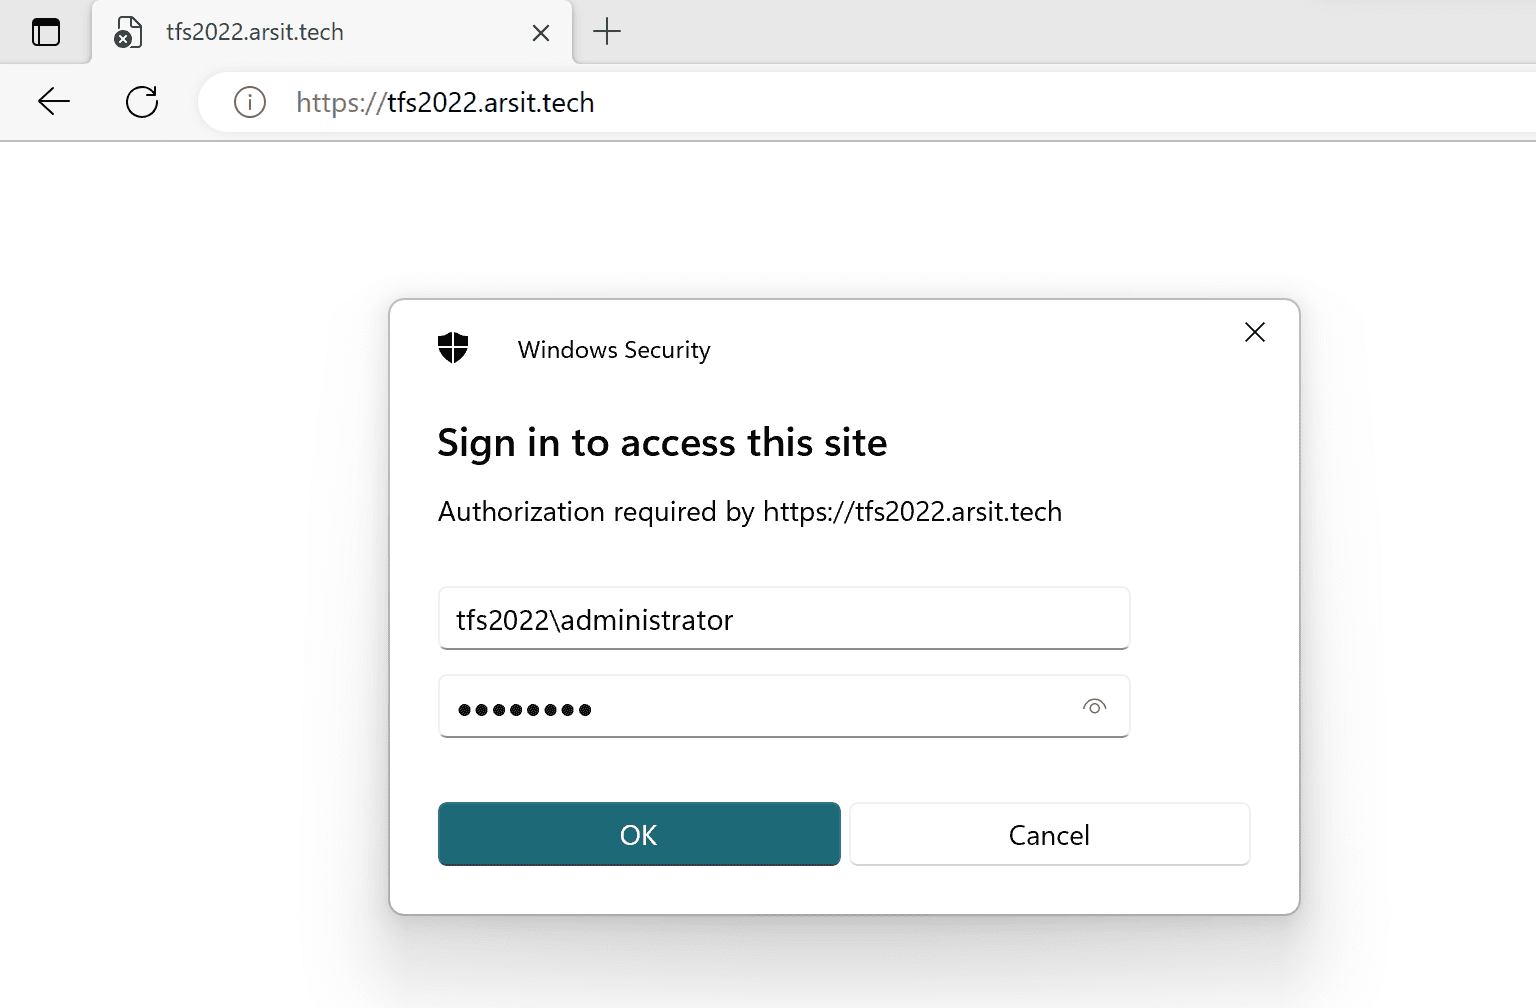
Now open your internet browser and write tfs2022.arsit.tech url and tfs admin password to enter to Azure Devops User Interface
Well done guys. We have installed Azure Devops 2022 on a vmware vm. Now let us go to next post to configure Azure Devops 2022 server to connect to Azure cloud subscription and on-premise windows and linux servers to be able deploy our application via azure devops pipelines.
<< GO TO CONNECT ON-PREMISE AZURE DEVOPS TO AZURE CLOUD >>
<< GO TO HOW TO DEPLOY PYTHON APP MAIN POST >>