Setup your domain names with cloudflare free plan to protect your app from attackers
- Sign up to Cloudflare is very easy that’s why I will not show here how to do it. I am pretty sure everyone can do it easily even if you are a start-up IT user. After you signed in, click on “Add a Site” button in Websites page

- Write your domain name (fqdn) into the text box and then click on “Add site” button

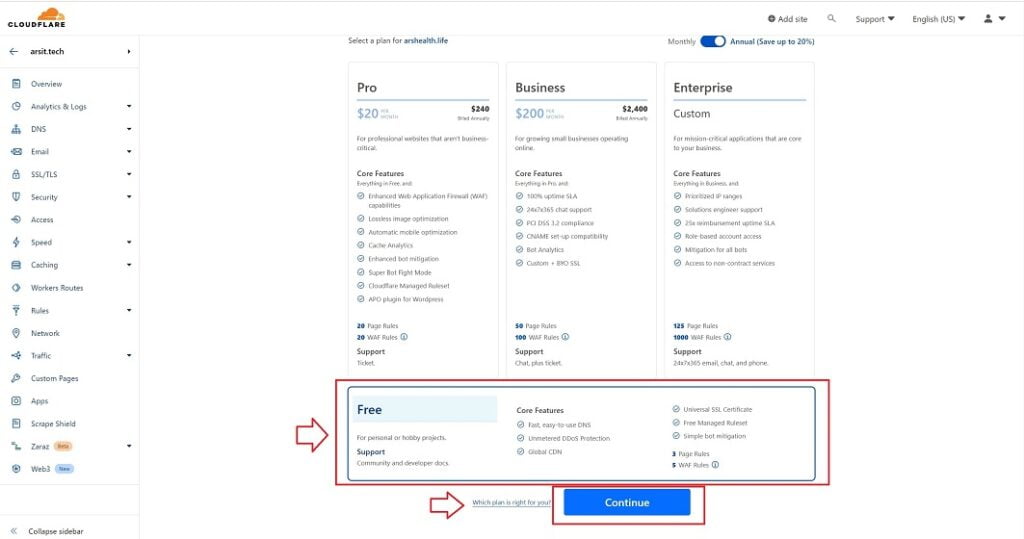
- Choose Free Plan and click to Continue
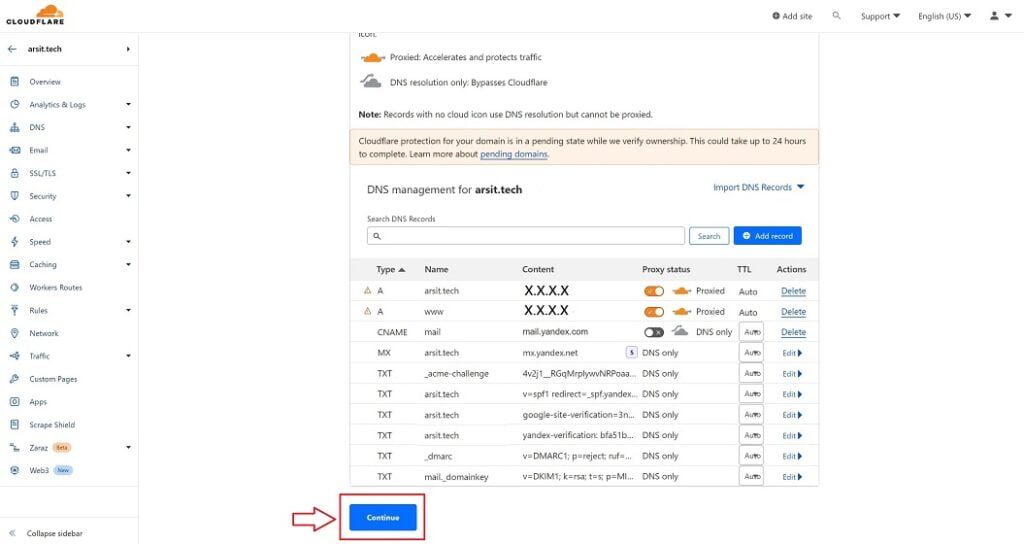
- If you bought a new domain name, dns records will be empty and you will need to create your own records according to your needs, otherwise Cloudflare will import and list down your recent dns records from your domain nameserver and will request you to change your current nameservers with Cloudflare nameservers so that Cloudflare can manage dns records to handle ssl, proxy, loadbalance, waf, and so on for your domain. Make your own changes and click to Continue. If Proxy status is “Proxied”, it means everyone will see one of Cloudflare public ip addresses when they try to lookup name resolution for that dns record. Only you and Cloudflare will know your backend server ip address. That’s why never share this ip address with people but your IT guys
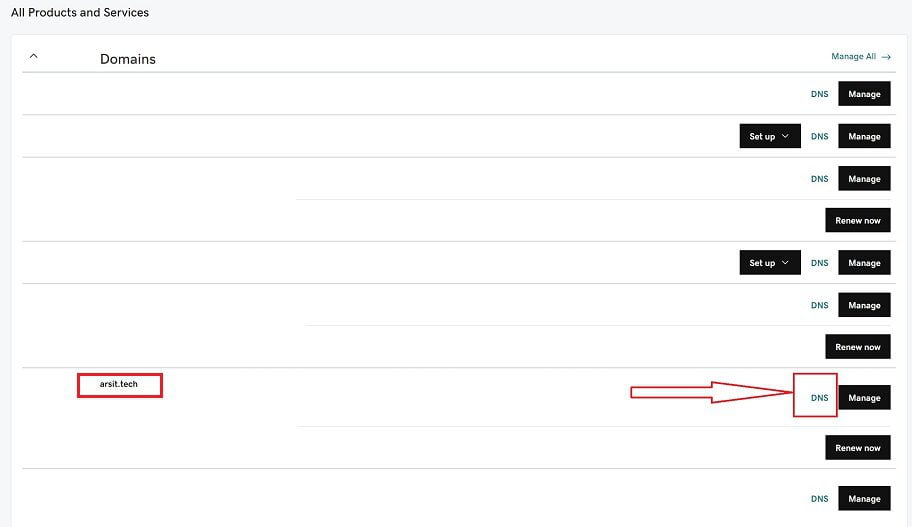
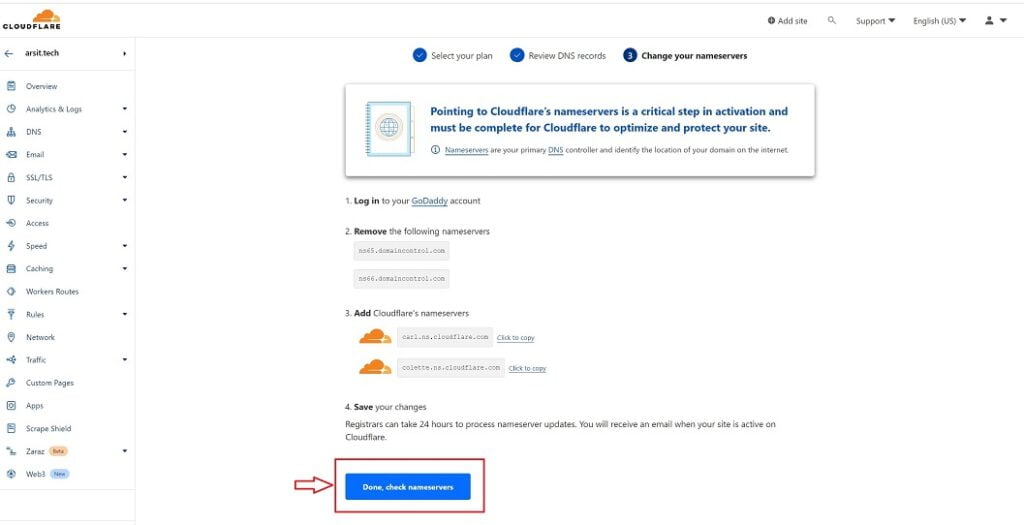
- Go to your own nameserver management screen and change nameservers with Cloudflare. I use godaddy to manage domain names so I did it under godaddy website and show how to do for godaddy users. Click on Dns to manage domain name records for your domain name under my product page. Then click on Change to write Cloudflare nameservers. You can find and copy Cloudflare nameservers in the page after you clicked on continue in dns records page
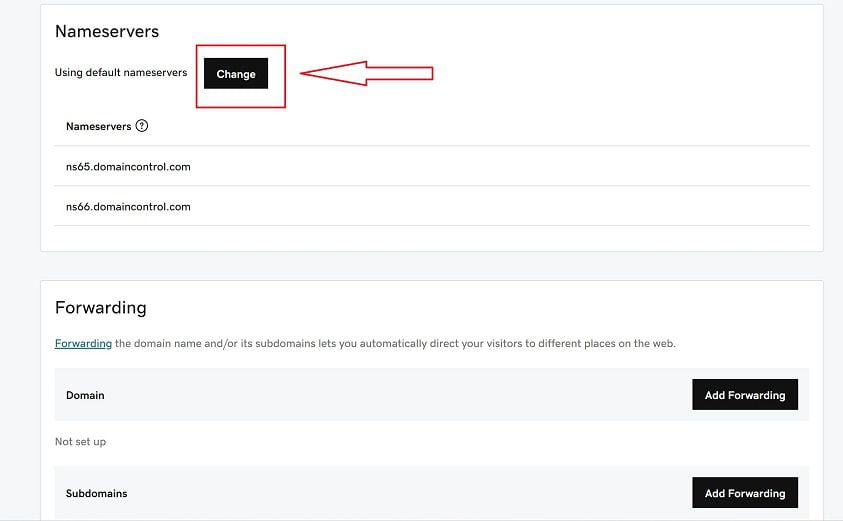
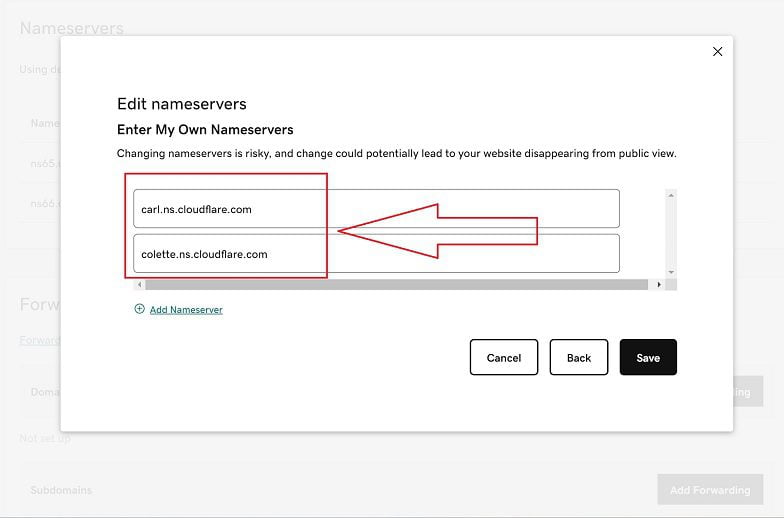
- Click on Done to finish setup after you changed your nameservers with Cloudflare
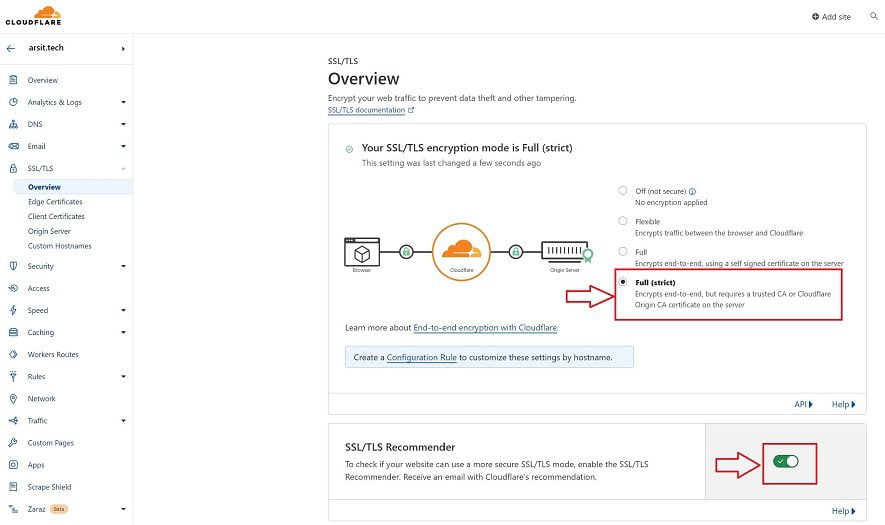
- Go To SSL/TLS settings under your account and choose Full mode to encrypt traffic between Cloudflare and your backend server. You can also switch on SSL/TLS recommender if you would like to get recommendation
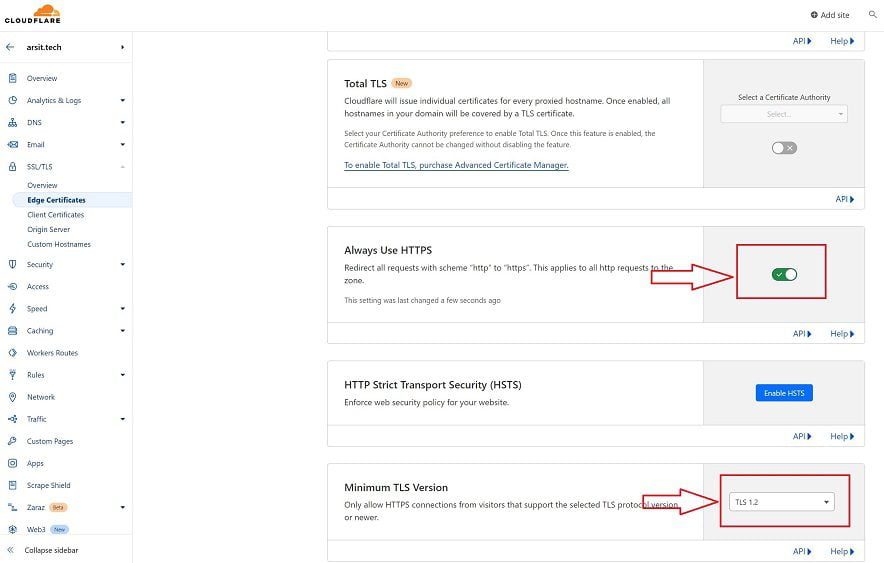
- Go to Edge Certificates and switch on “Always Use HTTPS” for ssl redirections and “Minimum TSL Version” to “TLS 1.2” for better security
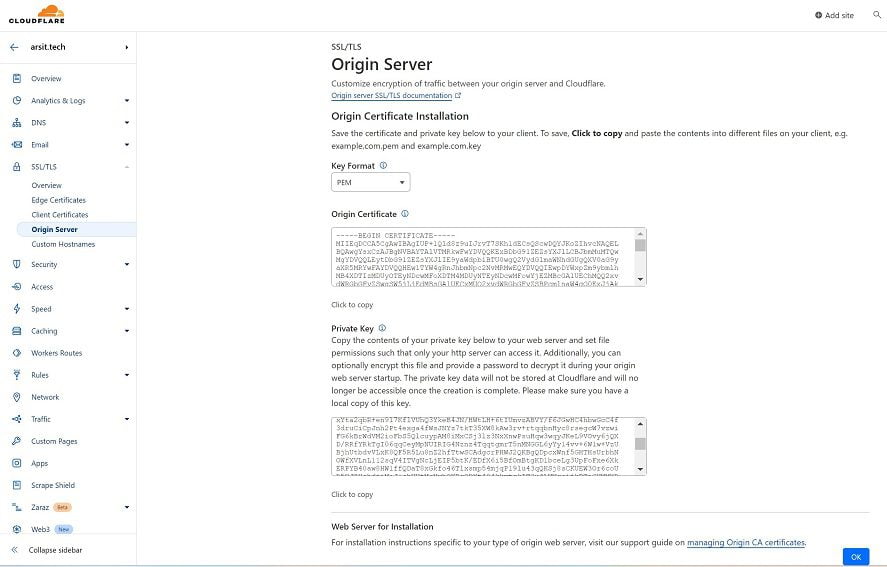
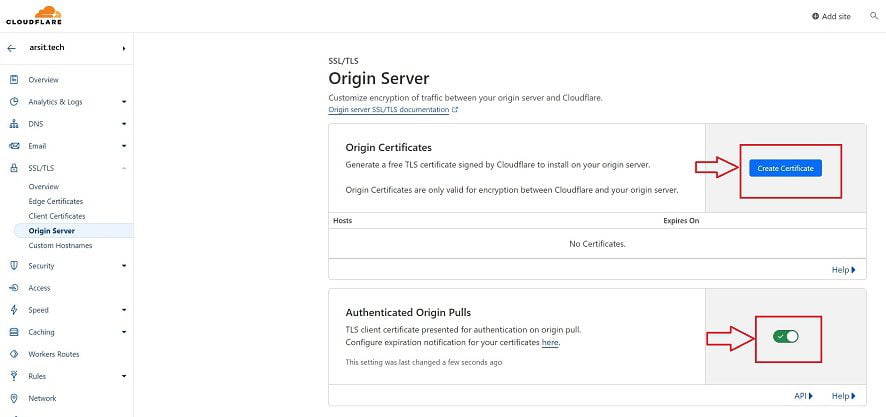
- Go to Origin Server and click on “Create Certificate” to create an SSL certificate to install on your backend server. Cloudflare will use this certificate to encrypt traffic between Cloudflare and your backend server
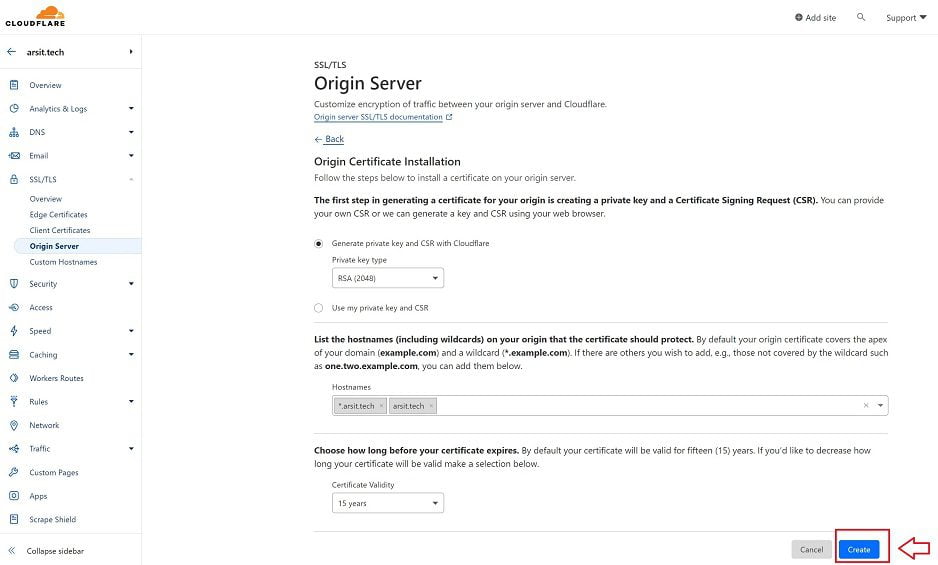
- Just click on Create button for ssl certificate for your domain. By the way you can only use this for Cloudflare encryption purpose. It doesn’t work if you use it as an SSL cert to encrypt traffic between your backend server and your end clients
- Copy and paste your cert and private key codes to files on your computer to save and be able use them in your backend server. If you don’t get private key code now, then you will need to bother yourself to get private key with other ways which is not so easy. That’s why let us just copy and paste them to files. Because we will need to use them later
