Setup Azure AKS Cluster With Terraform Code by Azure Devops Pipeline
We will deploy AKS cluster in Azure cloud subscription with terraform code using Azure Devops Pipeline in this article. If you want to learn how to setup on-premise Azure Devops 2022 in a windows virtual machine or activate your Azure Cloud Devops, please have a look at our related articles from urls at the end of this article. There are only a few differences between on-premise and cloud Azure Devops versions which are not going to affect what we want to do, that’s why you can apply same steps in this article in both of on-premise and cloud versions.
***These steps are for on-premise azure devops 2022 version. If you want to use cloud azure devops then you can skip these steps and go to creating new secret for app registration in Microsoft EntraID in azure portal. Because Azure devops has its own build in agents.
Now go to below web site to download latest version of azure hosted agent and install it to server that you have installed azure devops 2022. Agent is responsible to run your pipeline steps like nodes in Jenkins. If you want to deploy somethings on windows and IIS then you can use same server that you have installed azure devops 2022 or another windows server as agent machine.
If you want to deploy somethings on linux and nginx, apache or tomcat then you can use your Kubernetes master node or another linux server as agent machine. This decision is up to your infrastructure design and requirements. In this article we will install agent on azure devops 2022 server itself and on Kubernetes cluster master node linux server. So we will have 2 different agents to use for your pipeline steps.
Now connect with rdp to your azure devops server which I call it as Tfs 2022 😊 and download windows agent and you can copy linux agent url to download linux agent in k8s master node. Here is the url to download agents.
https://github.com/microsoft/azure-pipelines-agent/releases
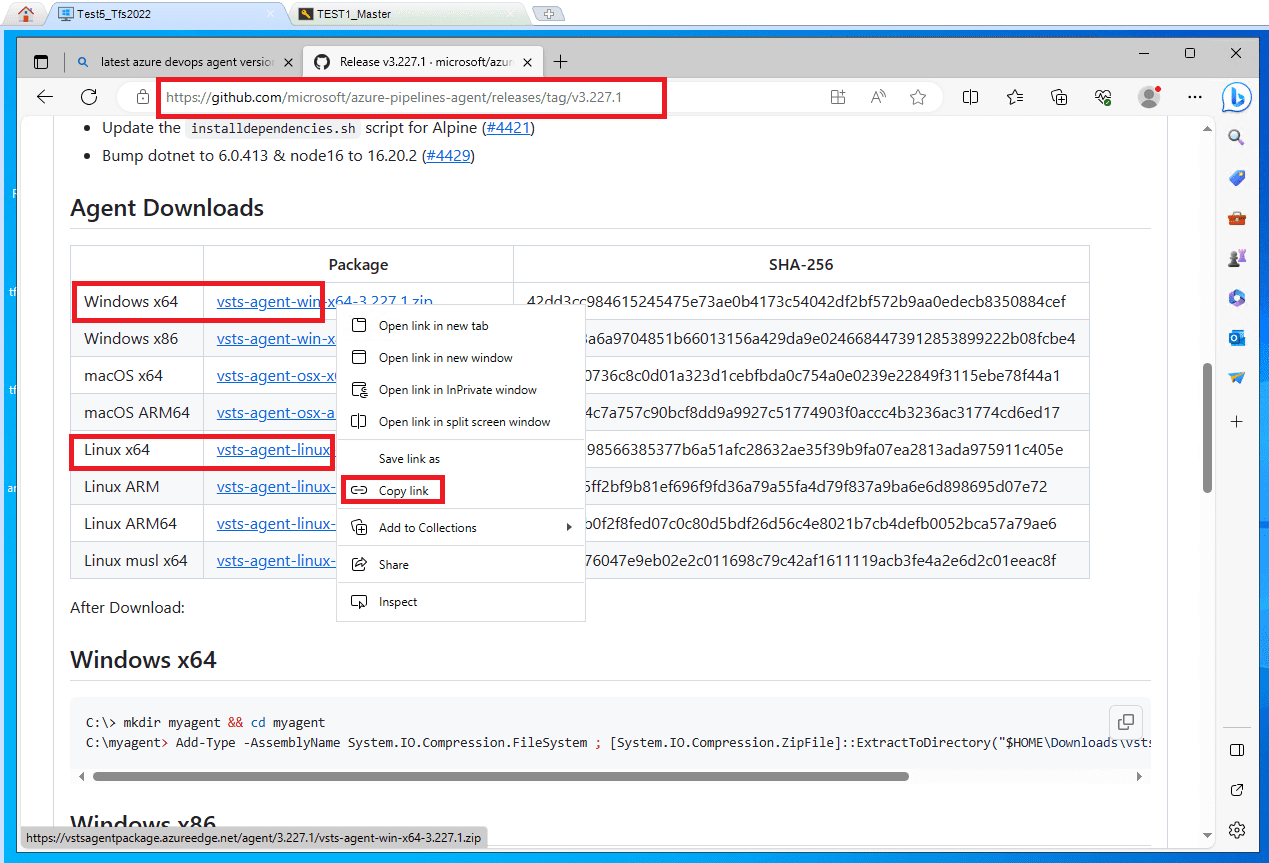
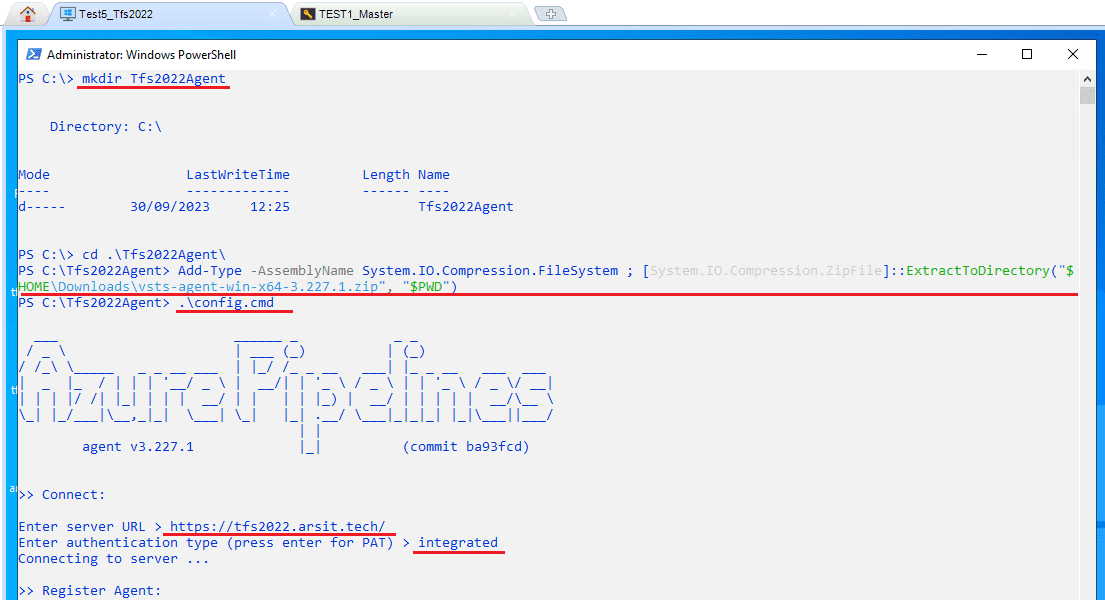
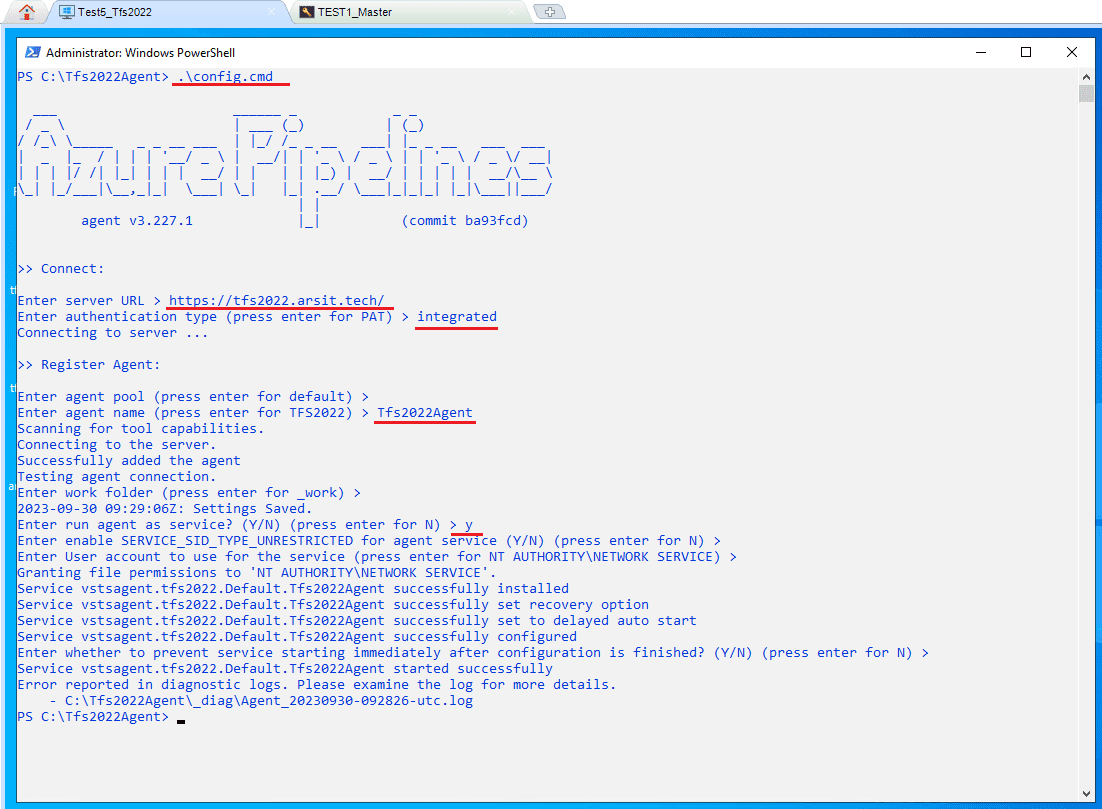
Open a powershell session as administrator and run below commands to install agent. Remember to change file name in the command with name that you downloaded. After you entered config.cmd, you need to write your own azure devops 2022 url and make sure that you have configured https port with a trusted certificate if you want to install this agent to another server apart from azure devops 2022 itself.
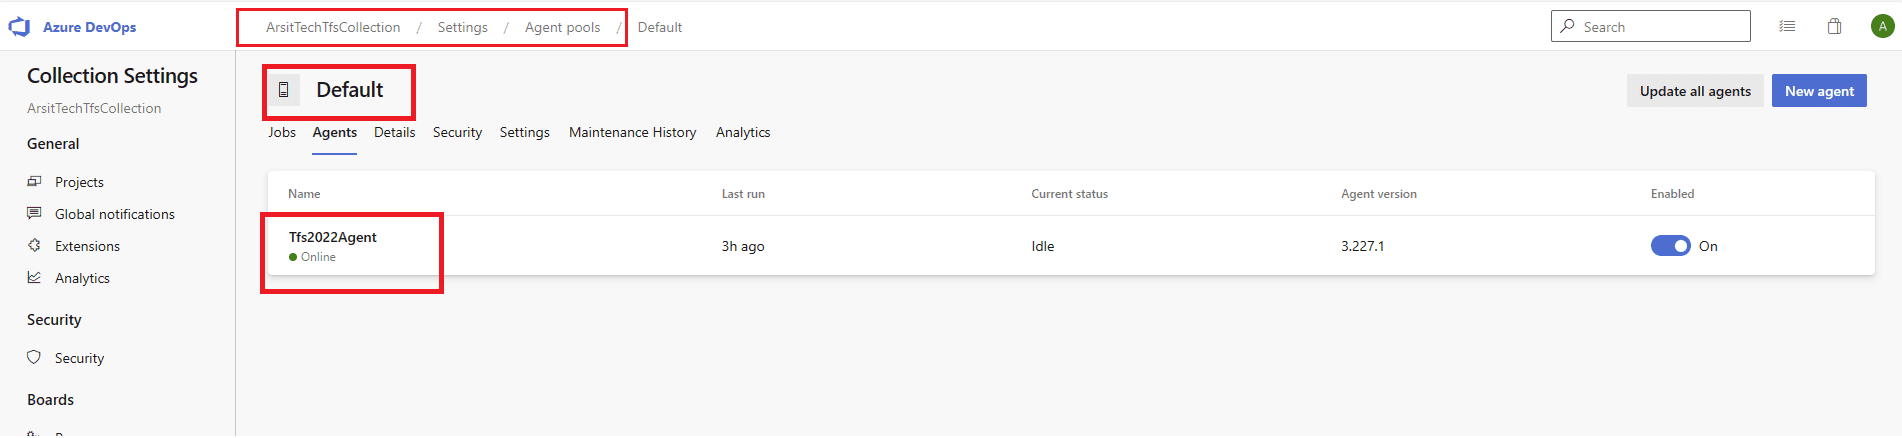
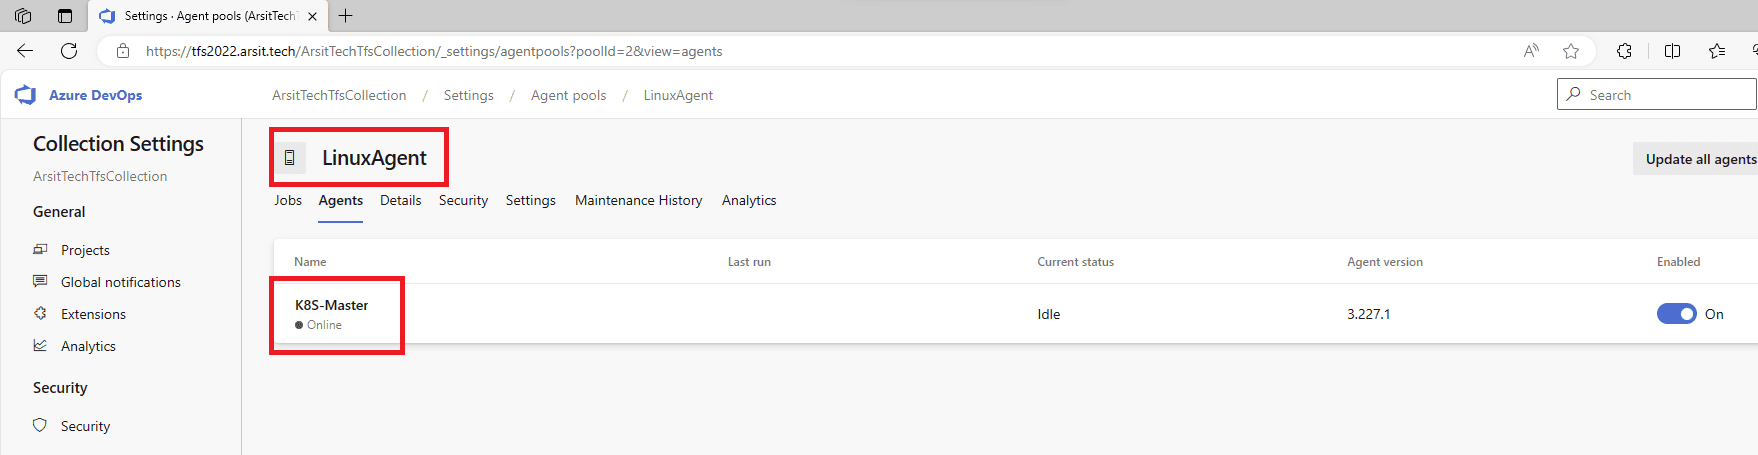
Or if you just used default certificate which is generated by installation then export this selfsigned certificate from azure devops and import to the server that you want to install agent. After agent configuration is done, you should see this agent under (Your Project Collection > Settings > Agent Pools).
mkdir Tfs2022Agent
cd Tfs2022Agent
Add-Type -AssemblyName System.IO.Compression.FileSystem ; [System.IO.Compression.ZipFile]::ExtractToDirectory(“$HOME\Downloads\vsts-agent-win-x64-3.227.1.zip”, “$PWD”)
.\config.cmd
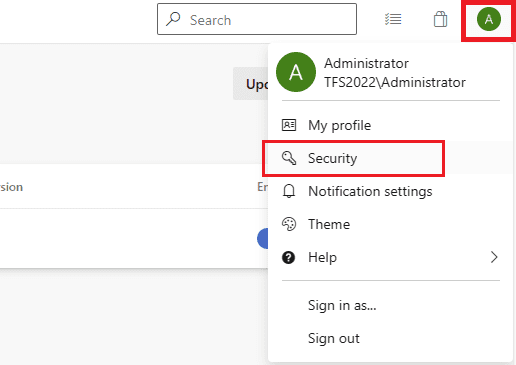
Now we will install agent on Linux server and to be able to do that we need to create a personal access token because this is the easiest way. To use windows administrator password you will need to install extra tools in Linux server that’s why I choose pat token. Click on your username on right top corner and security in the menu.
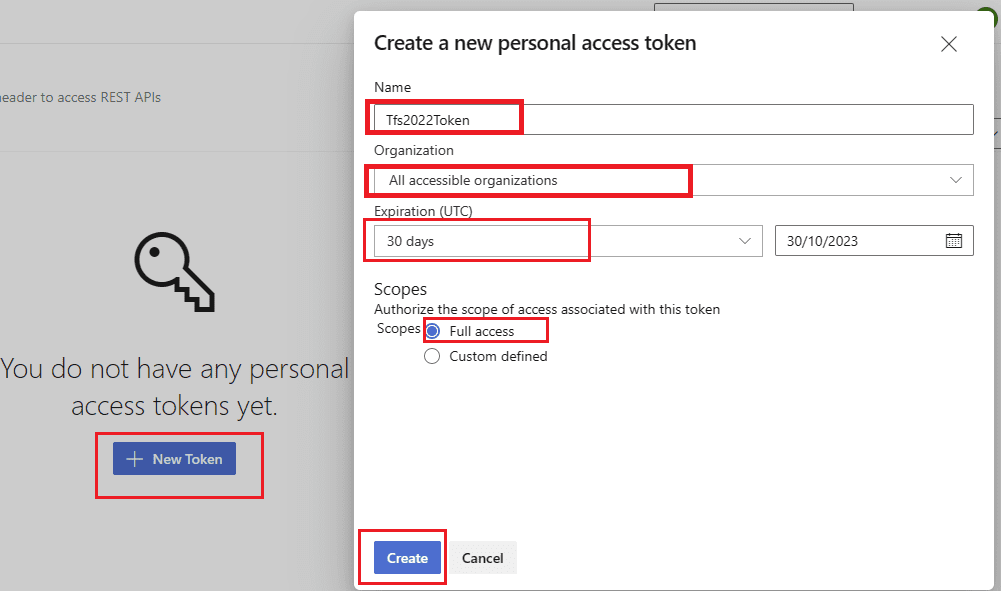
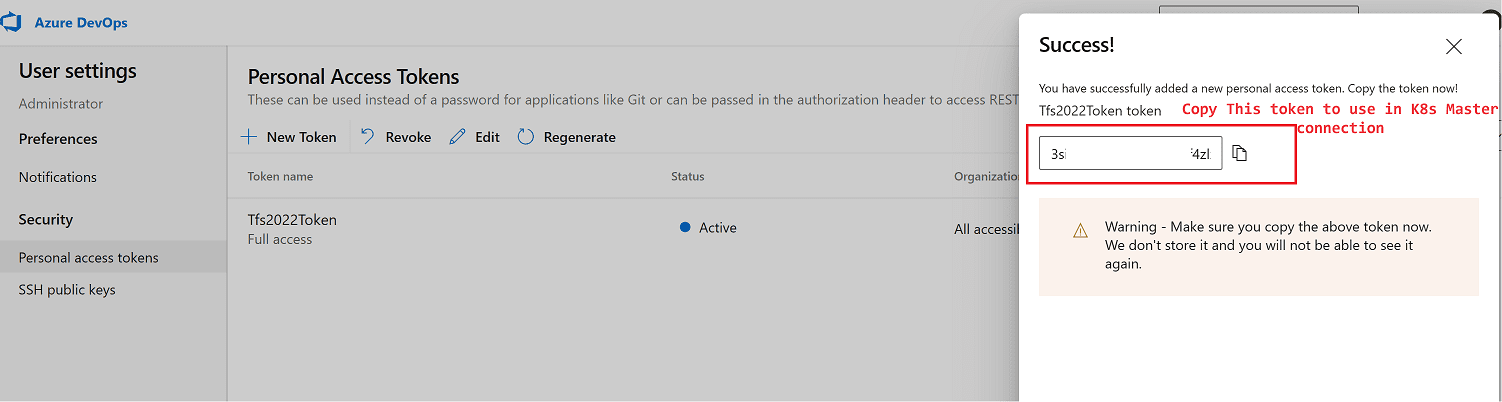
Then click on the New Token in the page and write a token name as you desired. Chose All Accessible Organizations from Organization menu and then Full Access as scope. Click to Create and please remember to copy token key as it will disappear after token is created. No problem even if you forgot to copy, you can regenerate again.
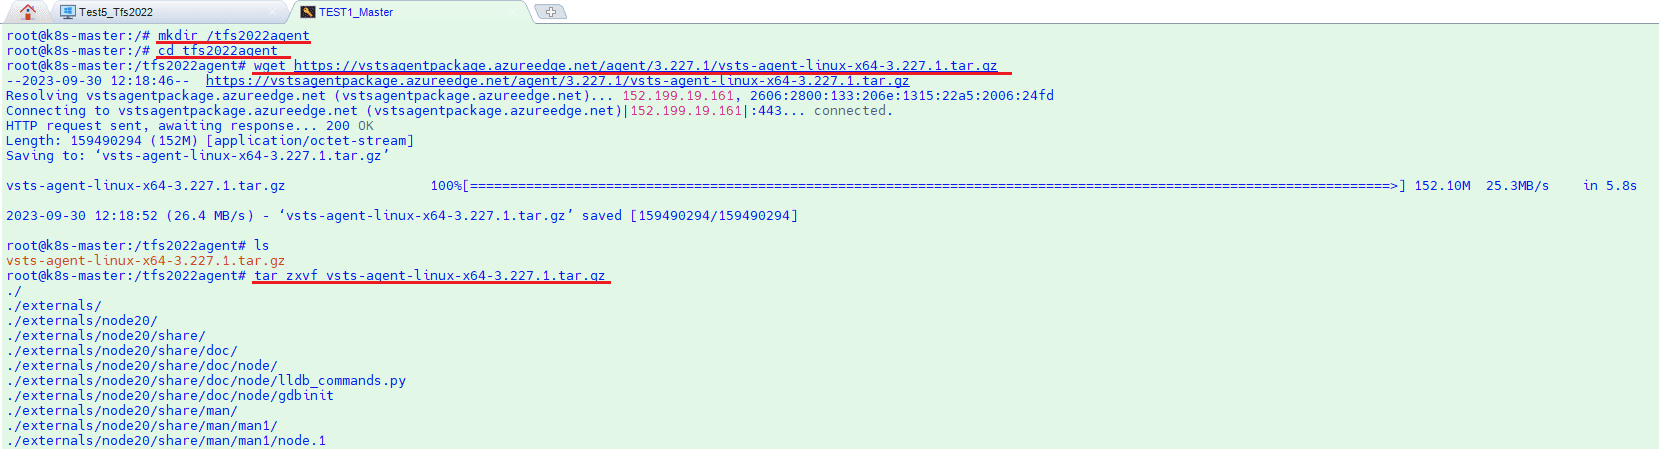
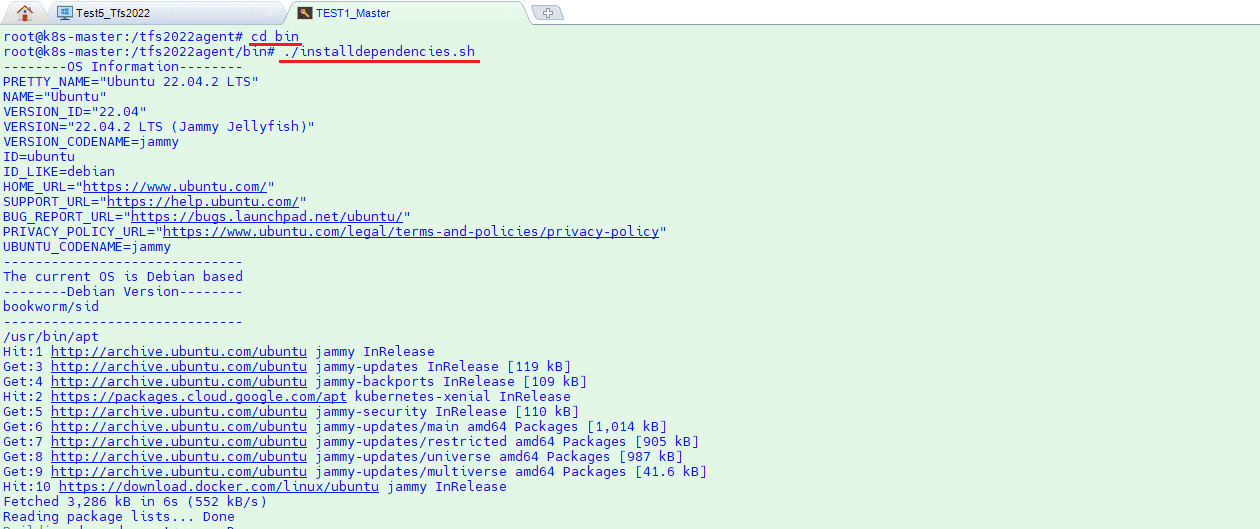
Let us connect to kubernetes master node linux server via ssh to install agent. Create a folder for agent and install dependencies for linux server. Before you start to apply config.sh please remove the lines in config.sh file for root user environment control if you want to install agent with root user as I do. Here are the commands.
mkdir /tfs2022agent
cd /tfs2022agent
wget https://vstsagentpackage.azureedge.net/agent/3.227.1/vsts-agent-linux-x64-3.227.1.tar.gz
tar zxvf vsts-agent-linux-x64-3.227.1.tar.gz
./tfs2022agent/bin/installdependencies.sh
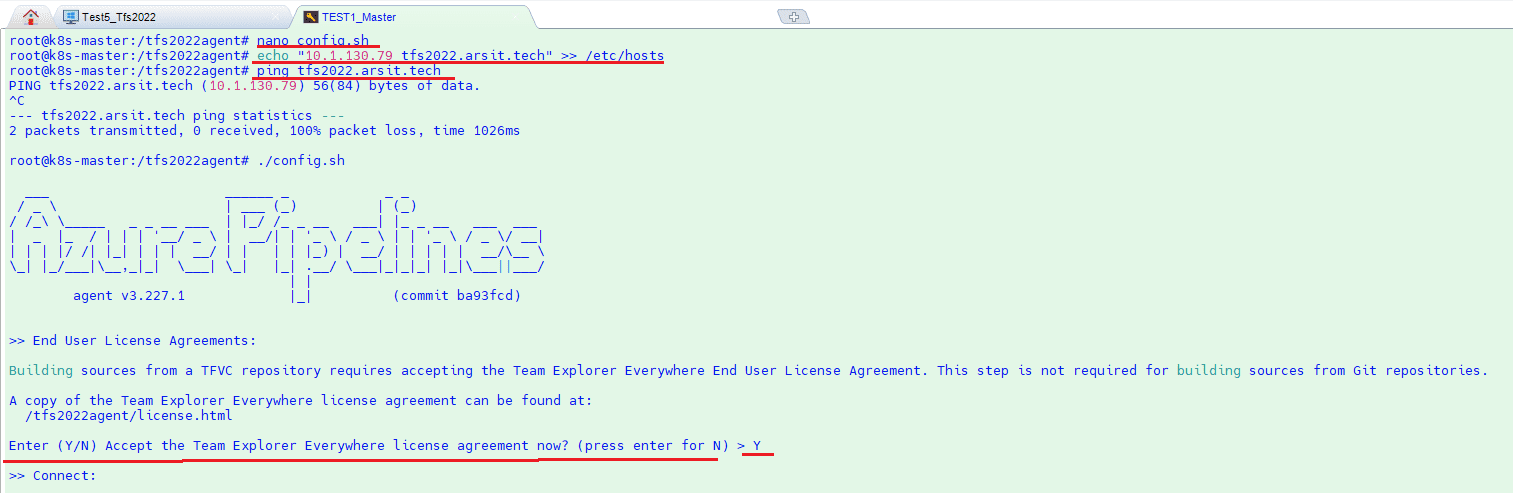
nano config.sh
echo “10.1.130.79 tfs2022.arsit.tech” >> /etc/hosts
ping tfs2022.arsit.tech
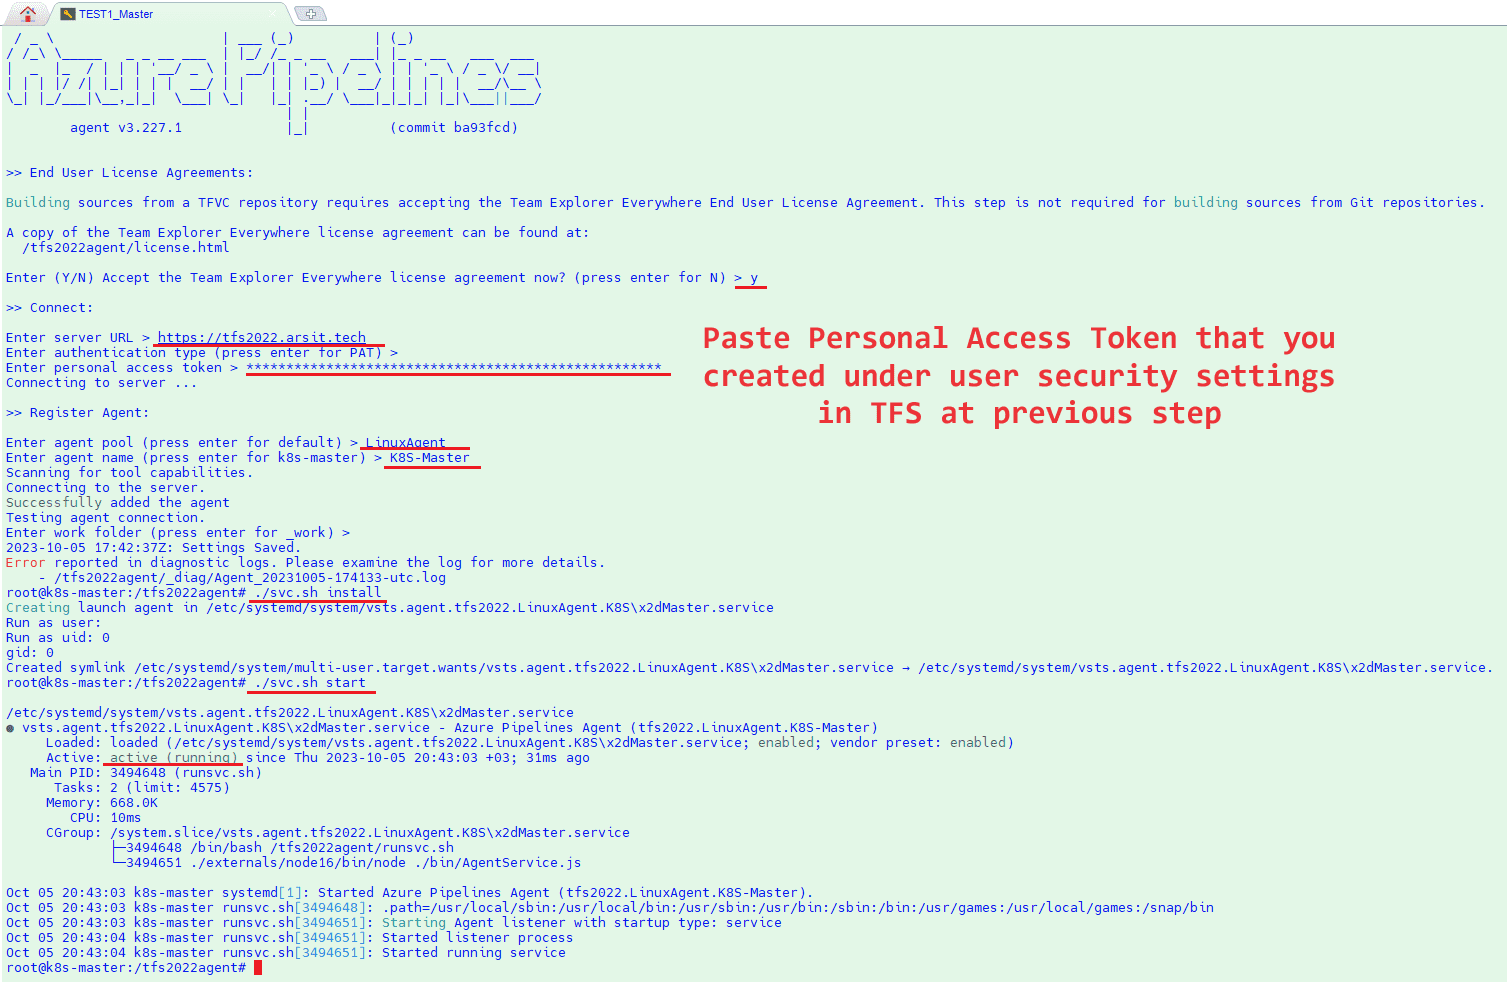
./config.sh
After you configured agent then you need to start agent service. Don t worry about error report after configuration. It is not a blocker for agent. You should see Linux agent under (Your Project Collection > Settings > Agent Pools).
./svc.sh install
./svc.sh start

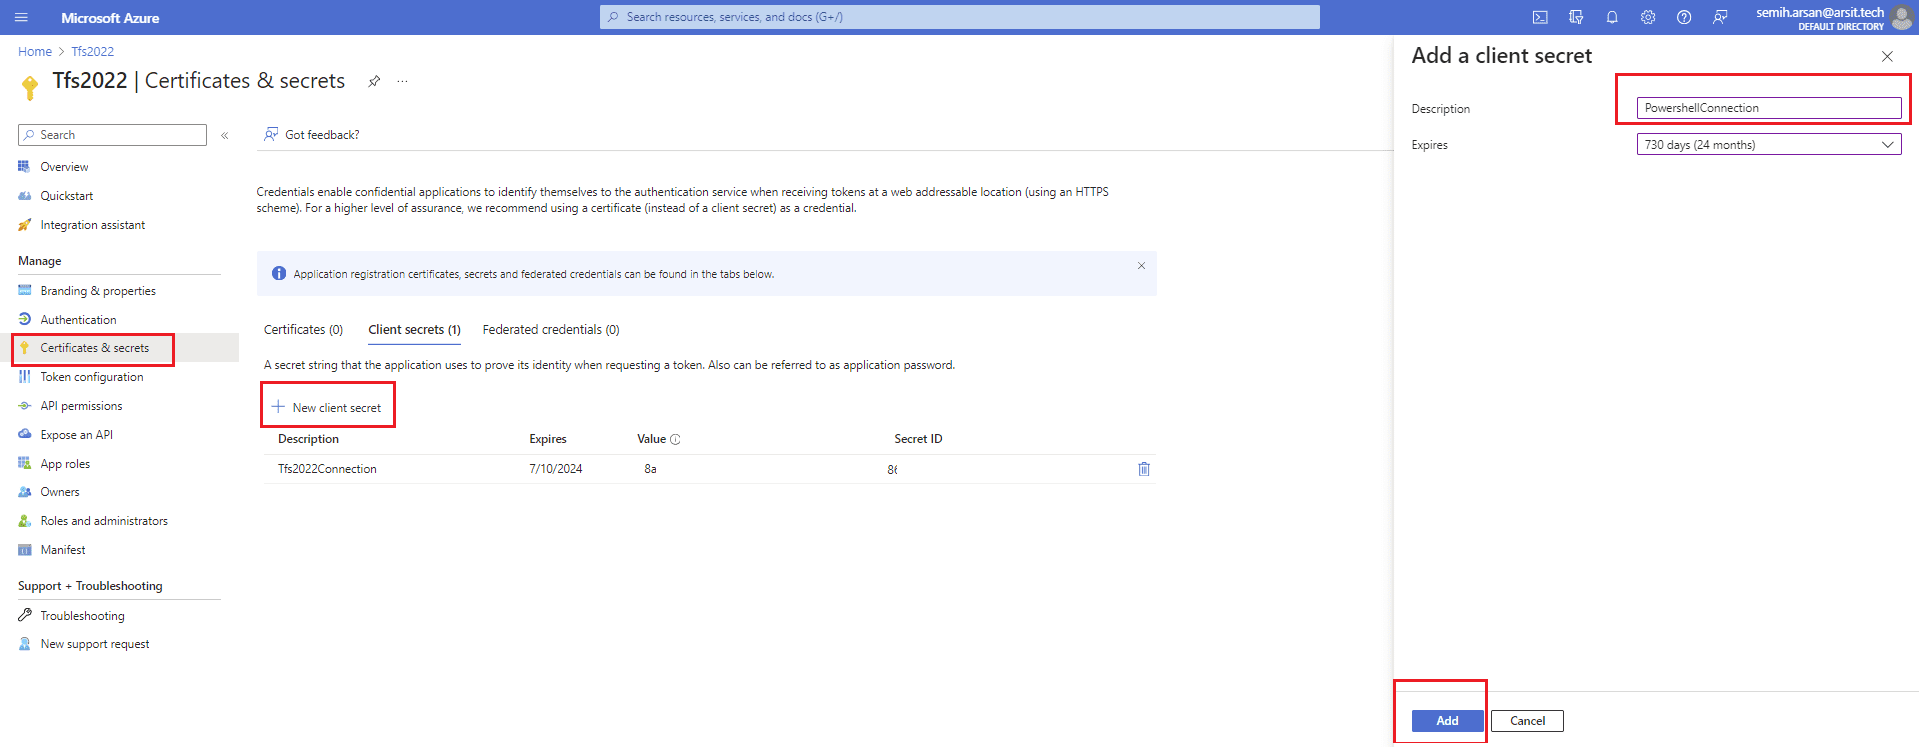
Now you are at the step if you want to use Azure Devops cloud version. it is time to create a secret for app registration service principle. If you don’t have one already then you can go to “Connect on-premise Azure Devops 2022 to your Azure Cloud Subscription” article to learn how to do it. We already did it with this article so I will create a new secret to use with powershell sessions.
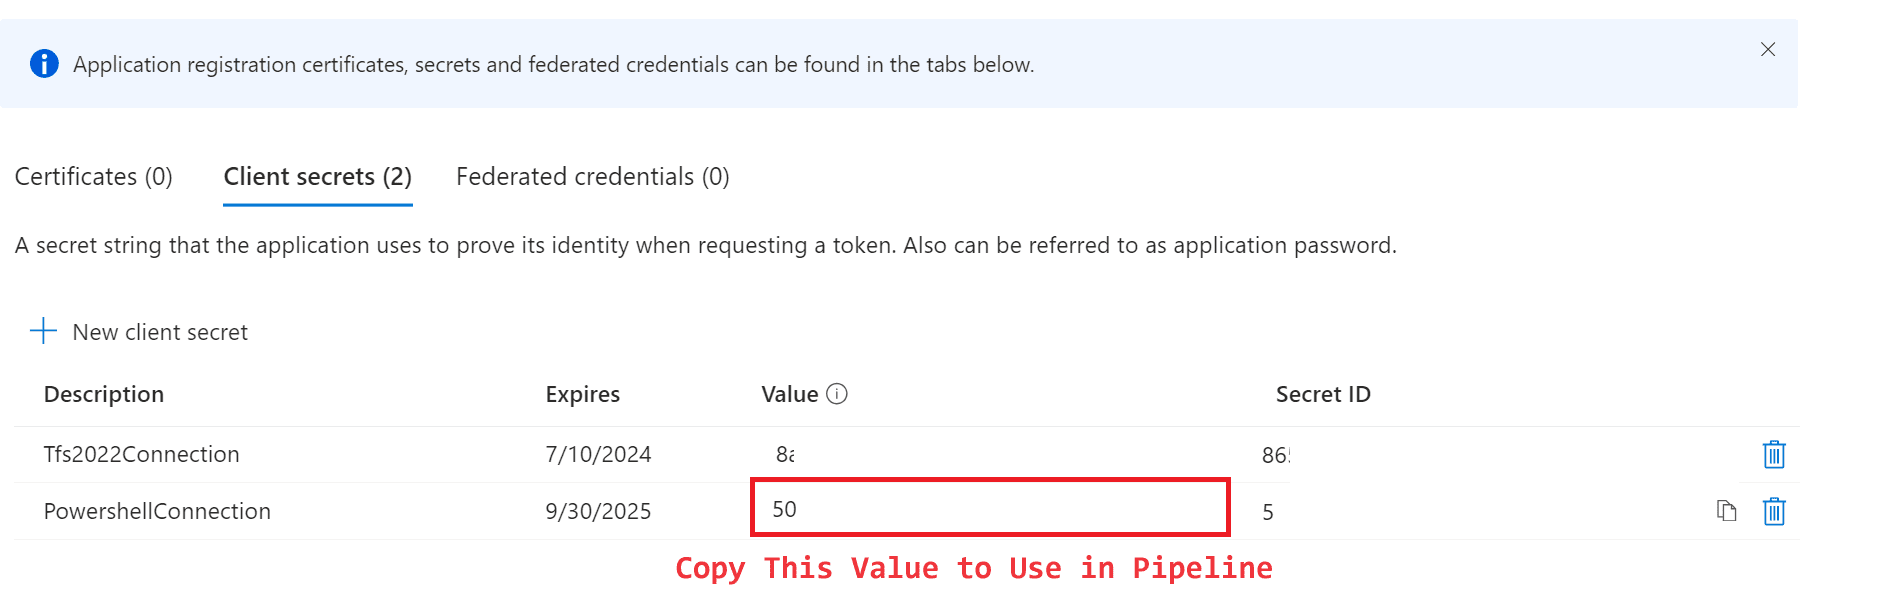
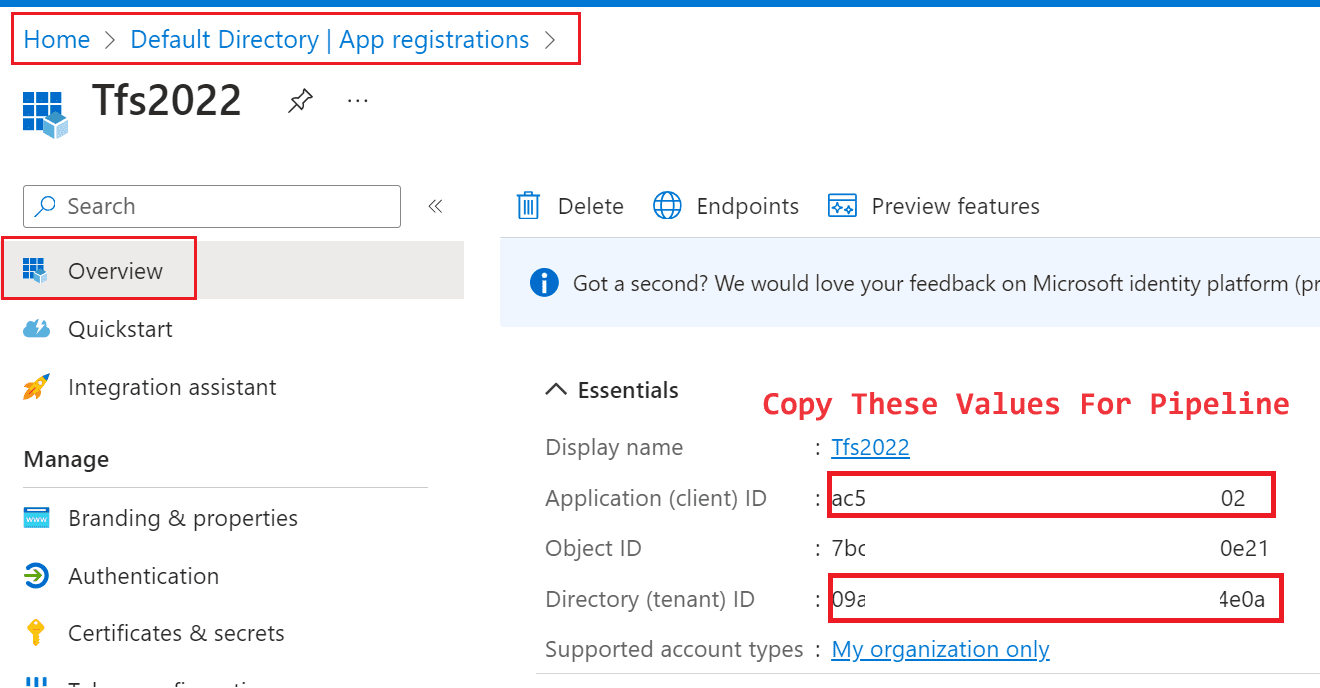
If you want, you can also use same secret for both azure devops pipeline and powershell connections. You don’t have to separate them as I do. Click on “New client secret” and write a name for this secret and click on “Add”. Copy the value to use with your connections where ever you want to use. Go to your app registration Overview page and copy app and tenant ids as well.
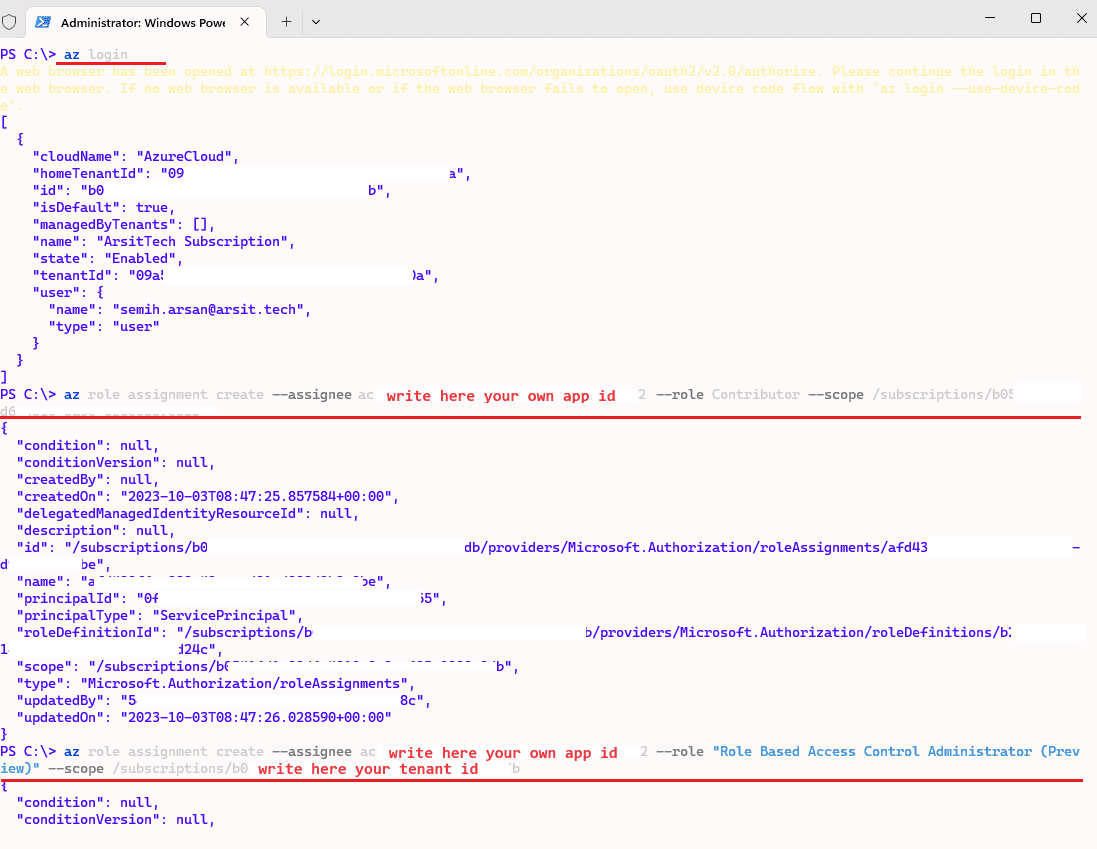
First, we will login azure with the user who has owner rights to be able to assign “Contributor” and “Role Based Access Control Administrator” roles for this app registration service principal account. So we will be able to use this service principal account to login azure subscription to create a storage account to save terraform status and lock files.
And in my terraform code, I create Azure Acr repository to save docker images and pull python app image from acr repository. To be able to pull images from Acr Repository to AKS cluster, you need to assign “Acr pull” role to AKS cluster. To be able to assign this role to AKS with terraform code, you need to have “Role Based Access Control Administrator” role in your service principal account.
az login
az role assignment create –assignee yourownappid –role Contributor –scope /subscriptions/yourowntenantid
az role assignment create –assignee yourownappid –role “Role Based Access Control Administrator (Preview)” –scope /subscriptions/yourowntenantid
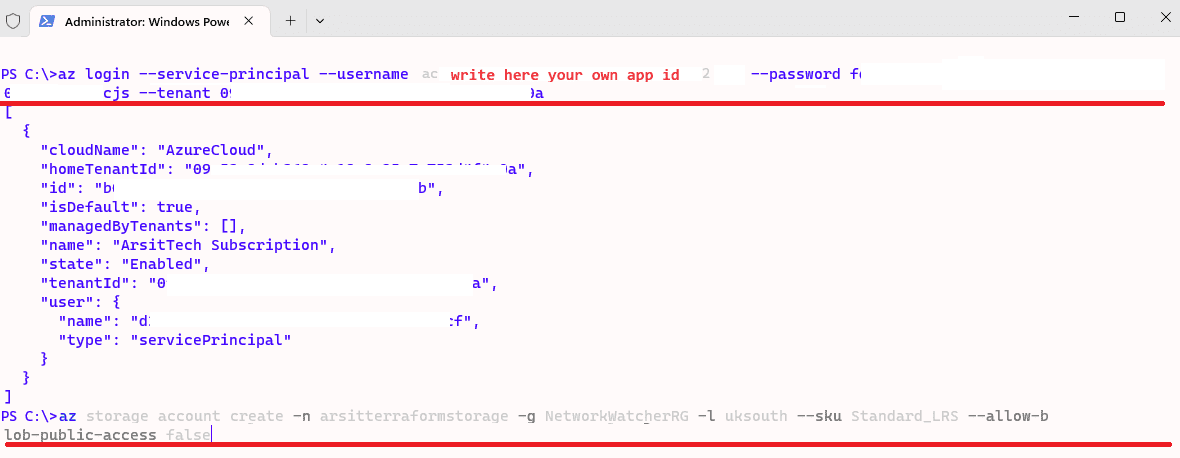
Now in powershell session we can login with this service principal id to create storage account. You can create storage account with your owner account as well. I want to do this just to confirm that I have assigned required permissions to service principal account. Please remember to change storage account names and resource group as you desired. Note somewhere your desired names as you will use them in your terraform code.
az login –service-principal –username yourownappid –password yoursecretkey –tenant yourowntenantid
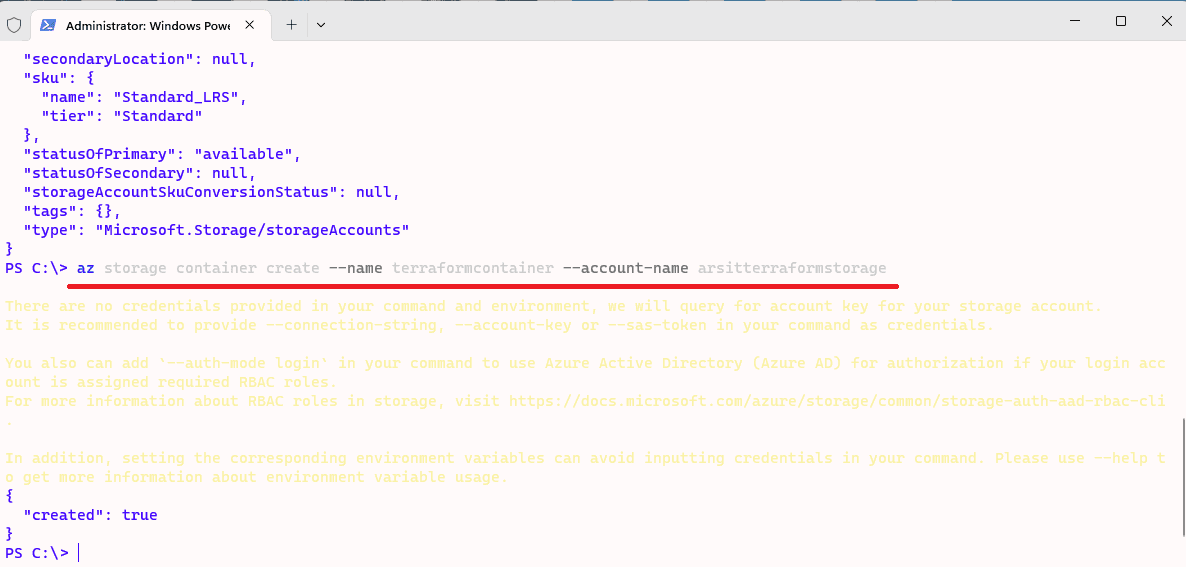
az storage account create -n arsitterraformstorage -g NetworkWatcherRG -l uksouth –sku Standard_LRS –allow-blob-public-access false
az storage container create –name terraformcontainer –account-name arsitterraformstorage
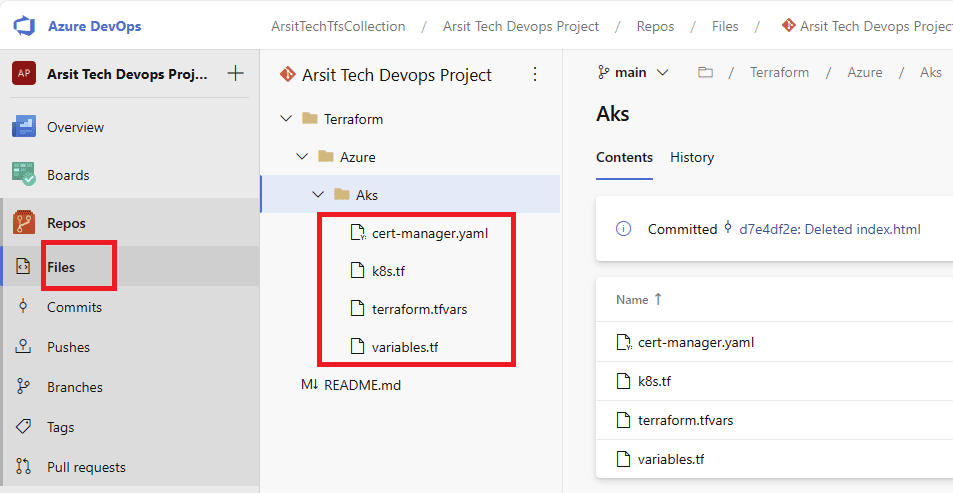
Now upload your terraform code file into your Collection repository. You can find my terraform code in below github url. You just need to change terraform.tfvars file values as you desired. This code will create an AKS cluster with one node. You can increase node counts as you wish. This code will also create azure nginx ingress controller for free ssl and layer 7 load balance purposes. Otherwise you have to use azure key vault to save certs and will need to pay for it.
https://github.com/semiharsan/terraform/tree/main/Azure/AKS
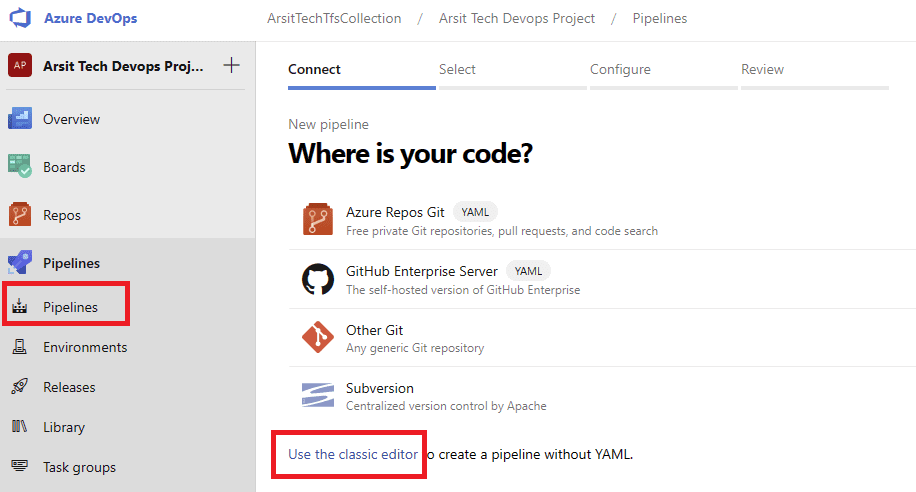
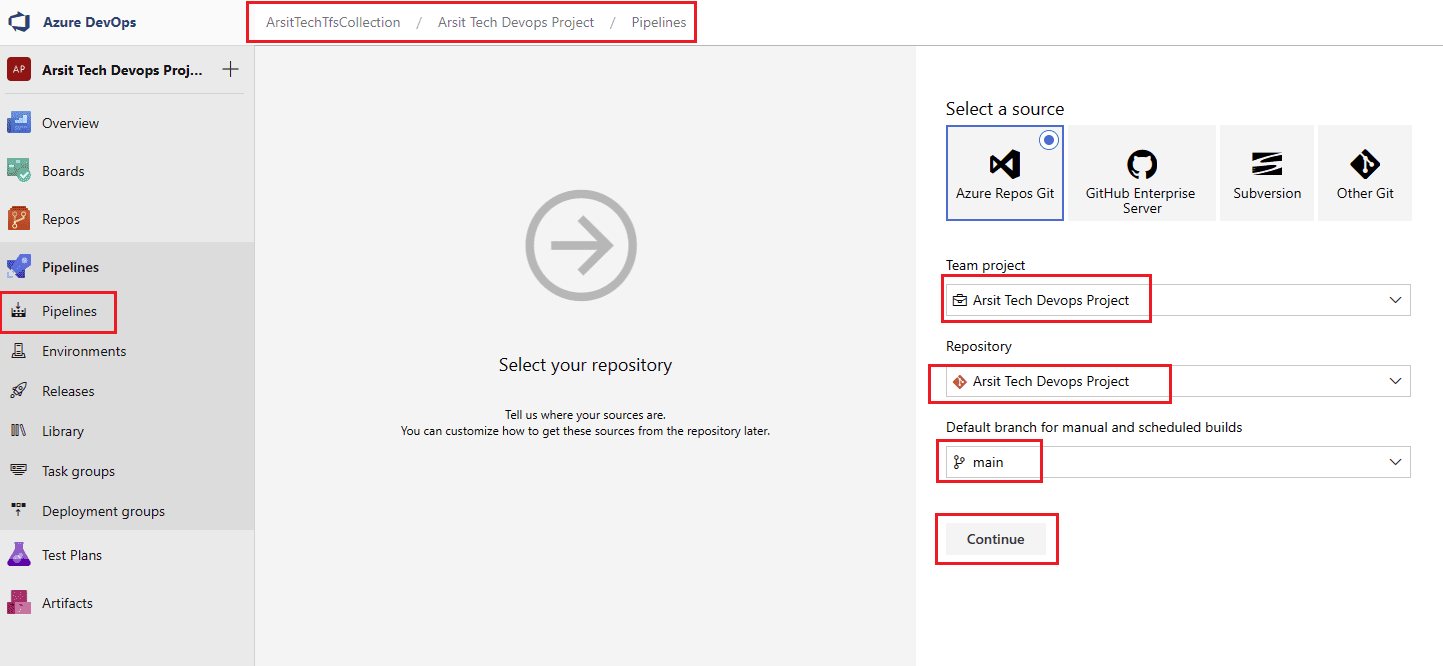
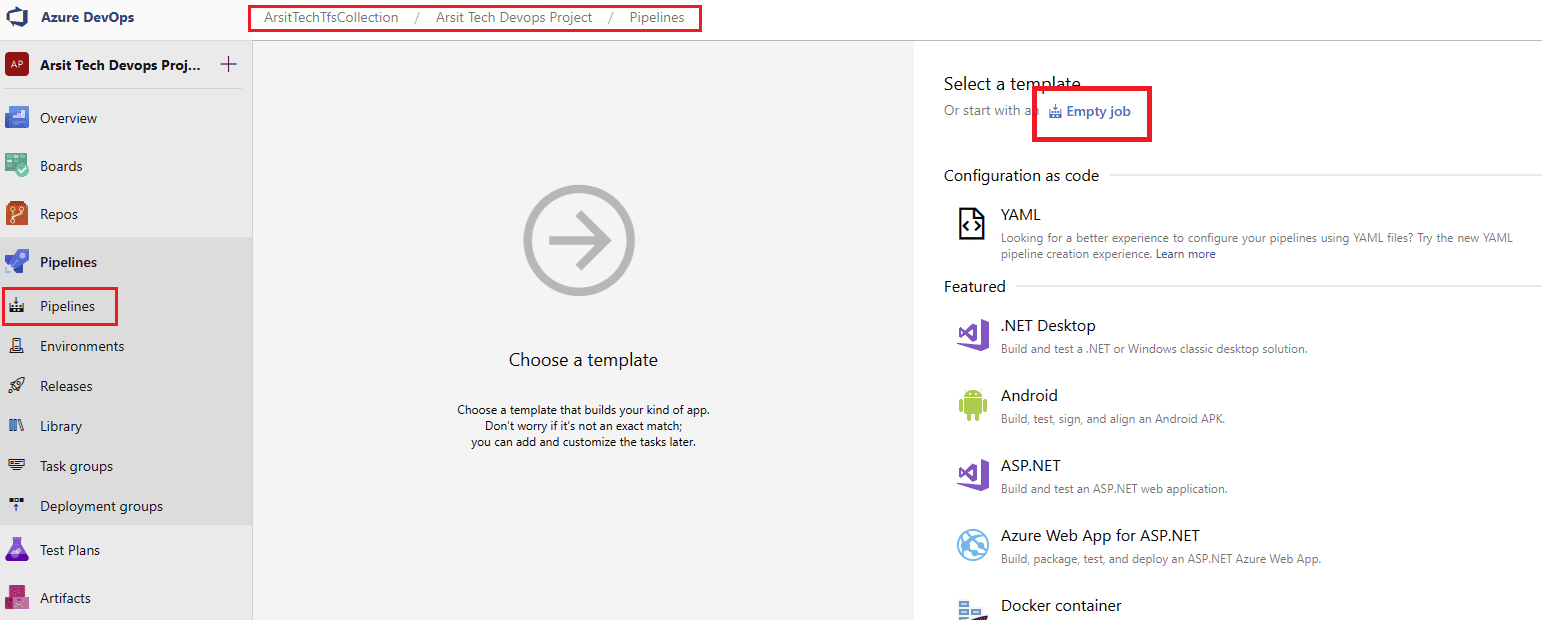
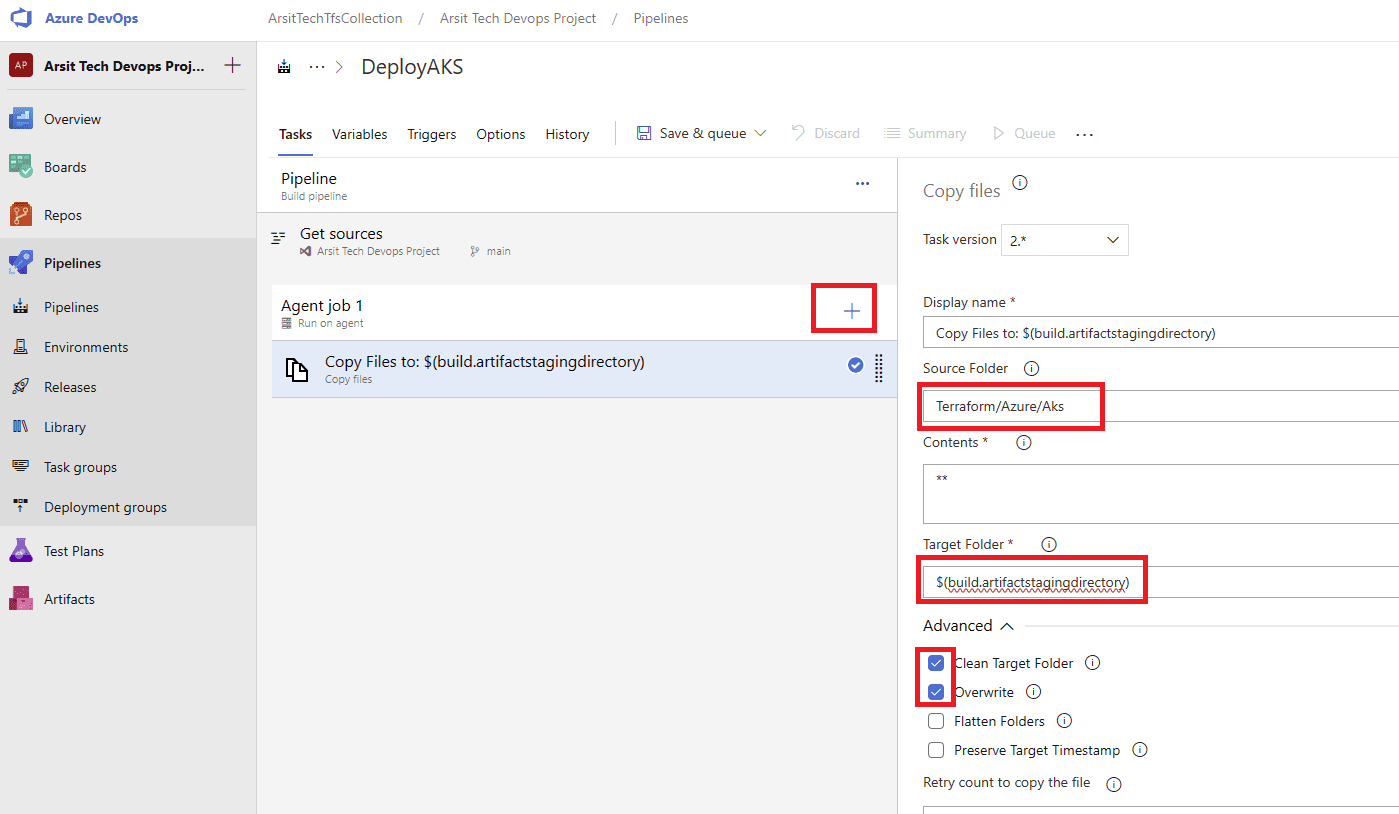
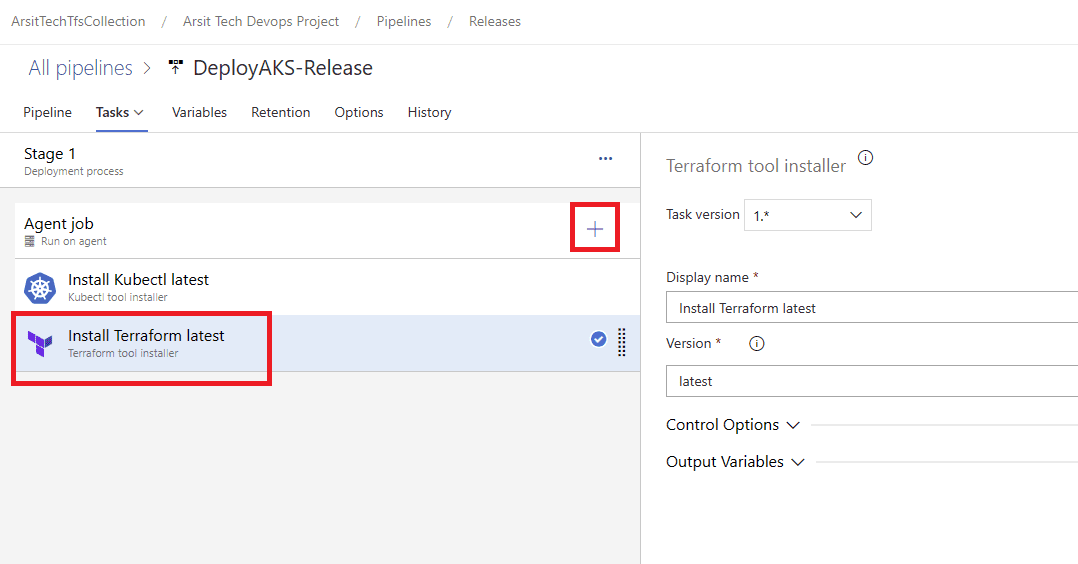
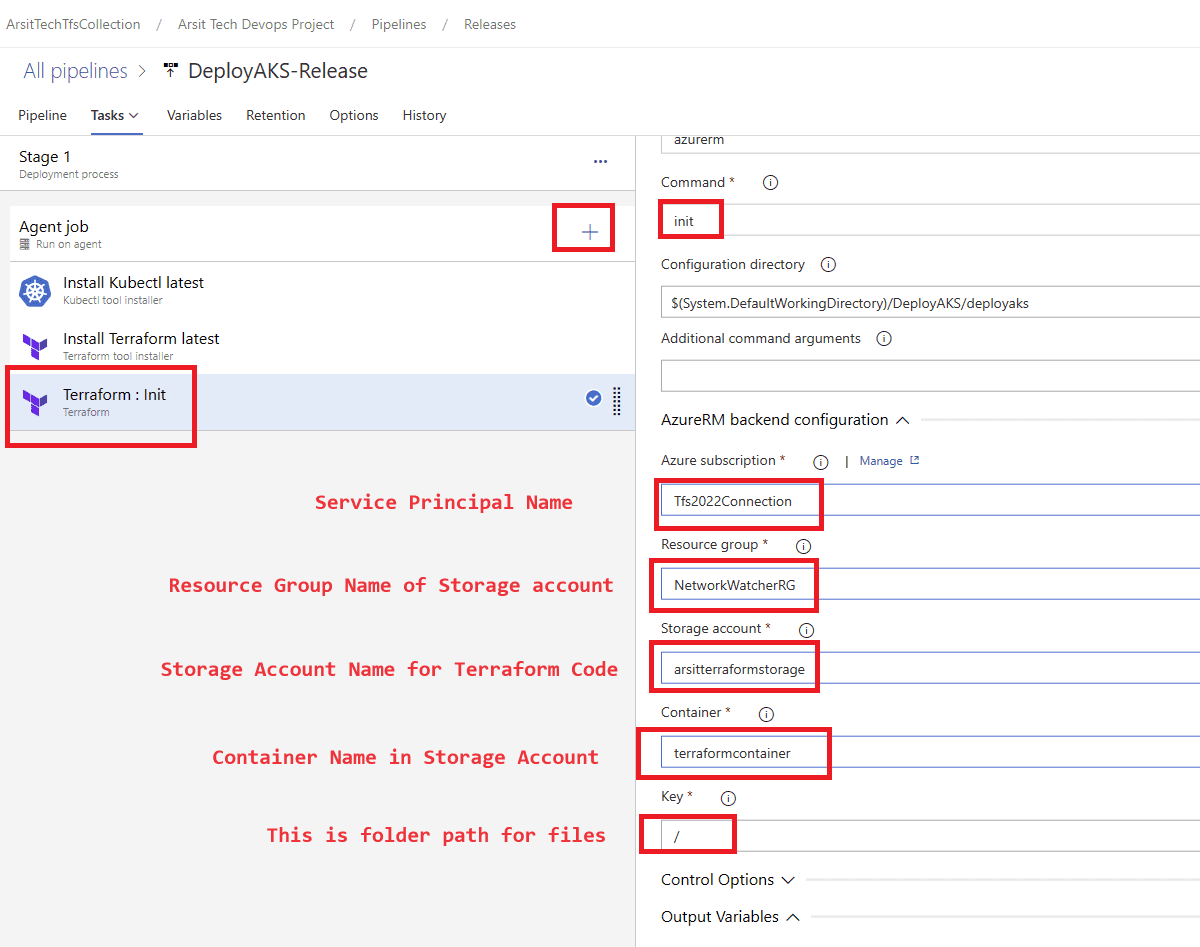
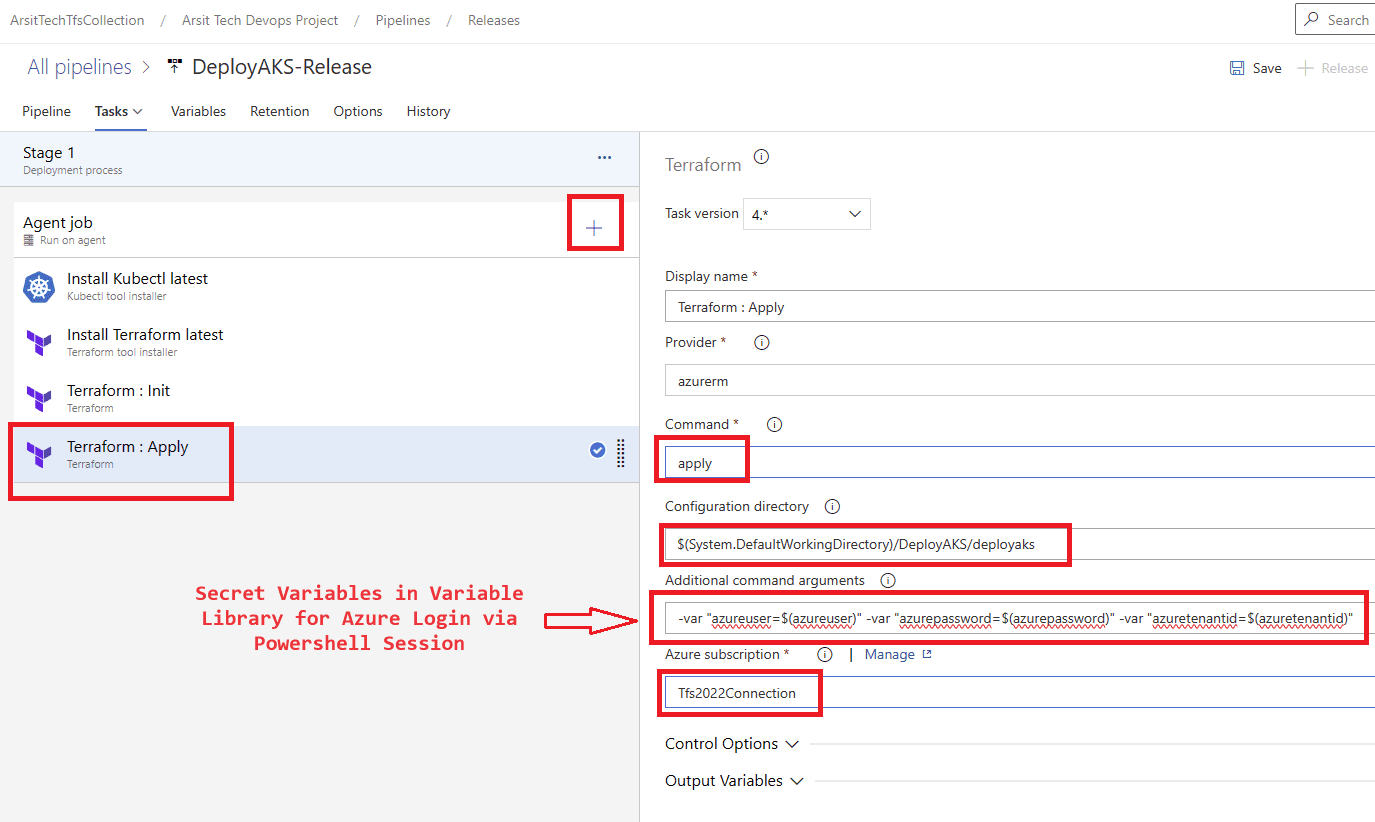
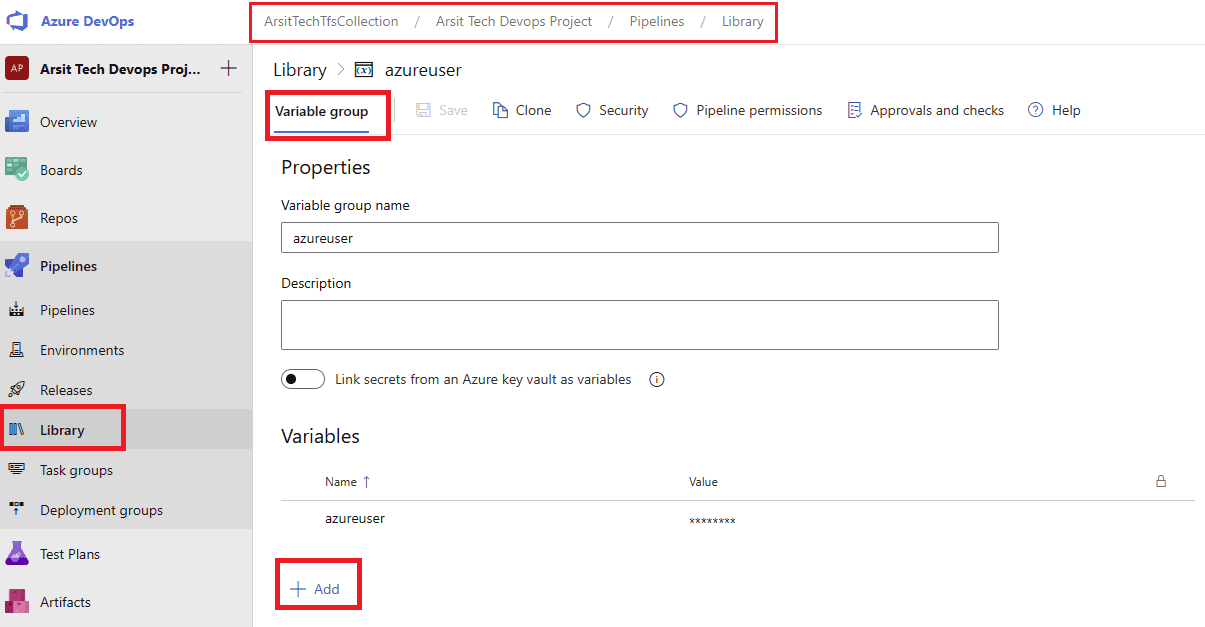
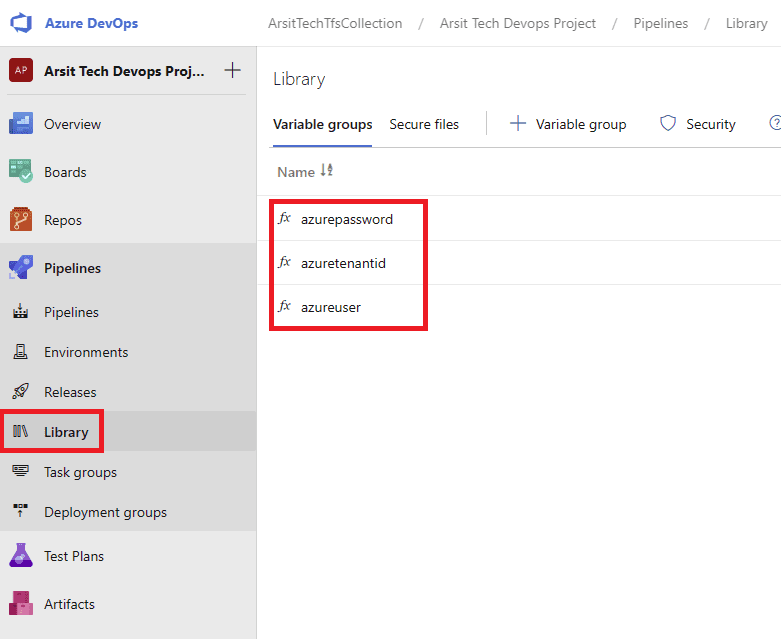
Let us create our build pipeline to save our files in a container to use for release pipelines. You can also use build pipeline directly to create aks but sometimes you might want to deploy to multiple targets, in this case you will need release pipeline to be able to do this multiple target deployment. So I will show with release pipeline. If you want to do it only with build pipeline then apply release pipeline steps into build pipeline. Please apply the steps as I showed in the screenshots.
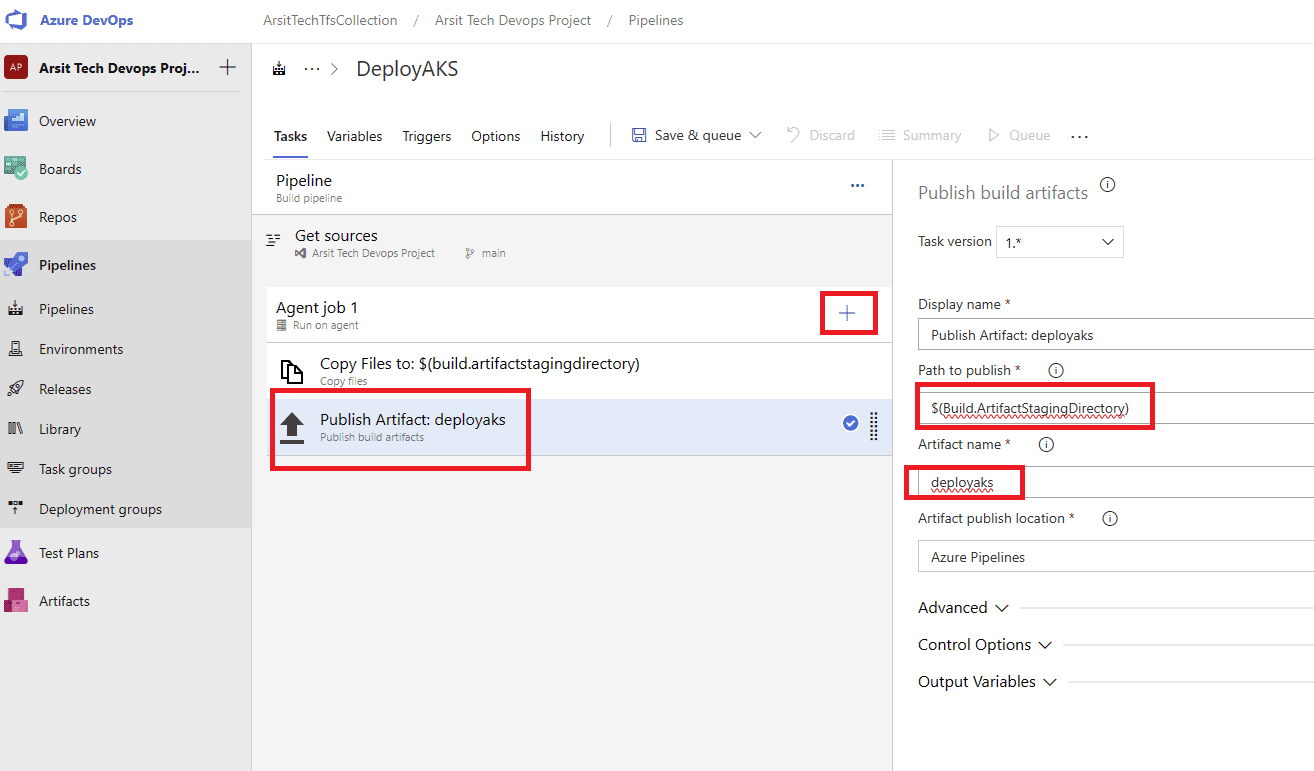
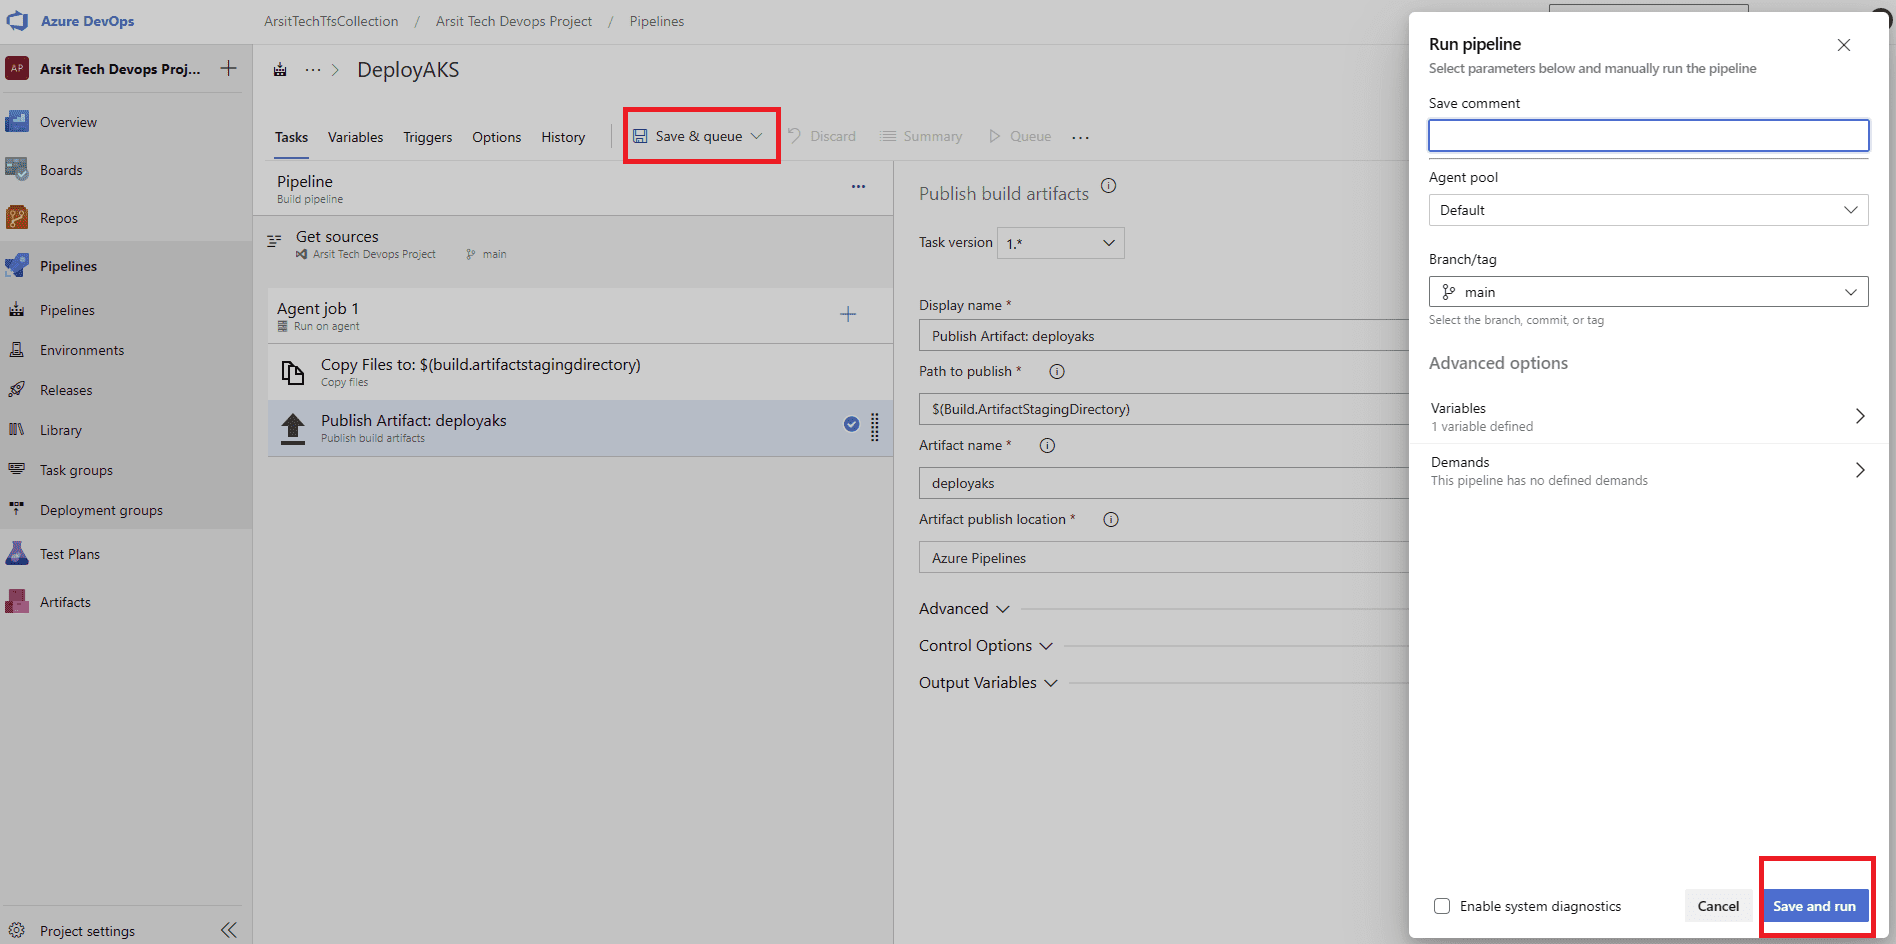
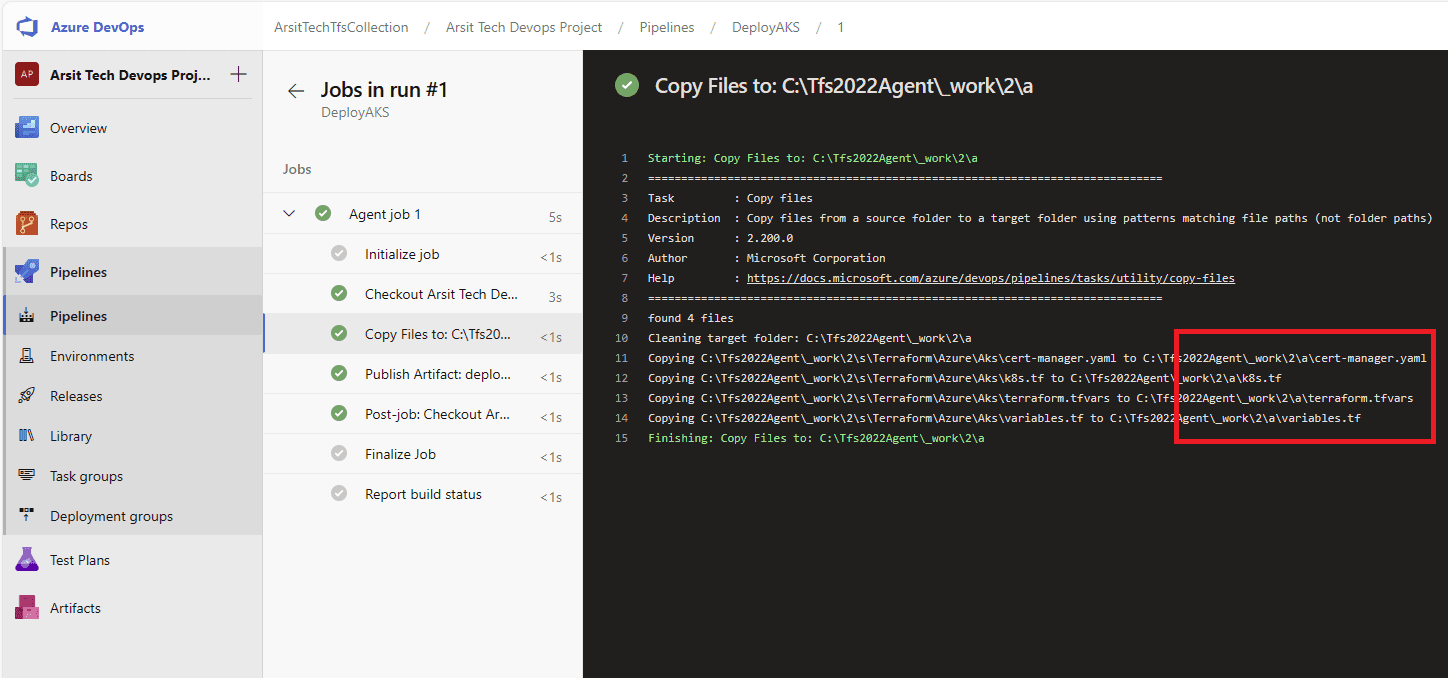
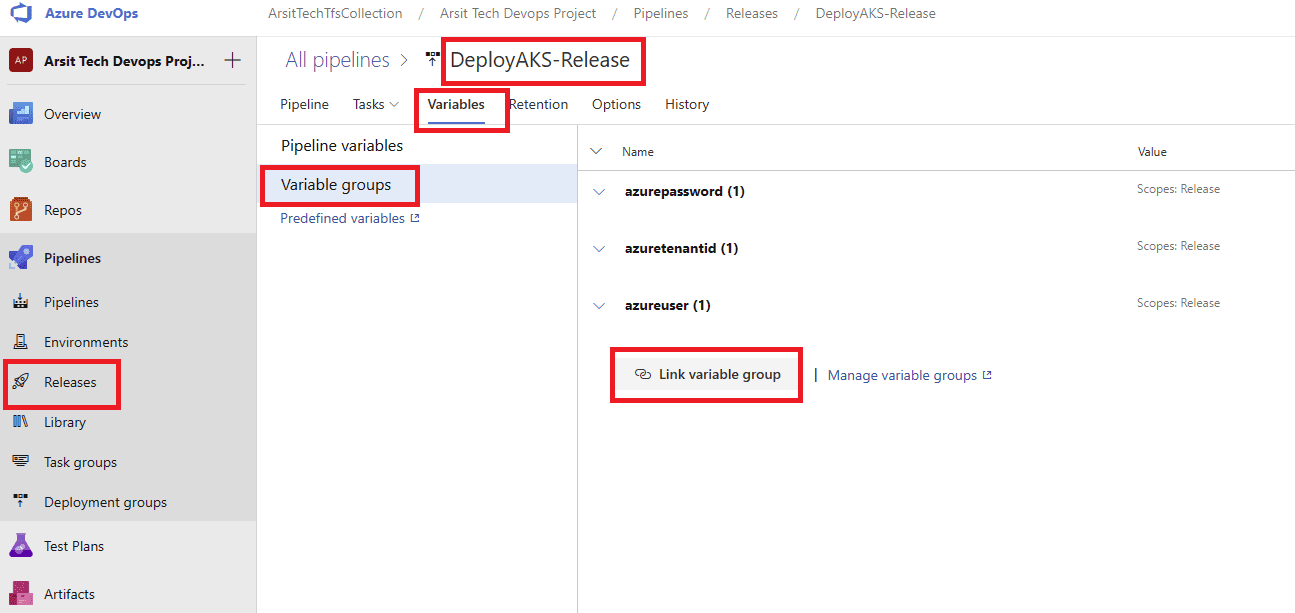
Build pipeline is done and created container for release pipeline. Now go to release pipelines and apply the steps in screenshots please 😊
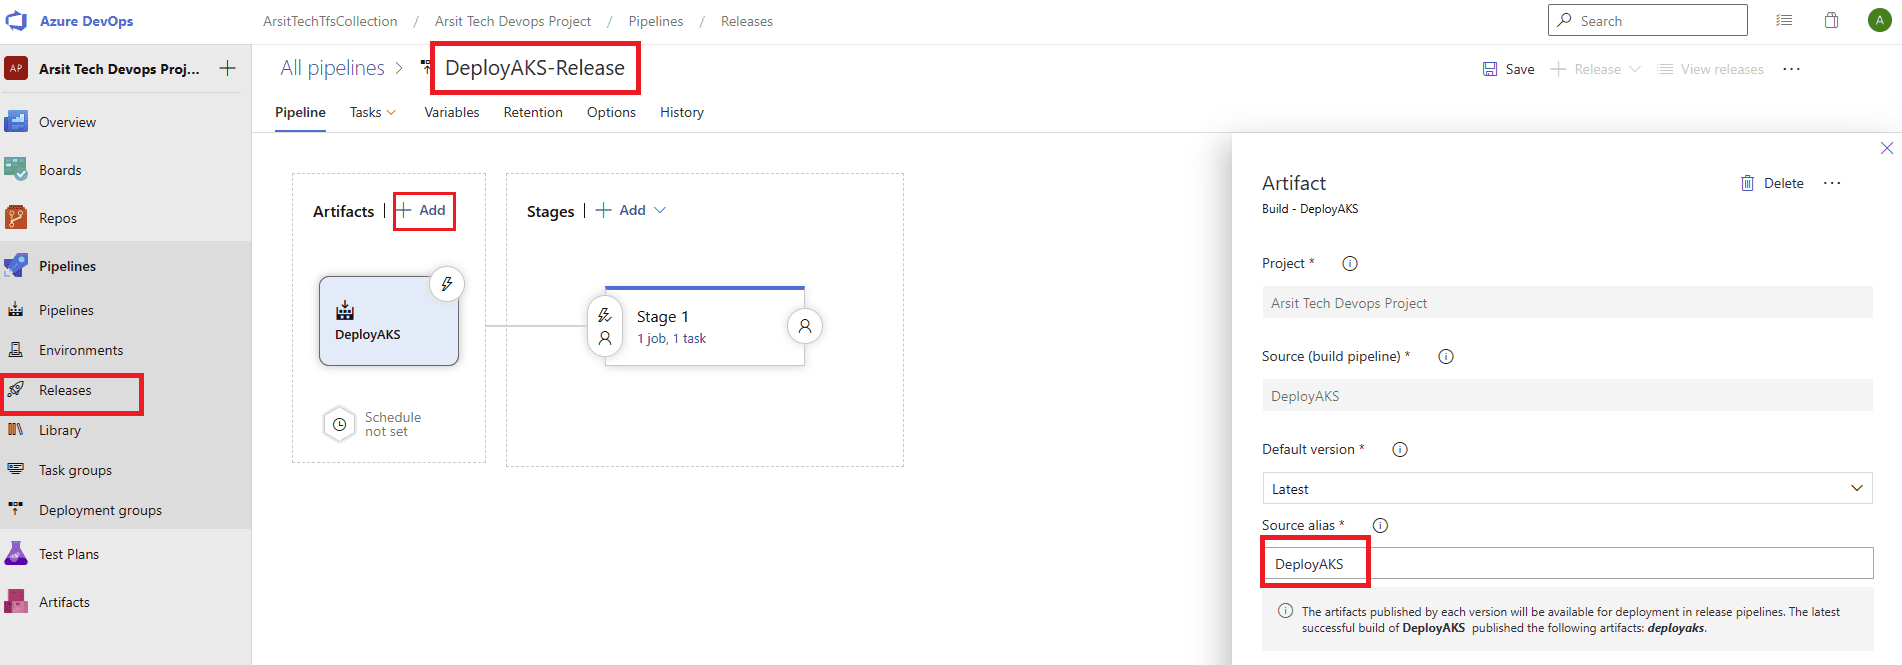
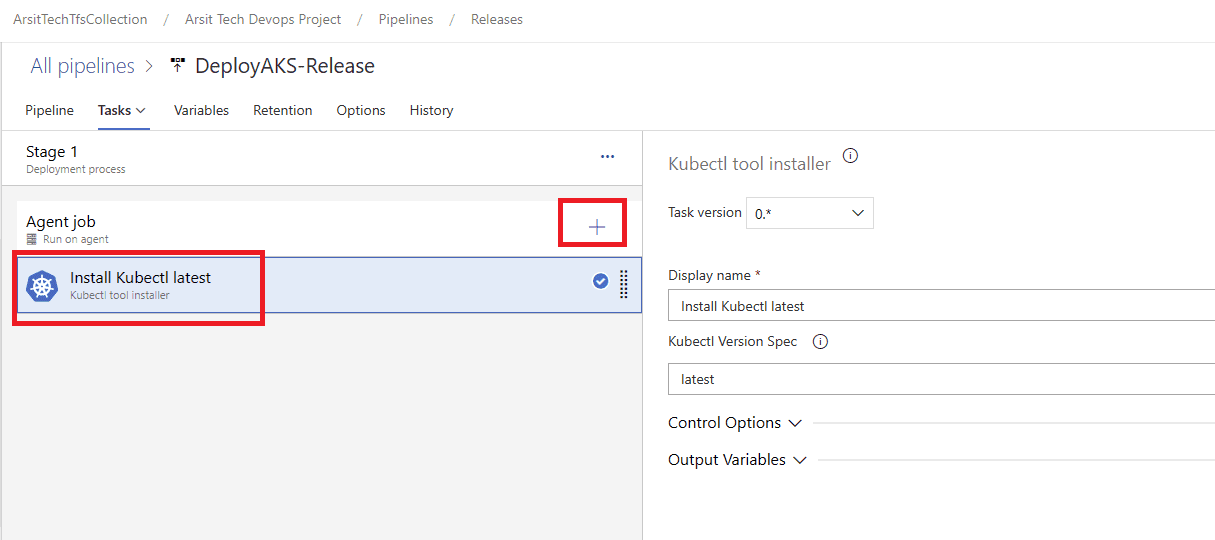
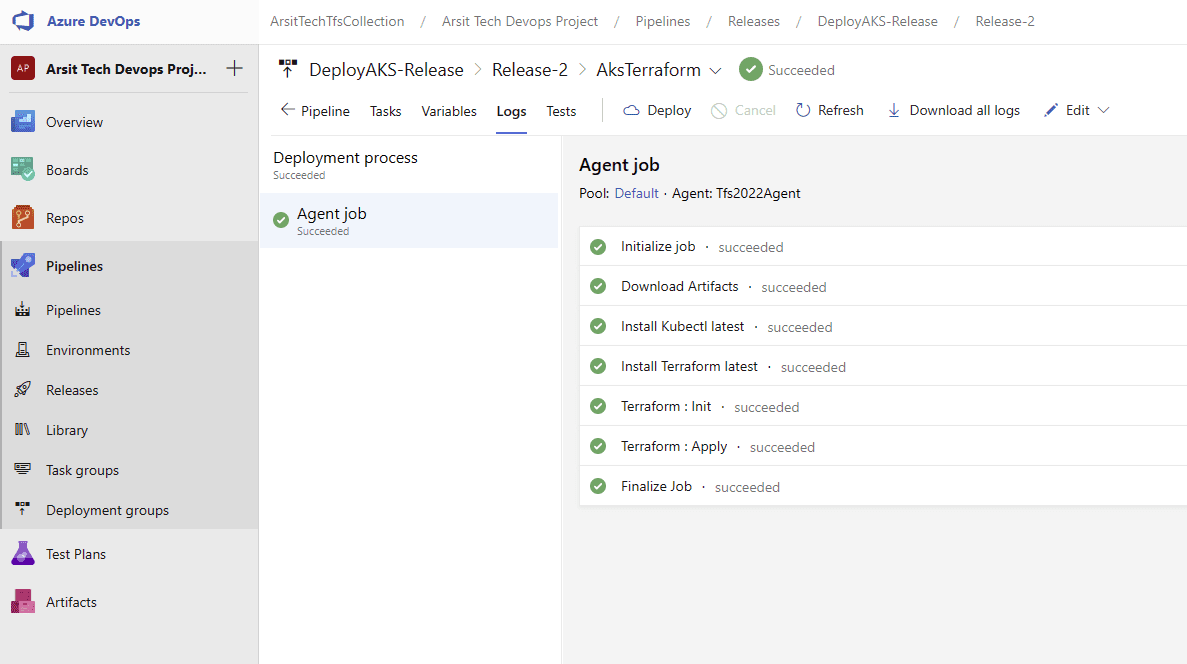
Release pipeline is done and created Azure AKS cluster as expected. You can update your powershell session with below command and control aks cluster.
az aks get-credentials –resource-group yourresourcegroupname –name youraksname
kubectl get pods –all-namespaces

Well done !!! We just created azure devops pipeline to deploy AKS cluster in our azure cloud subscription with terraform code. You can have a look at other related articles about this. Thanks.
<< GO TO DEPLOY PYTHON APP TO AZURE AKS CLUSTER >>
<< GO TO SETUP AZURE DEVOPS 2022 ON A WINDOWS 2022 SERVER VIRTUAL MACHINE >>
<< GO TO CONNECT ON-PREMISE AZURE DEVOPS TO AZURE CLOUD >>
<< GO TO HOW TO DEPLOY PYTHON APP MAIN POST >>