Deploy Python App to On-premise Kubernetes Cluster by Azure Devops Pipeline
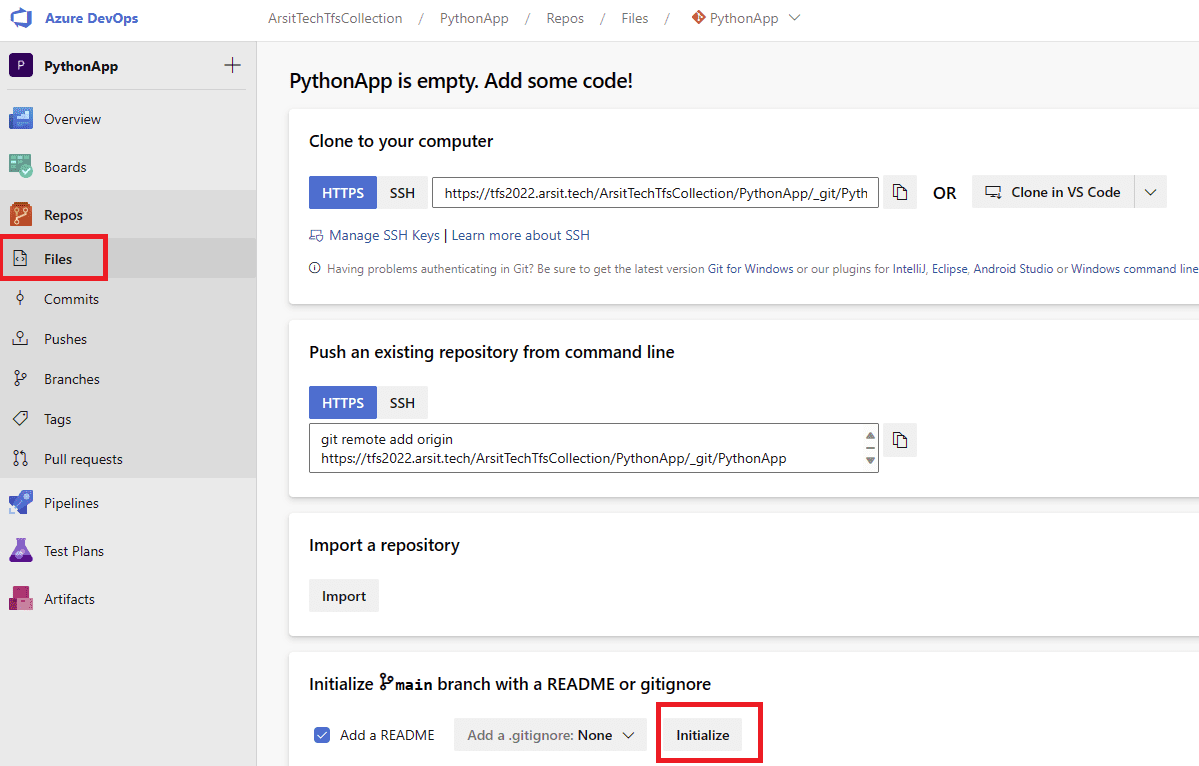
We will deploy python app to on-premise Kubernetes cluster by Azure Devops Pipeline. Go to your Collection files repository to upload files into repository. If this is your first repository then you need to click on Initialize and write a first file name to check in and create the repository. I have used on-premise Azure Devops pipeline in this article but if you want to use Azure Devops Pipeline in your azure cloud then you can apply same steps for that as well. There is no difference.
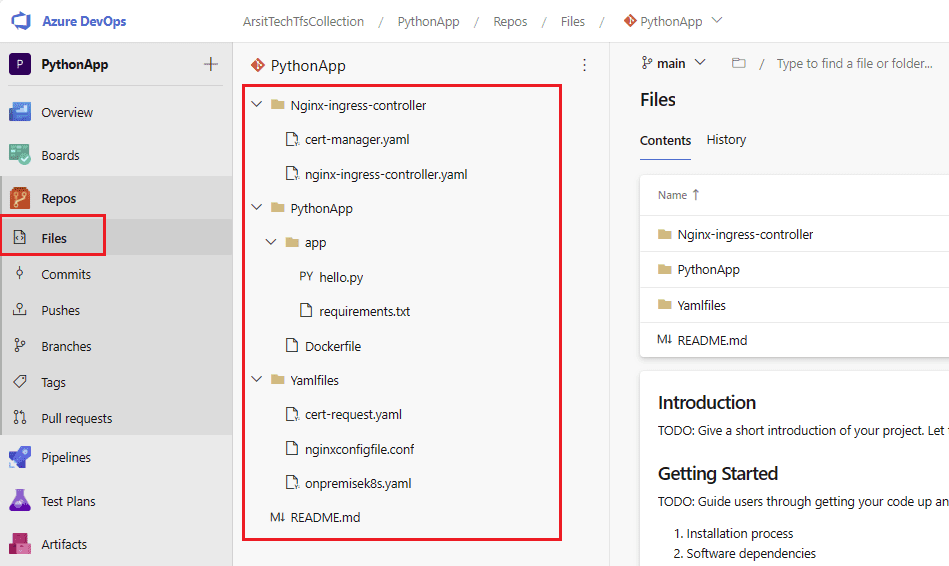
You can find my demo app, docker file and Kubernetes yaml files in below github url. Please remember to change file names as you desired and change in deployment shell script as well. We will use cloudflare for domain names management that’s why cert-request.yaml file is according to cloudflare. If you use another dns provider then you can find how to create cert request according to your own dns provider in cert manager official web page. You can find issuer in below cert manager url.
Python Application Codes:
https://github.com/semiharsan/pythondemoapp
Cert Manager Issuers:
https://cert-manager.io/docs/configuration/acme/dns01/
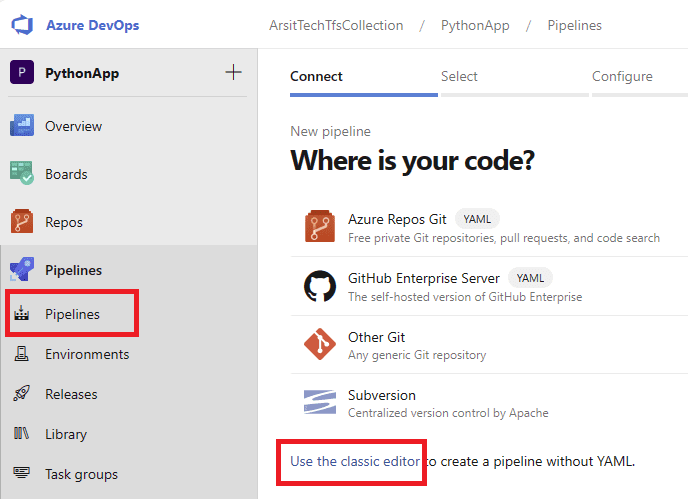
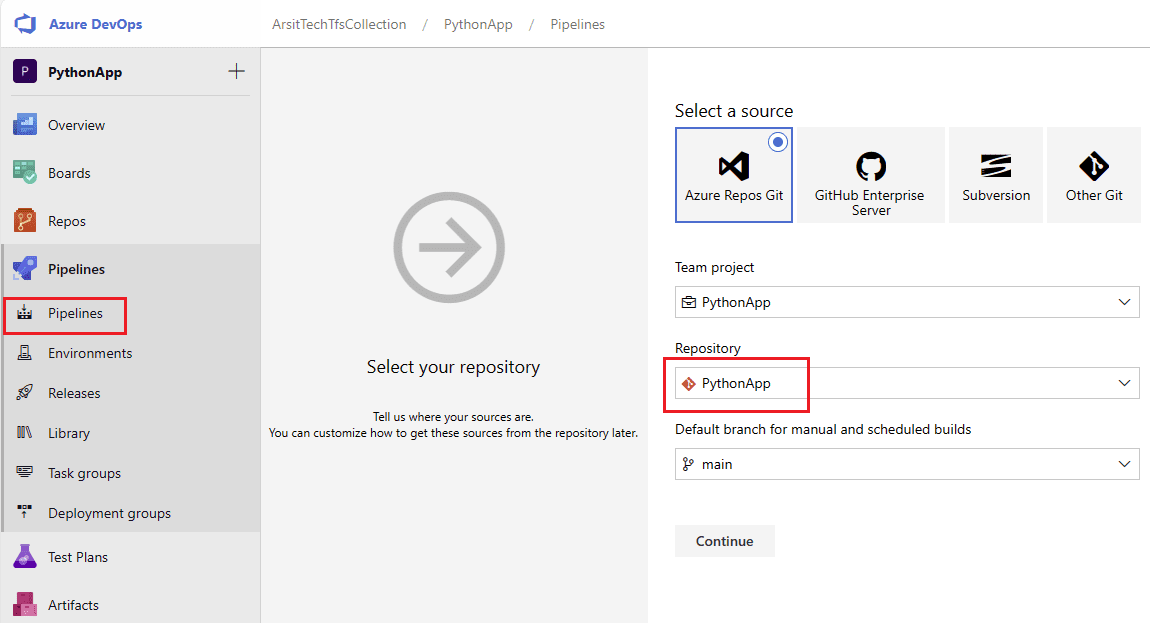
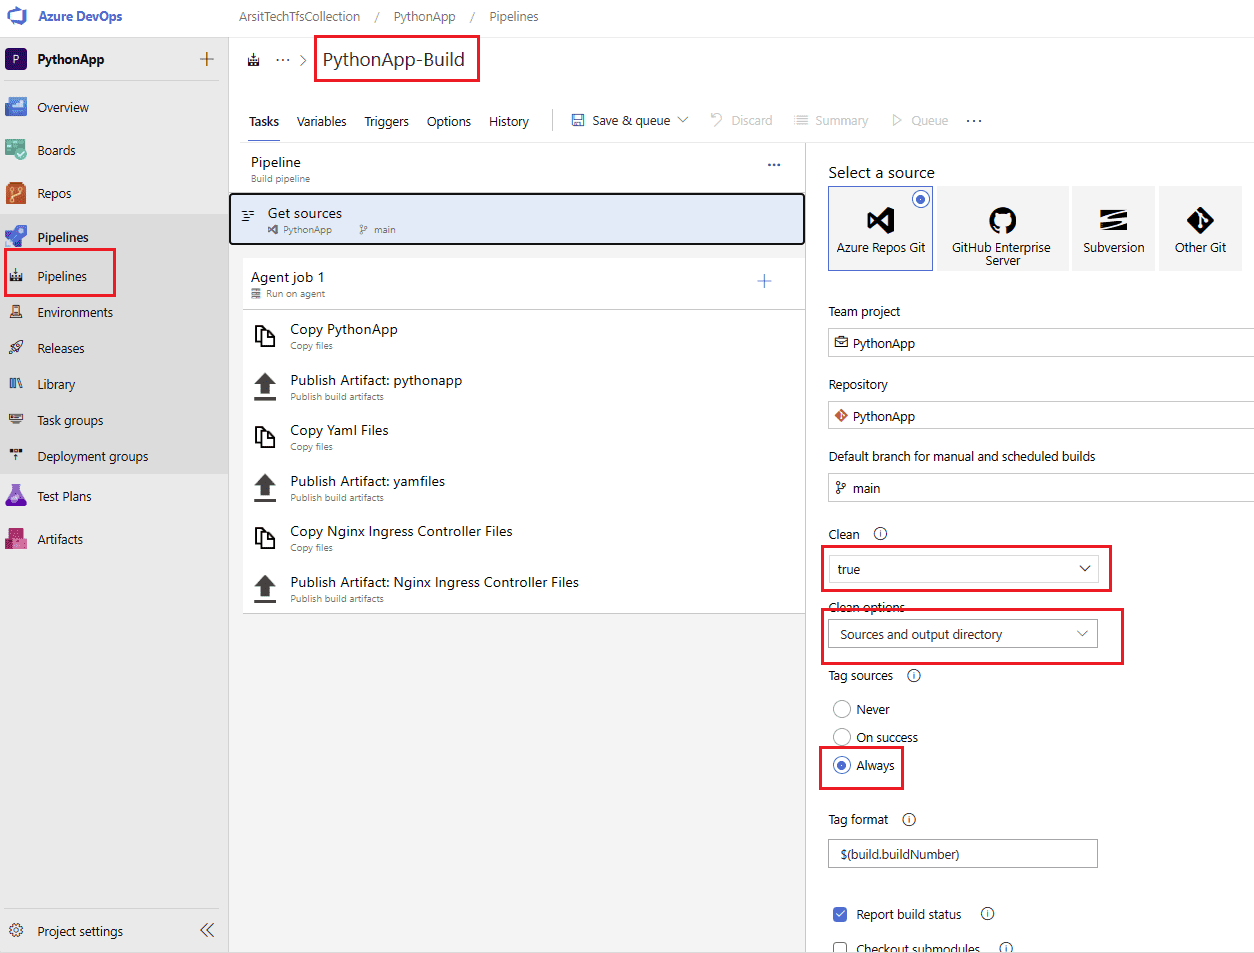
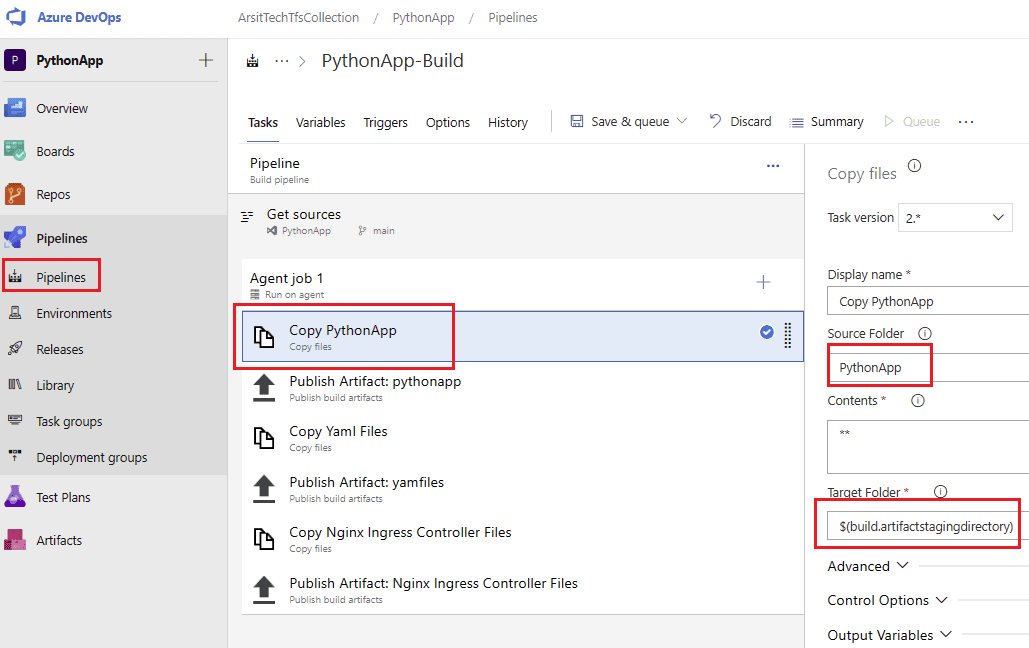
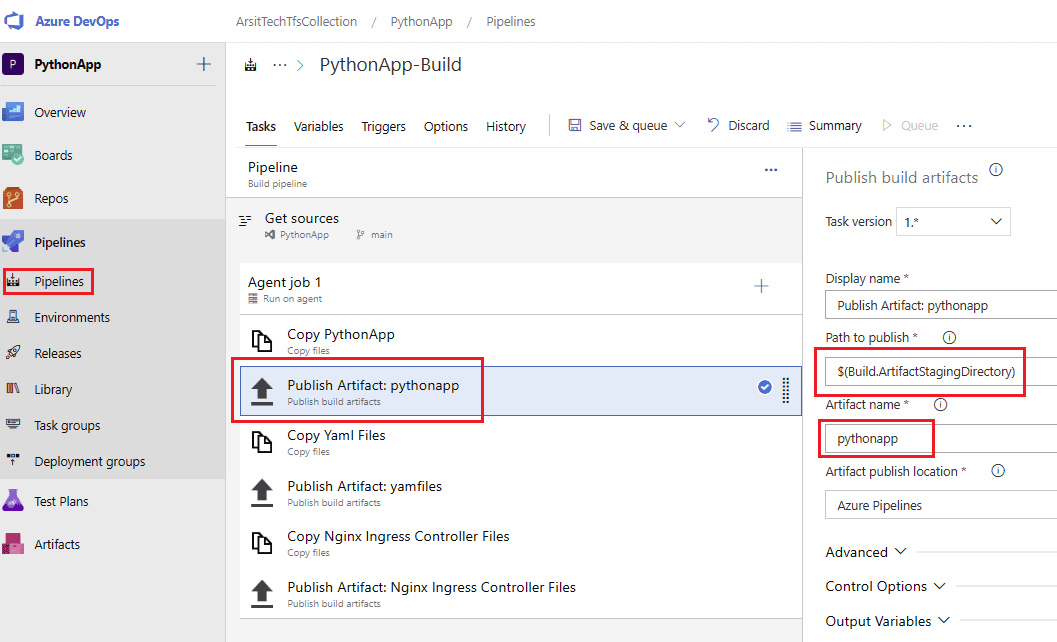
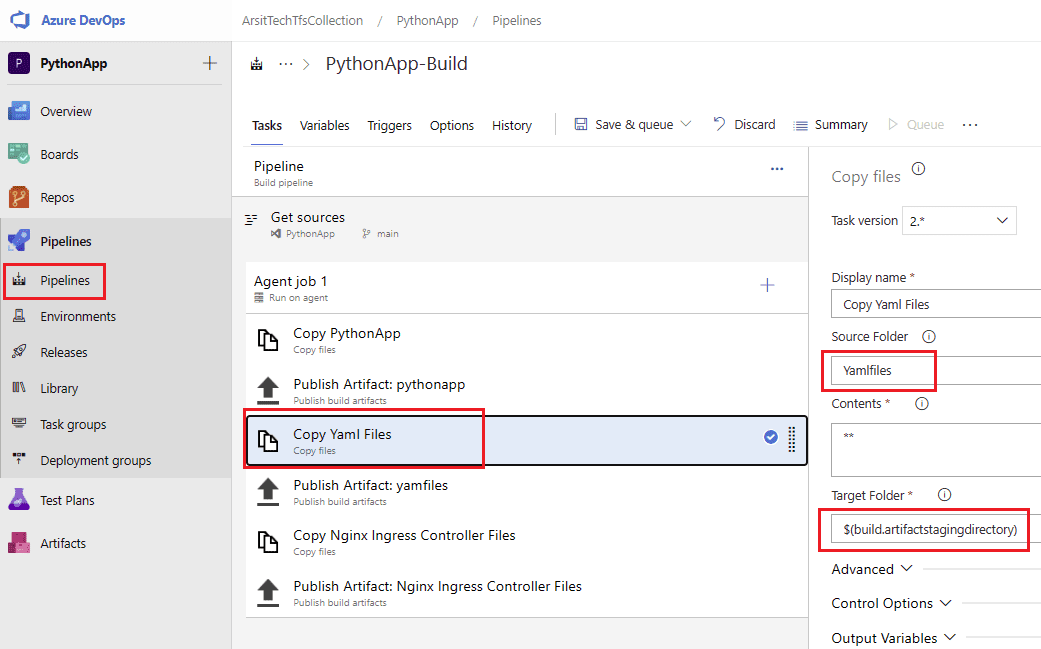
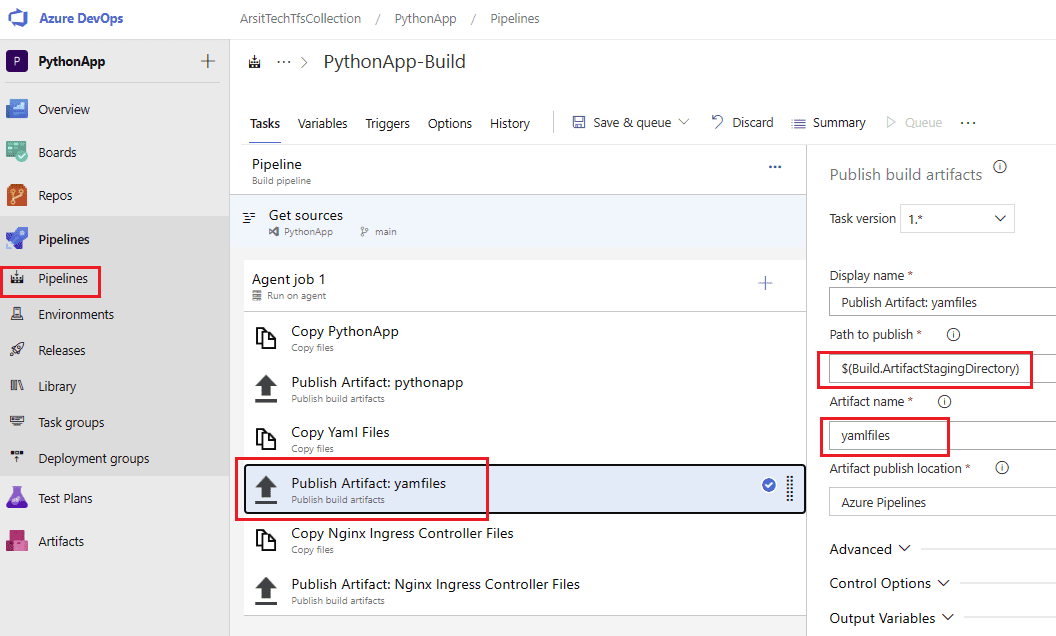
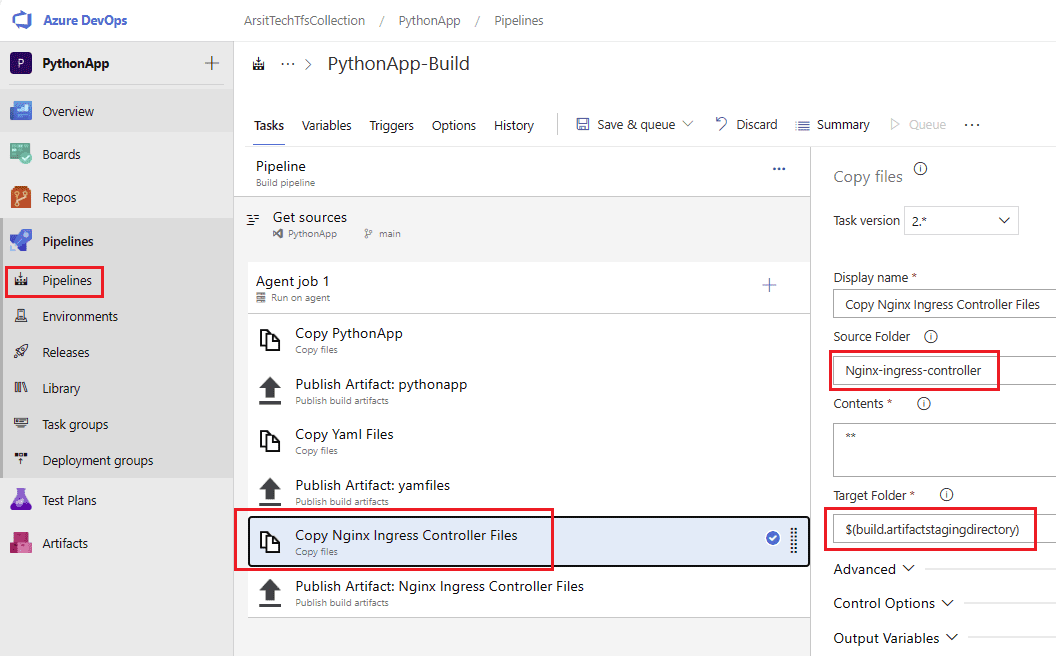
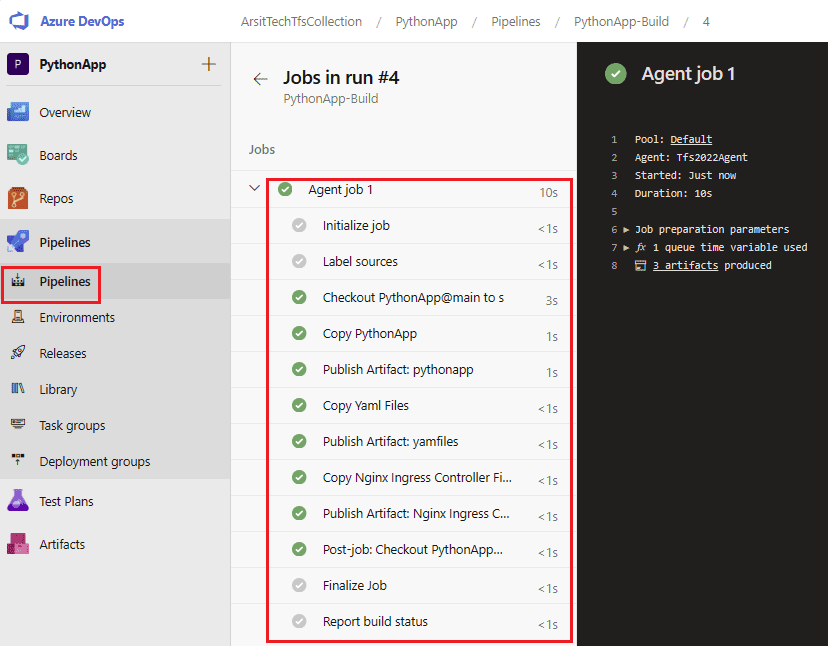
Let us create build pipeline to create artifacts means file container to use in release pipeline. We will create 3 different containers for our yaml and application files because we don’t want to upload yaml files into docker container that we will use in release pipeline. Please apply same steps as you see in below screenshots for your pipeline😊

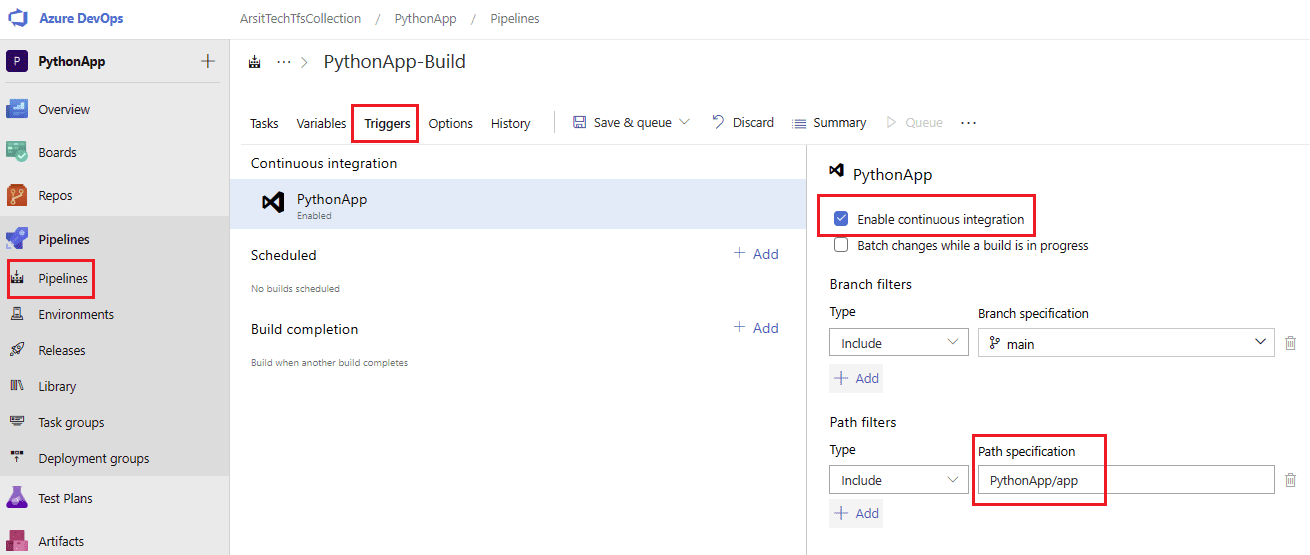
Let us enable continues integration to trigger automatically build pipeline if we change somethings in our application codes. We make sure only application codes changes will trigger the pipeline as we defined in “Path specification”. So build pipeline will run after checked in to create new container with updated files. And click on “Save and Queue” to run build pipeline.
Let us define service connection to give permission on-premise azure devops pipeline to be able to access to on-premise Kubernetes cluster master node. You have to do same thing for your azure cloud devops as well. We already have done this step in another article which you can find its url at the end of this article. If you want to learn how to do it please have a look at that article.
Before create release pipeline we need to install Nginx to on-premise Kubernetes master node as we will use it as network layer 3 load balancer in-front of ingress controller. If you wish to use another linux server as layer 3 nginx load balancer then you need to change ip address in nginx.conf file with your Kubernetes master node ip address or Kubernetes node ip address that ingress nginx controller pod is running on.
Or if you wish to use another load balancer then you need to redirect public 80 and 443 ports to 30280 and 30243 ports which serve on kubernetes node that ingress nginx controller pod is running on. These 30280 and 30243 ports are defined in nginx-ingress-controller.yaml under “kind: service” section.
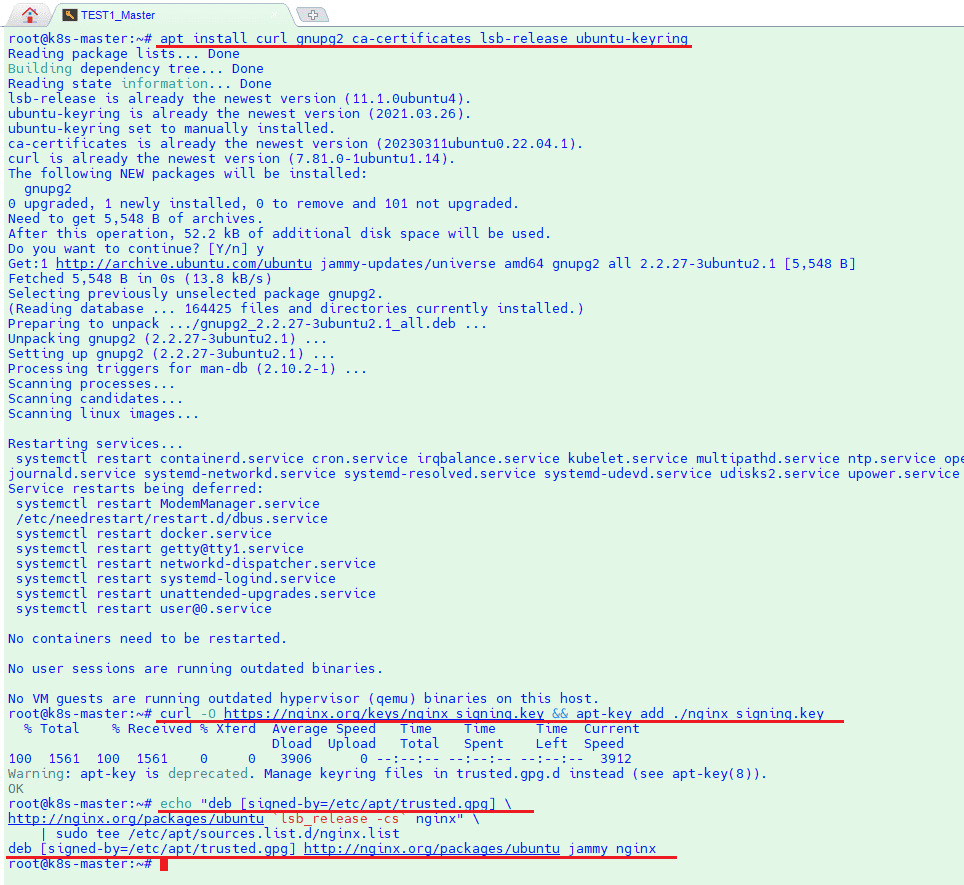
apt install curl gnupg2 ca-certificates lsb-release ubuntu-keyring
curl -O https://nginx.org/keys/nginx_signing.key && apt-key add ./nginx_signing.key
echo “deb [signed-by=/etc/apt/trusted.gpg] \
http://nginx.org/packages/ubuntu `lsb_release -cs` nginx” \
| sudo tee /etc/apt/sources.list.d/nginx.list
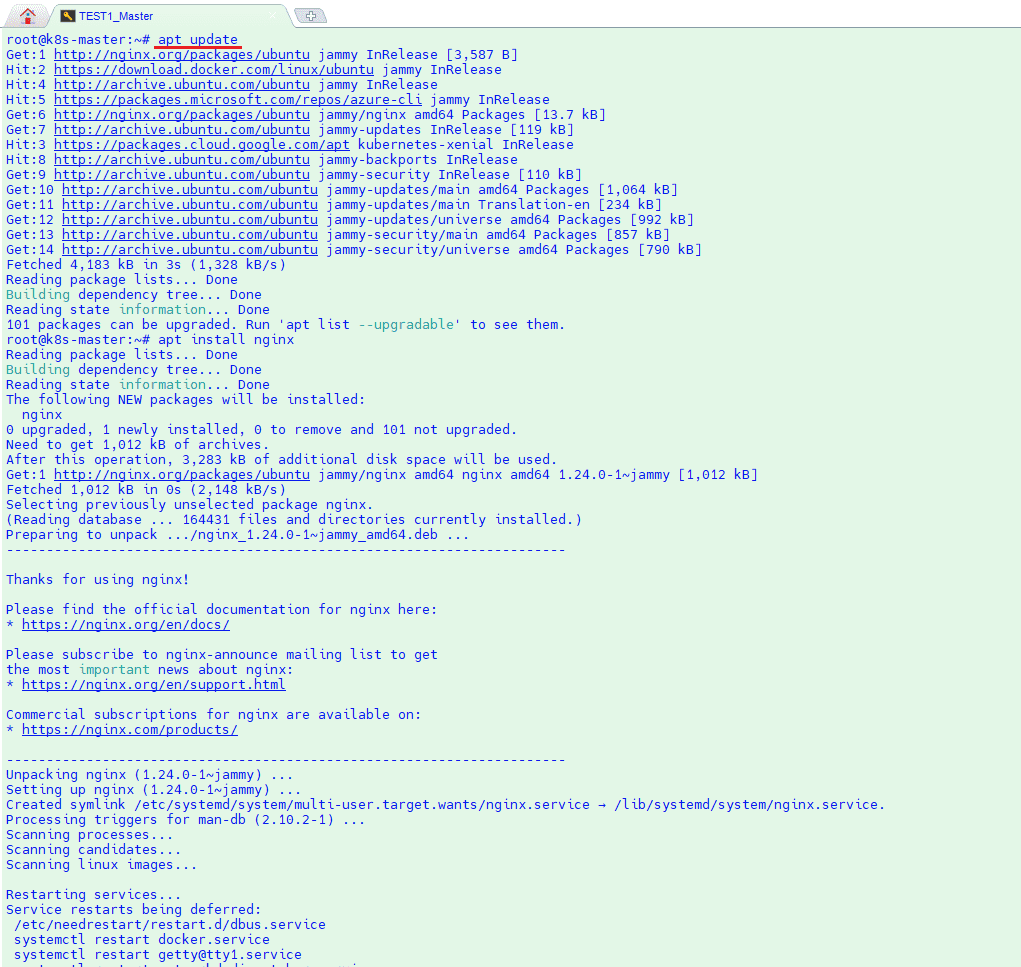
apt update
apt install nginx
After Nginx is installed we need to enable proxy and stream modules. Please apply below commands to do that. Sorry for didn’t upload screenshots as these commands and outputs were long.
TO CONFIGURE PROXY PROTOCOL IN NGINX
#Check module
nginx -V 2>&1 | grep — –with-http_realip_module
#Install Dependency packages
apt-get update
apt-get install build-essential libpcre3 libpcre3-dev zlib1g zlib1g-dev -y
# Get your currently installed nginx version number
NGINX_VERSION=$(nginx -v 2>&1 | awk -F’/’ ‘{print $2}’)
# Download the Nginx source code
cd /tmp
wget http://nginx.org/download/nginx-${NGINX_VERSION}.tar.gz
# Extract the source code
tar -zxvf nginx-${NGINX_VERSION}.tar.gz
# Navigate to the source code directory
cd nginx-${NGINX_VERSION}
./configure –with-http_realip_module –with-stream
make
make install
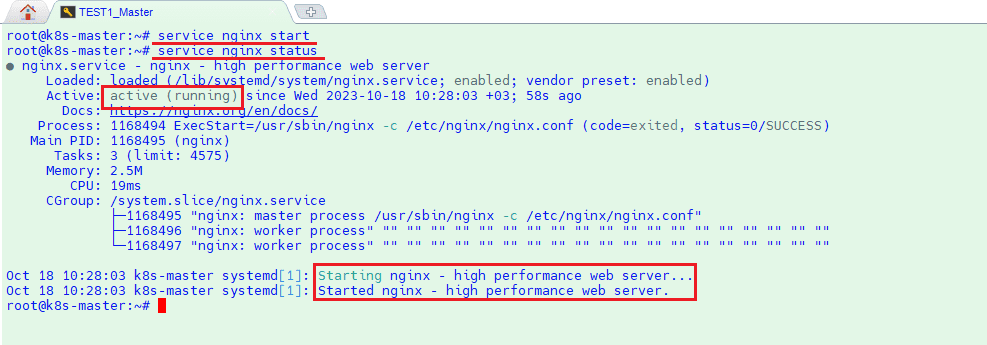
Our kubernetes master node is ready to serve as nginx load balancer as well. It will be public face and redirect all incoming requests from 80 and 443 ports to 30280 and 30243 ports of ingress nginx controller.
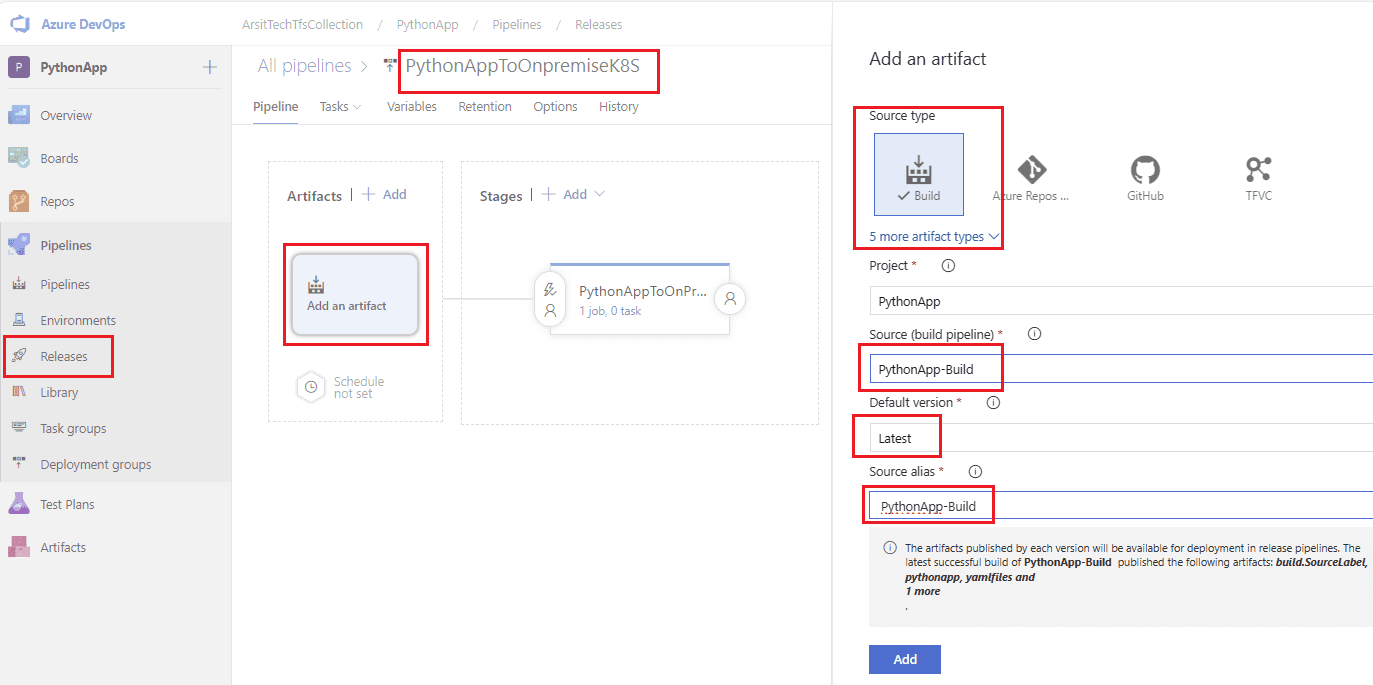
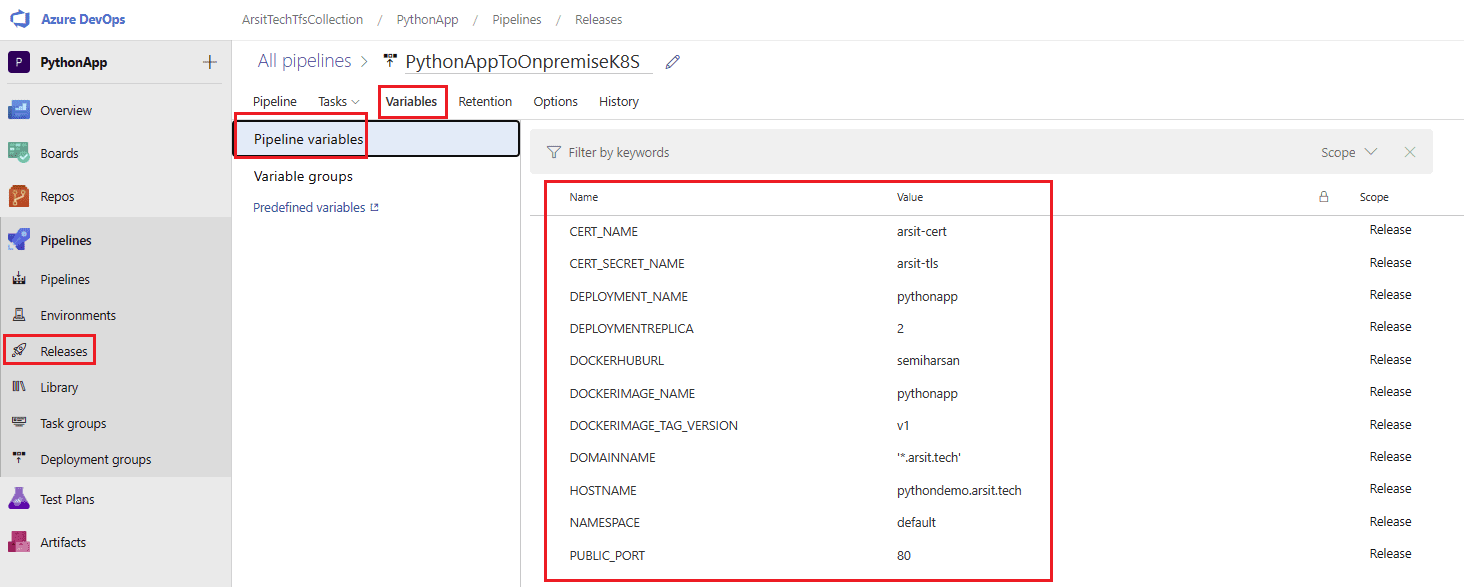
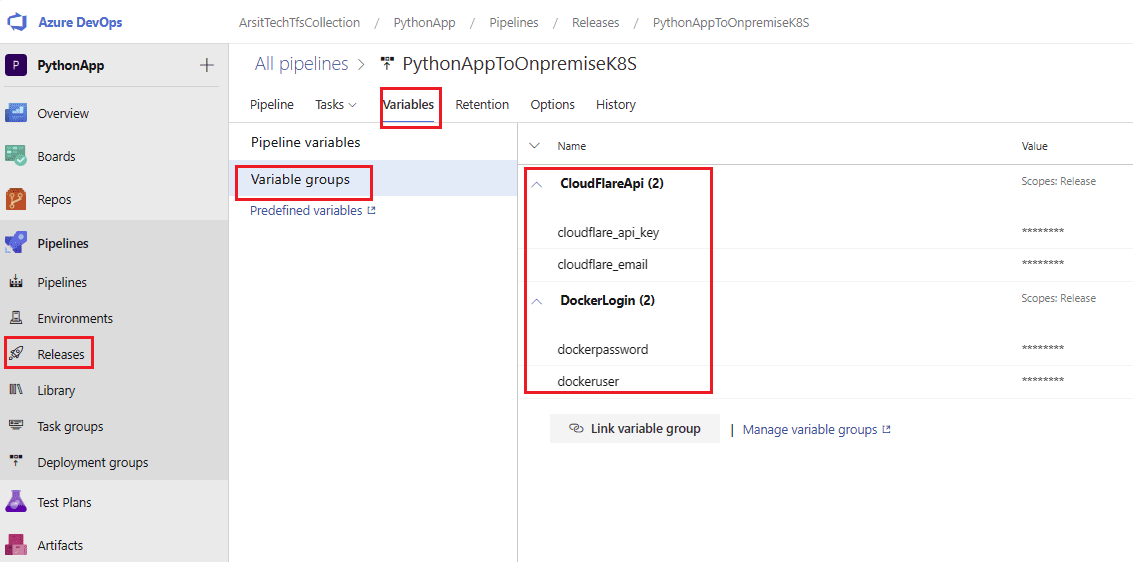
Now go to releases and create a new release pipeline with your desired name. Add build pipeline as artifact and link docker login and cloudflare secret variable groups to this pipeline. Then go to pipeline variables to define docker image and kubernetes yaml variables to use in bash script. You can change names as you desired according to your infrastructure design.
You need to choose a linux agent to be able to run bash commands. If you use Azure devops you can choose build in linux hosted agents and connect to kubernetes master node via ssh to run ssh commands. In our case we will chose our linux agent that we have installed on our Kubernetes master node linux server. You can find how to do it in the article url at the end of this article.

Let us add bash script steps from Add menu. I have separated 4 parts. First one is to build docker image from our application codes and push it to docker hub repository. If you wish to use another repository then you need to change docker push command according to your repository location and login variables into that repository.
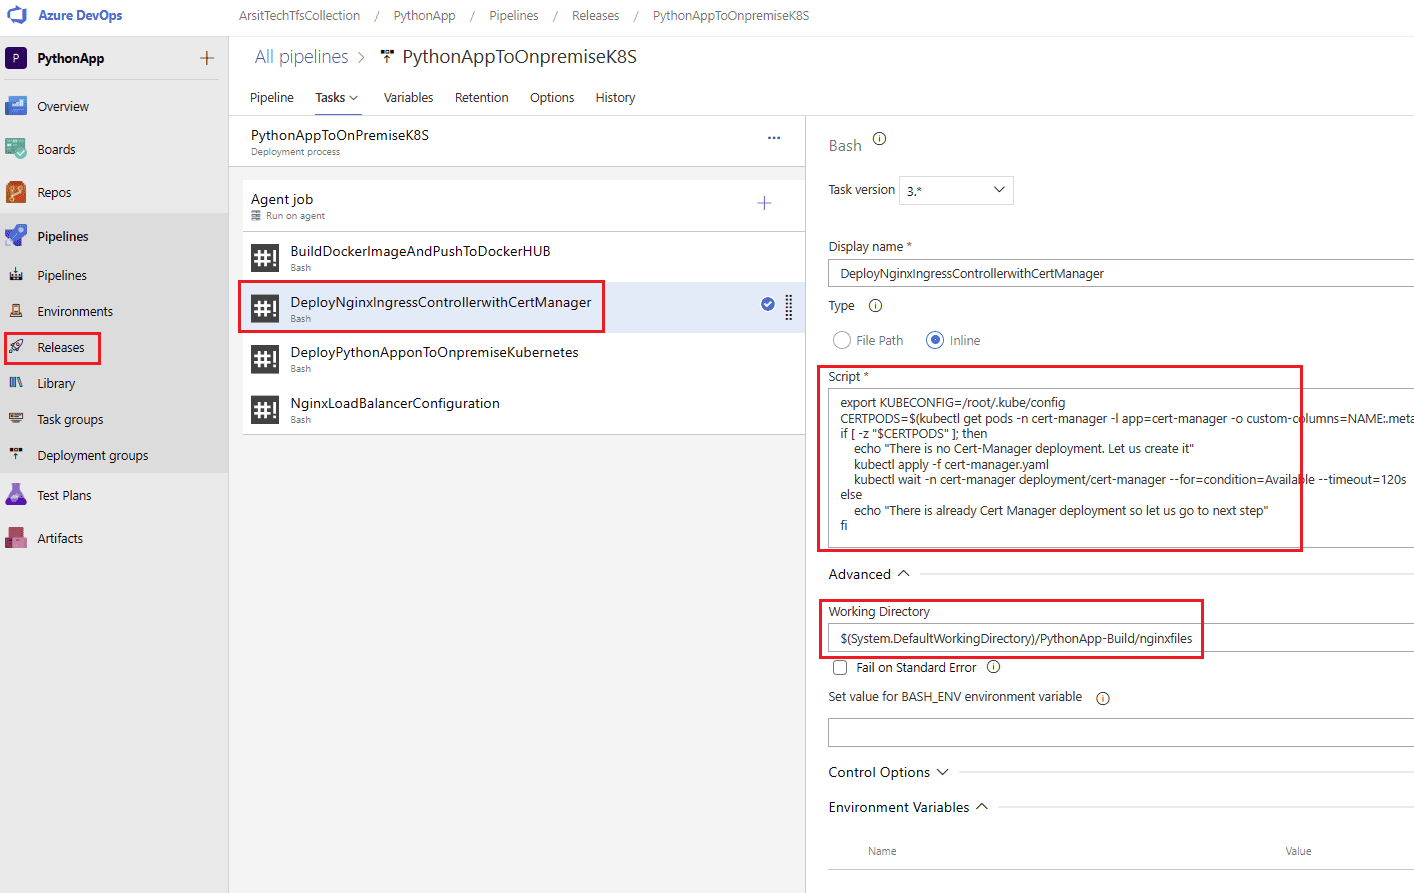
Second is to deploy ingress nginx controller and cert-manager so you can disable this step after first release if you don’t want it to run again after new code commits. Anyway, even if you don’t disable no worries because script will check whether ingress controller and cert-manager exist and then deploy if there is no ingress controller or cert-manager.
Third is to deploy application on Kubernetes cluster and if there is already app pods then it will just update pods with zero down method.
Fourth is to configure nginx load balancer config with ingress controller service ip address. You can also disable this step after first release if you will not make any changes regarding nginx ingress controller service ip or ports.
You can find bash script in below github url and please remember to separate script into 4 parts in your pipeline steps.
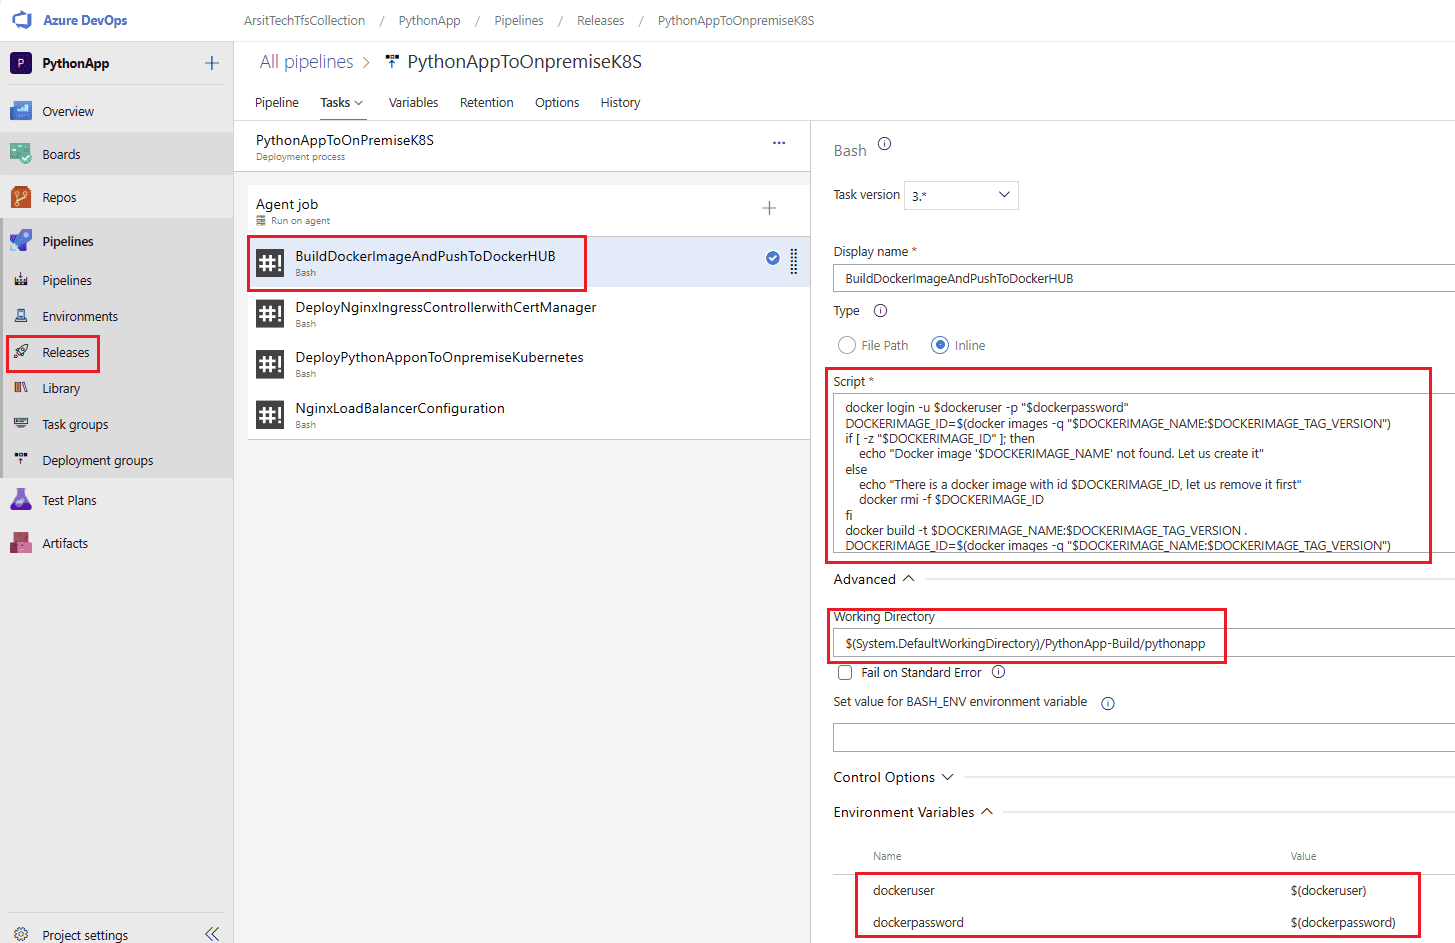
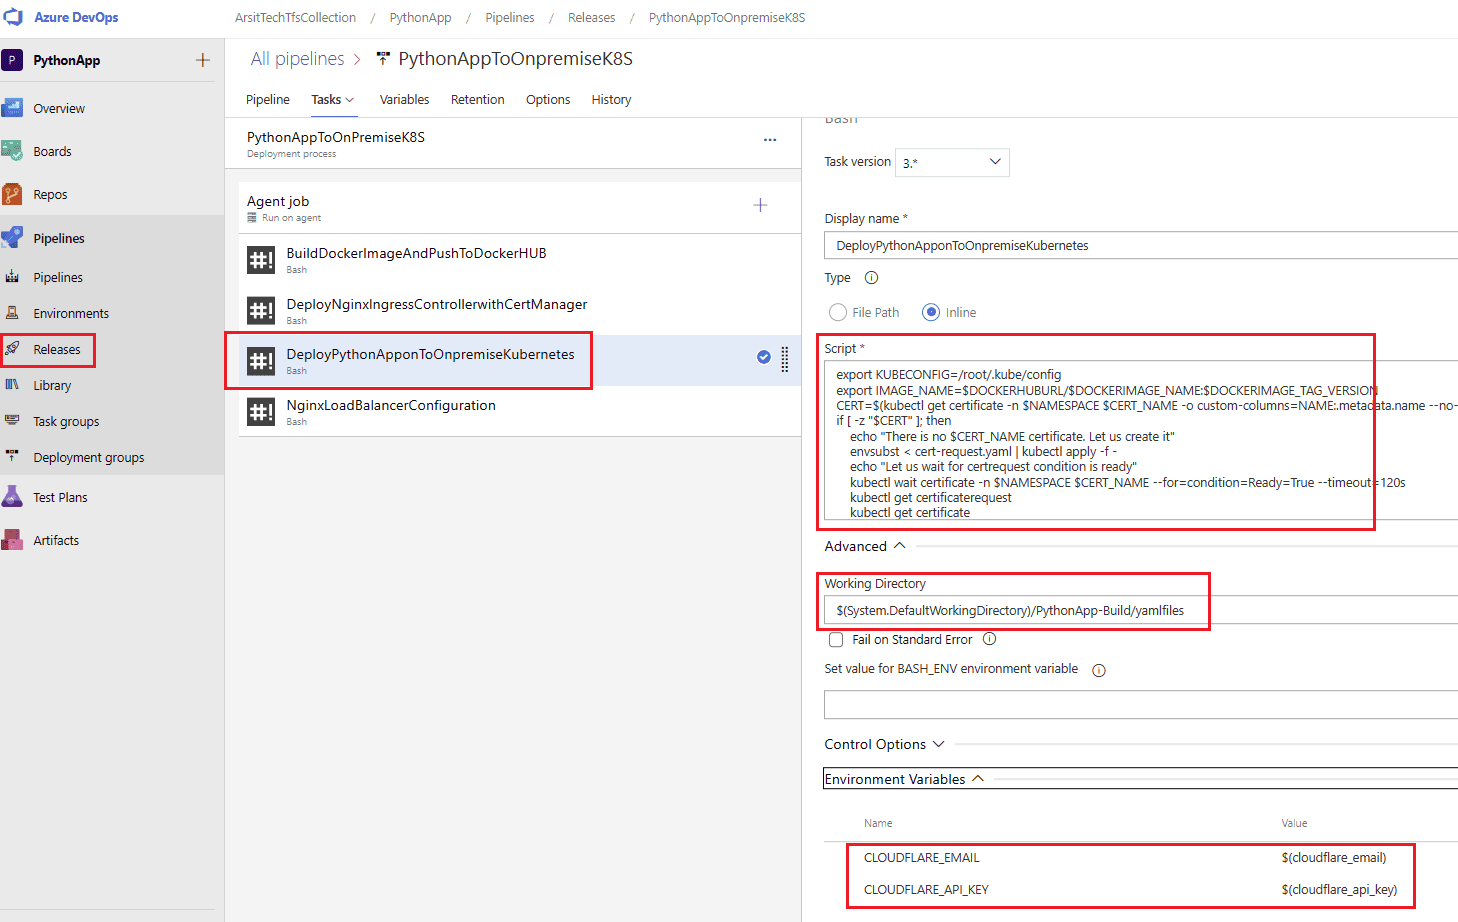

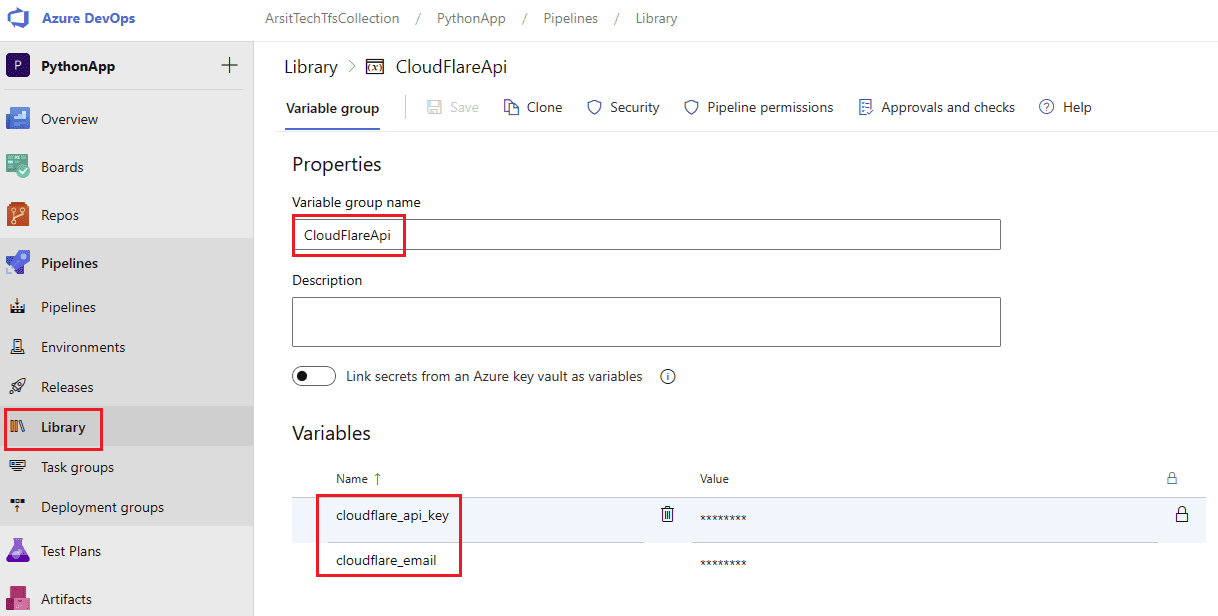
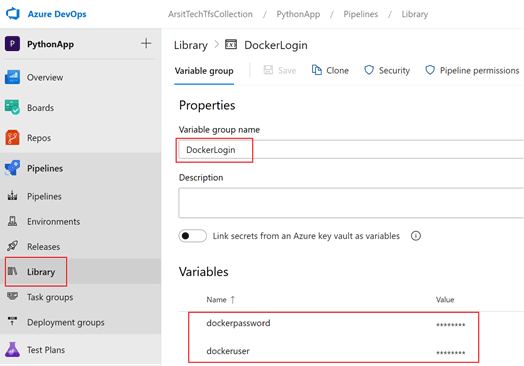
We will need docker username and password for docker login command and cloud flare api key for creating certificate request,so create required secret variables in Library to use in pipeline step.
Dockeruser : Your docker hub user name
Dockerpassword : Your docker hub login password
Cloudflare_api_key : Your cloud flare account api key
Cloudflare_email : Your cloud flare login email address.
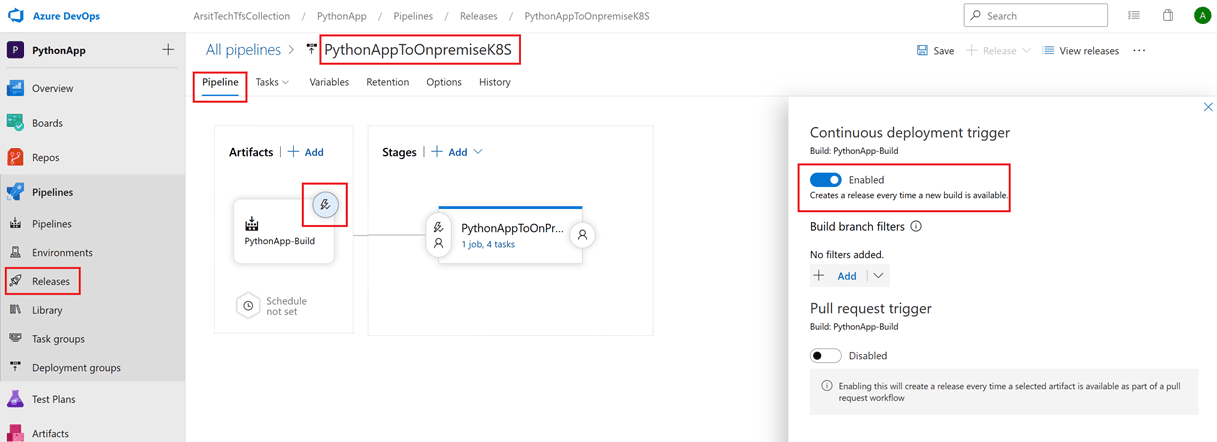
Let us enable continues deployment for release pipeline. If you change your code in your app repository then build pipeline will create a new updated artifact and then release pipeline will deploy it again with zero downtime as my bash script is written to do so. It will increase scale set 1 more and update pods with new image and delete old pods.
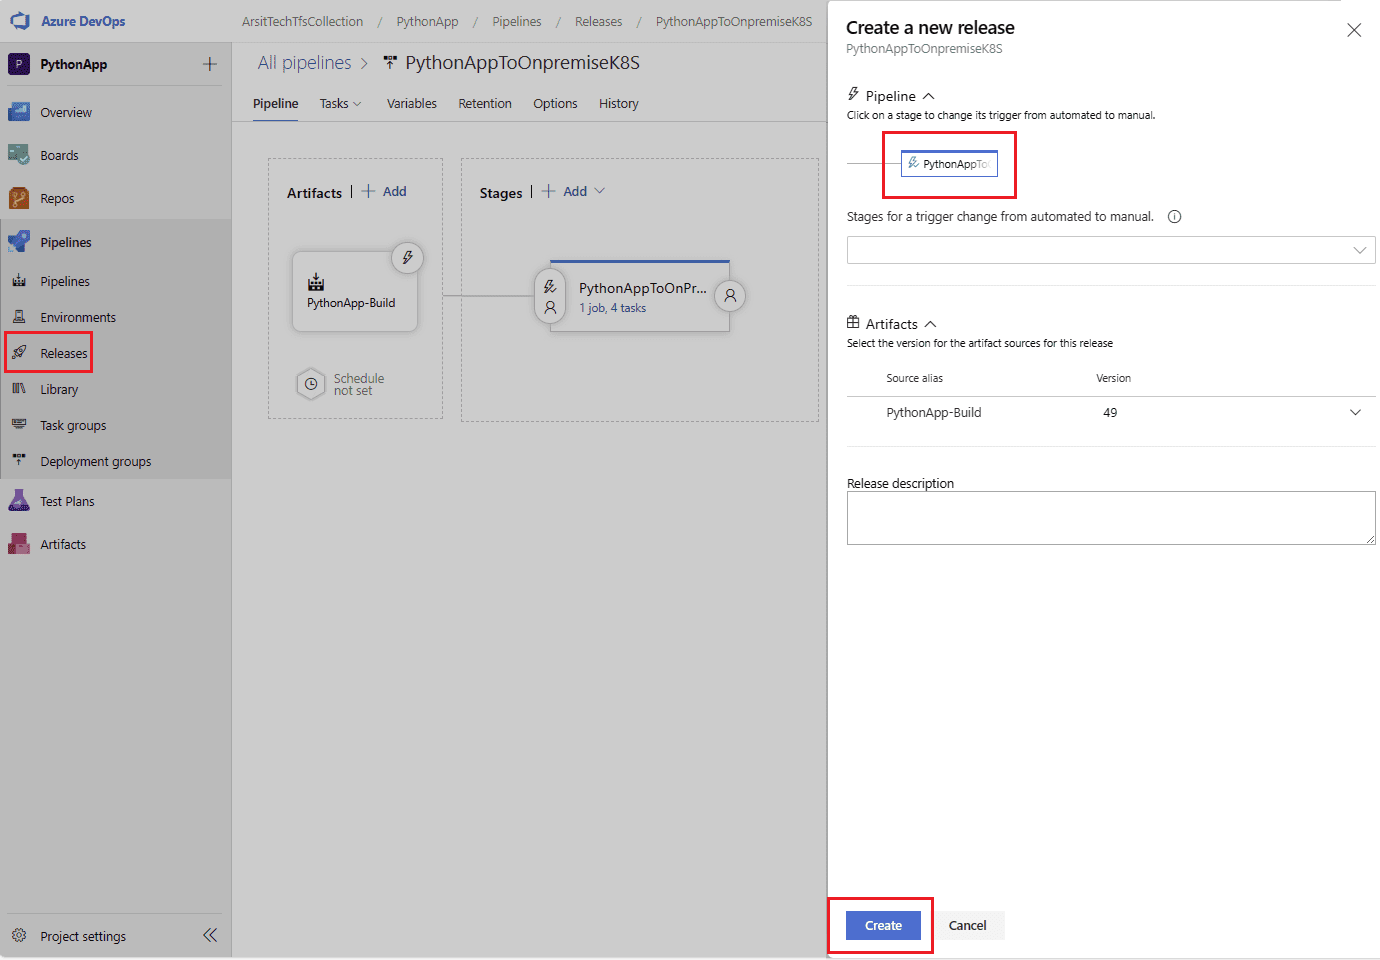
Time to create a release pipeline to deploy application on kubernetes cluster. Come one let us do that. Click on Save then Release near it and Create Release in the menu. Choose PythonApp step and click on Create button at bottom.
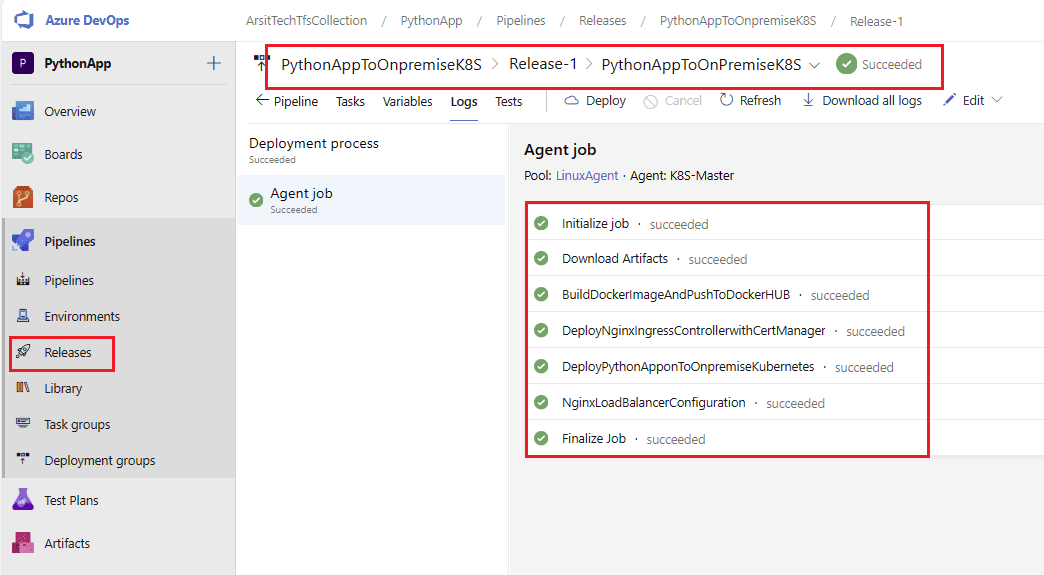
And application is deployed on Kubernetes cluster with 2 pods. We used free lets encrypt certificate with 3 months auto rotation. You can change somethings in hello.py file and see what is gonna happen by yourself 😊

Congrats guys !!! We have just deployed python application to on-premise Kubernetes cluster by devops pipeline automation without knowing any python coding skills. You can visit our related articles about this.
<< GO TO SETUP AZURE AKS CLUSTER WITH TERRAFORM CODE >>
<< GO TO SETUP AZURE DEVOPS 2022 ON A WINDOWS 2022 SERVER VIRTUAL MACHINE >>
<< GO TO CONNECT ON-PREMISE AZURE DEVOPS TO AZURE CLOUD >>
<< GO TO HOW TO DEPLOY PYTHON APP MAIN POST >>