Connect on-premise Azure Devops 2022 to your Azure Cloud Subscription
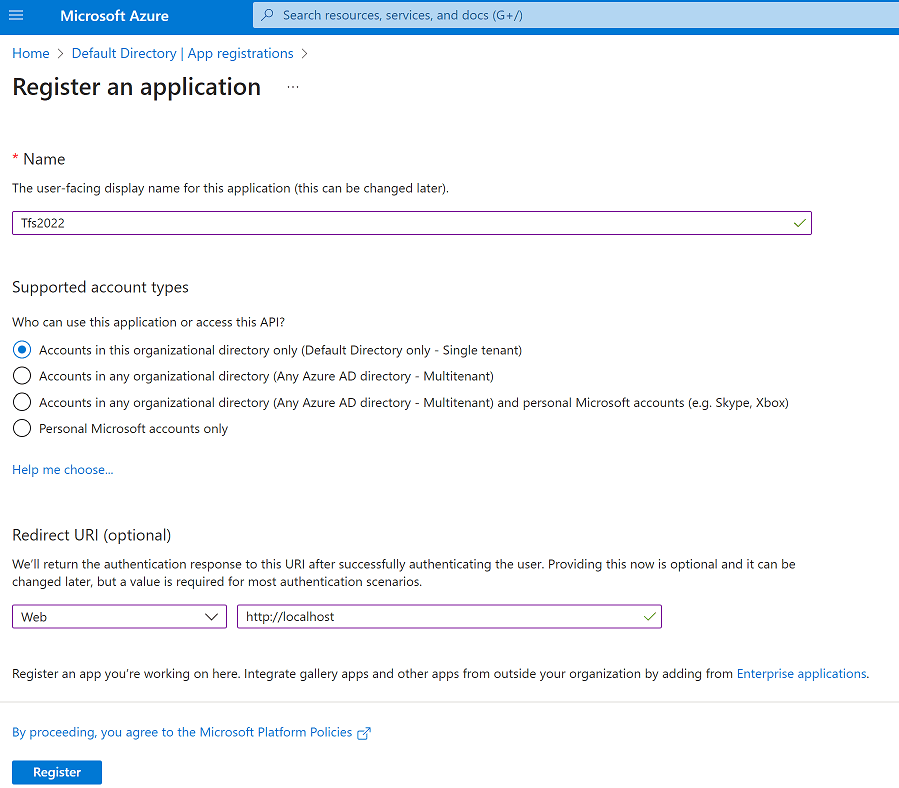
Go to portal.azure.com and login with your subscription owner or admin rights credential. Open Azure Active Directory to create an application registration for on-premise Tfs 2022 connection. Write a name for registration and choose “Accounts in this organizational directory only”. For redirect url, you can just write localhost. Click to register and after azure created registration, go to certificate and secrets in Tfs2022 app registration.

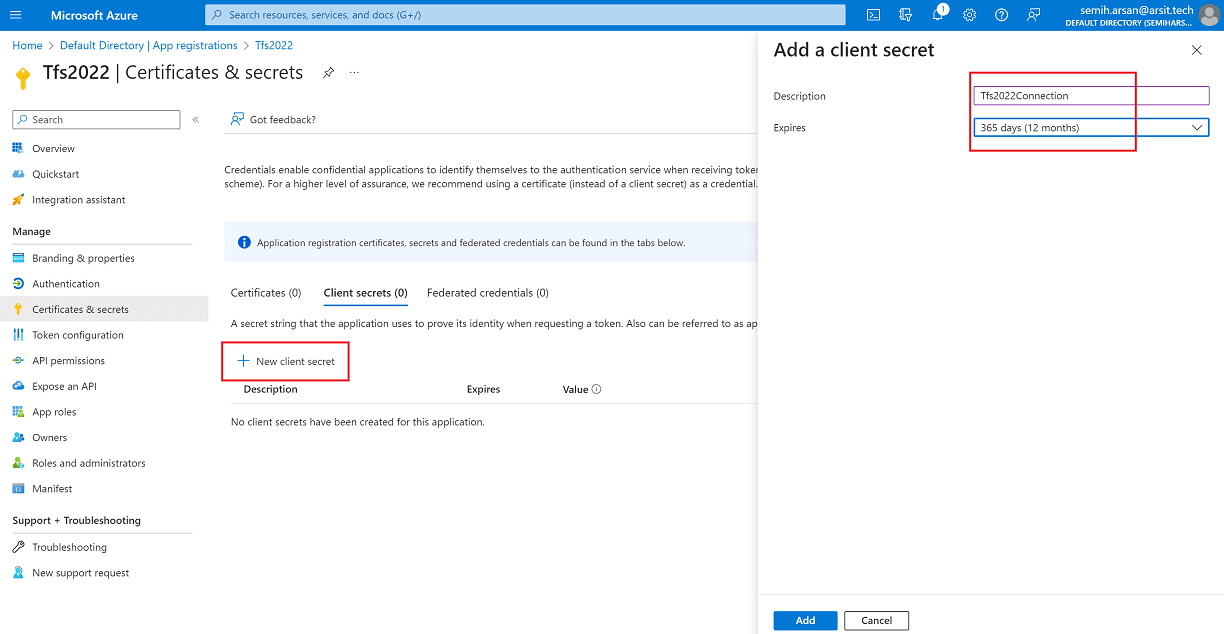
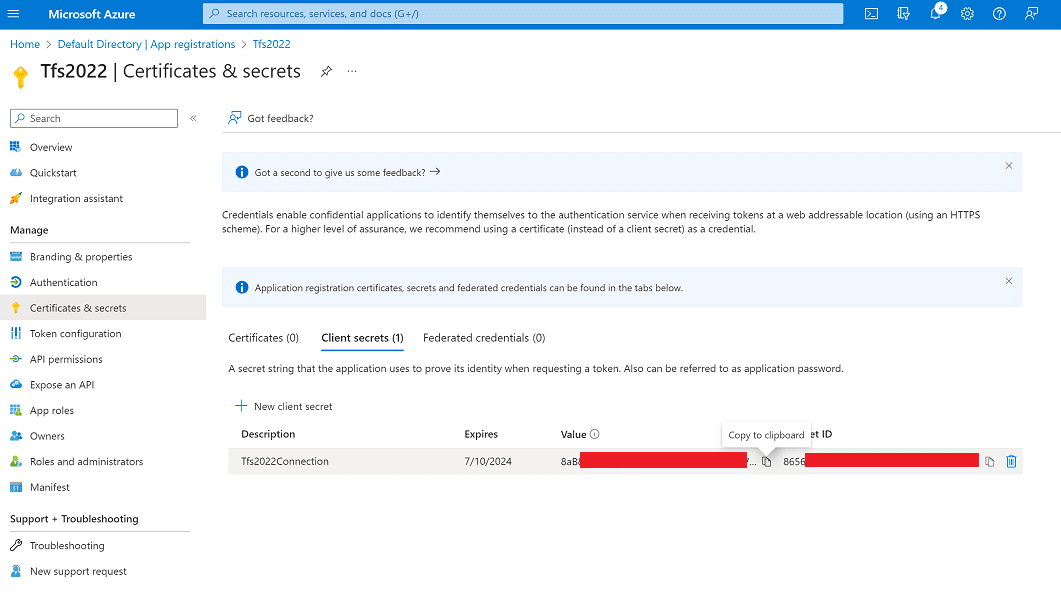
Click on “New client secret” to create a secret key to use for secure authentication between on-premise Tfs2022 and Azure Resources. Write a name for this secret that we will use later when we create a service connection in on-premise Tfs2022. After it’s been created, remember to copy secret value to somewhere because we will also use this later because value will disappear after a while and you will no longer be able to get it again. You will need to create a new one if you forget to copy.
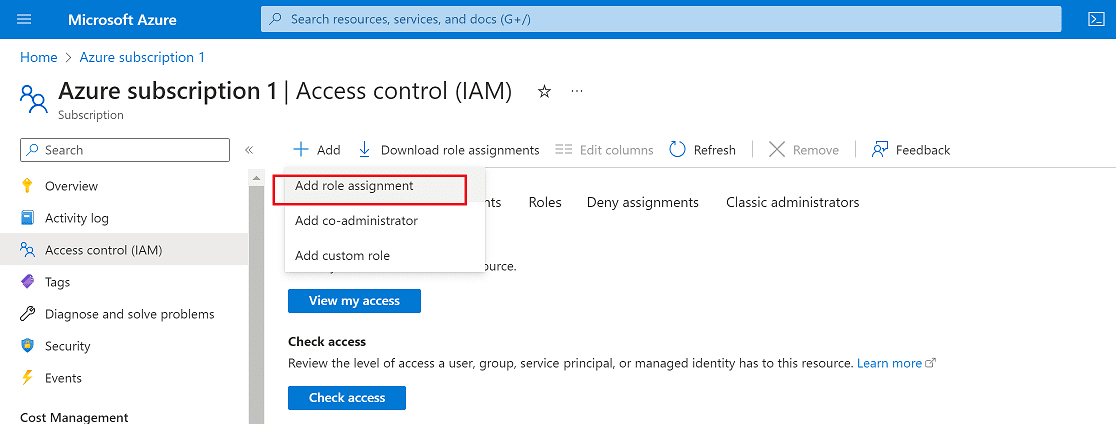
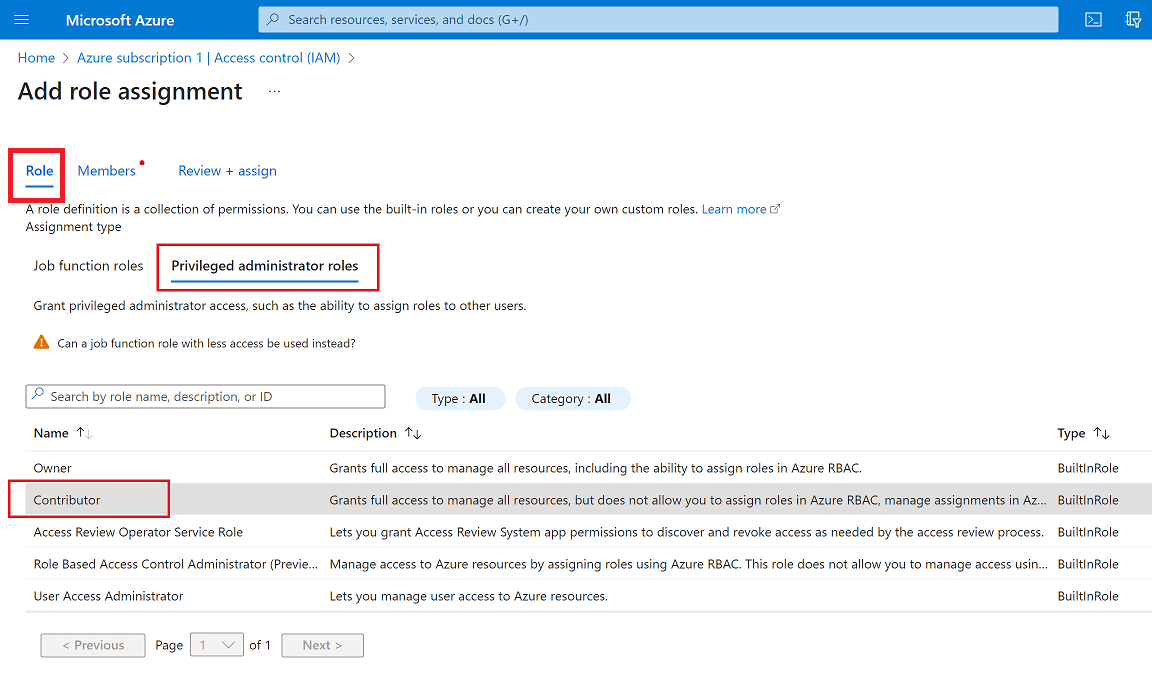
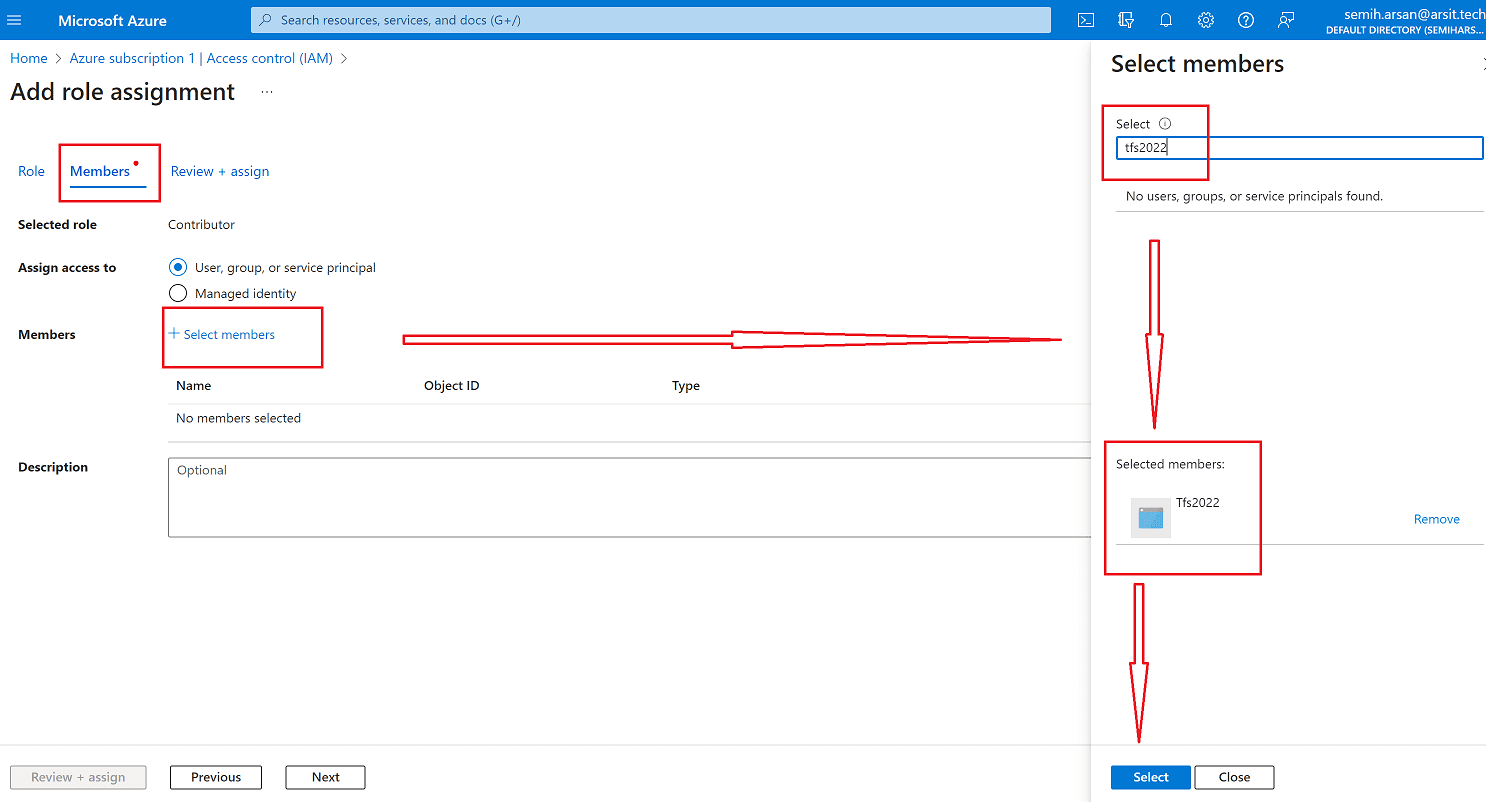
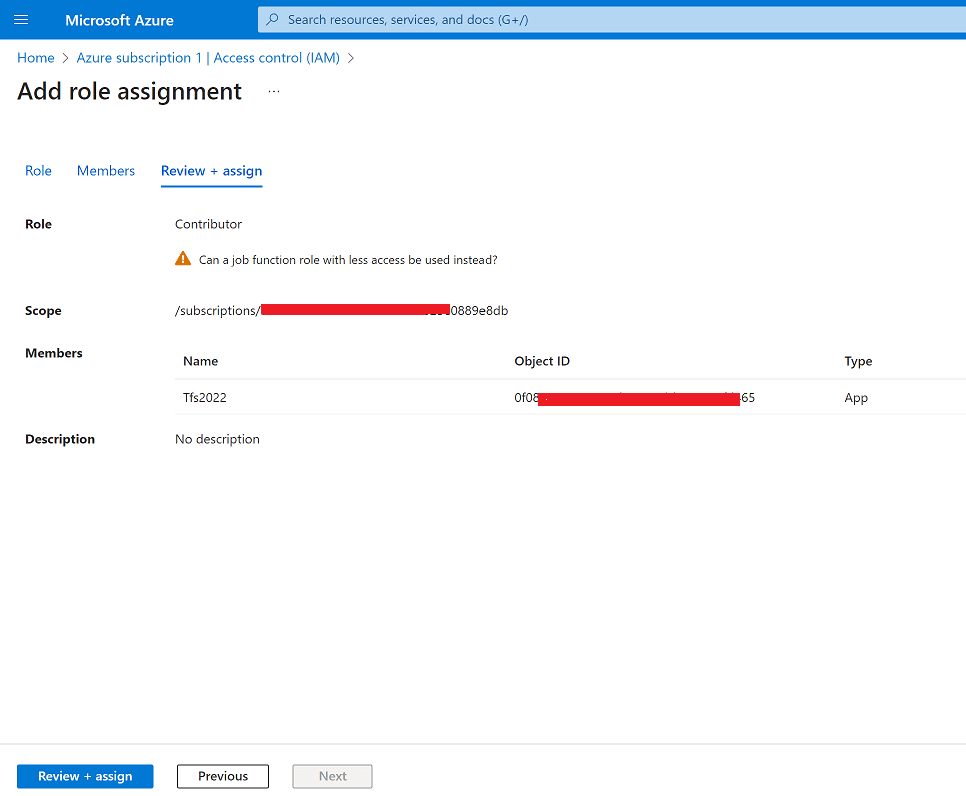
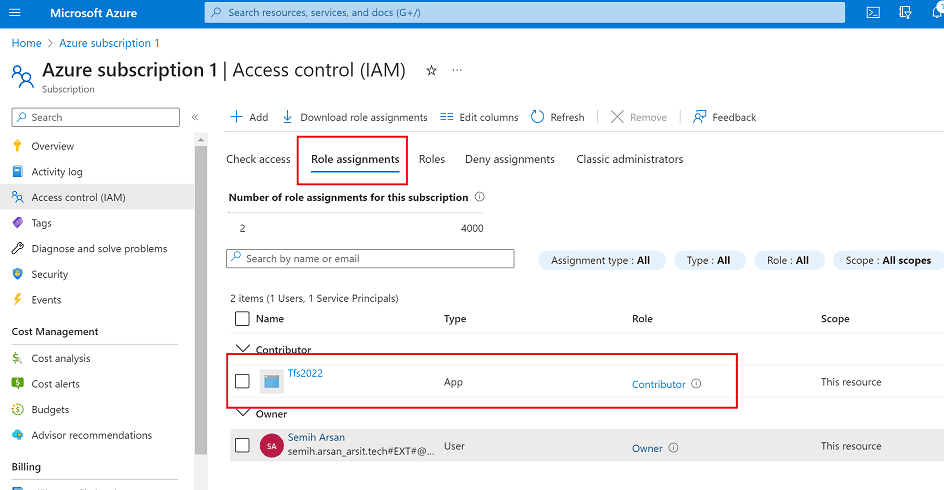
Go to Azure Subscription to assign permissions to this service principle connection Tfs2022. Click to “Add role assignment” and choose “Contributor” option under “Privileged administrator roles” section. Under Members section click on “Select members” and write tfs2022 to find our Tfs2022 app register which we created before. Click to select to add it as a member of contributor role. Then click to Review and Assign, and see Tfs2022 account under Role Assignments.

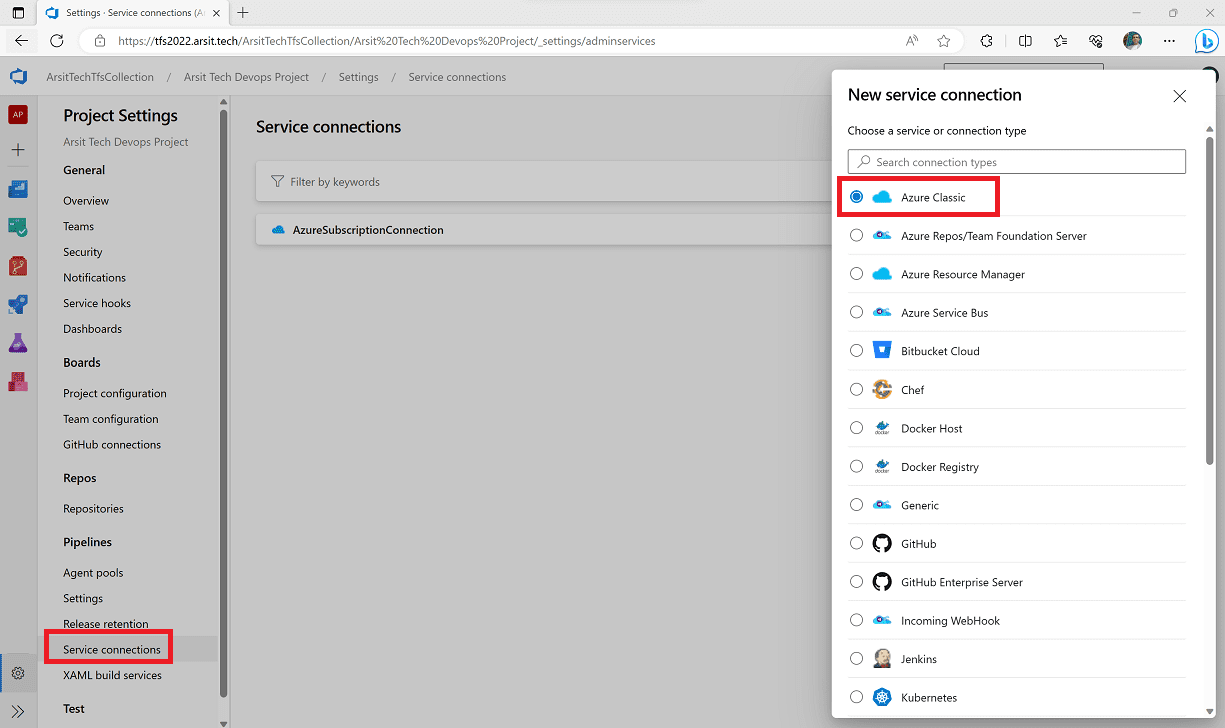
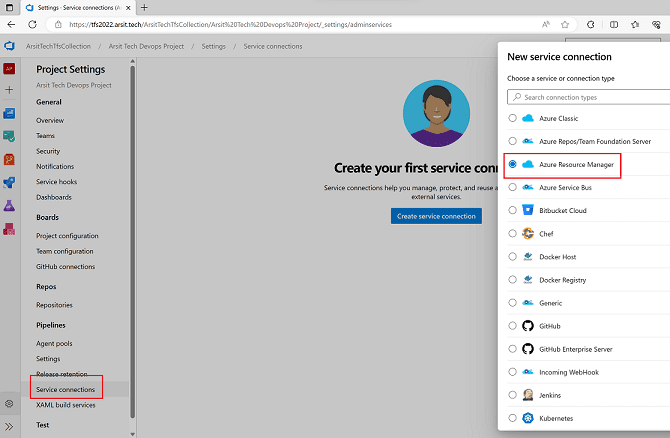
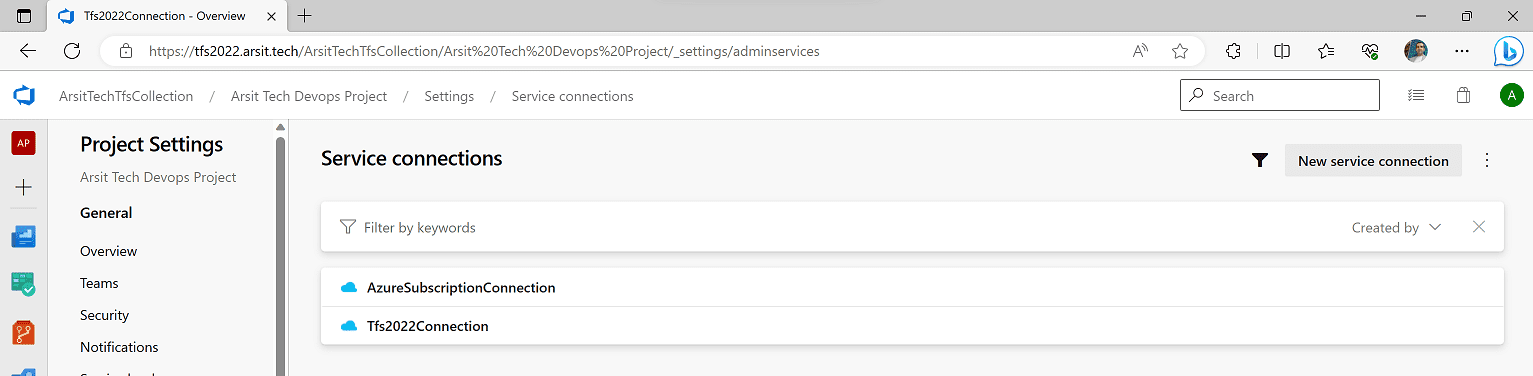
Login to on-premise Tfs2022 web interface to configure service connection with Azure cloud resources. Click on “Project Settings” and “Service connections”. Now, we need to consider about how to create a service connection between on-premise tfs 2022 and azure subscription. There are some small differences between Classic and Resource Manager. Sometimes with some resources, you cannot do something in pipeline that other one can do. That’s why we will create both service connections for our Tfs2022 just in case if we need one of them in future. I have used my own account for Classic connection but I suggest you to create a separated contributor devops account for this connection in Azure Active Directory.
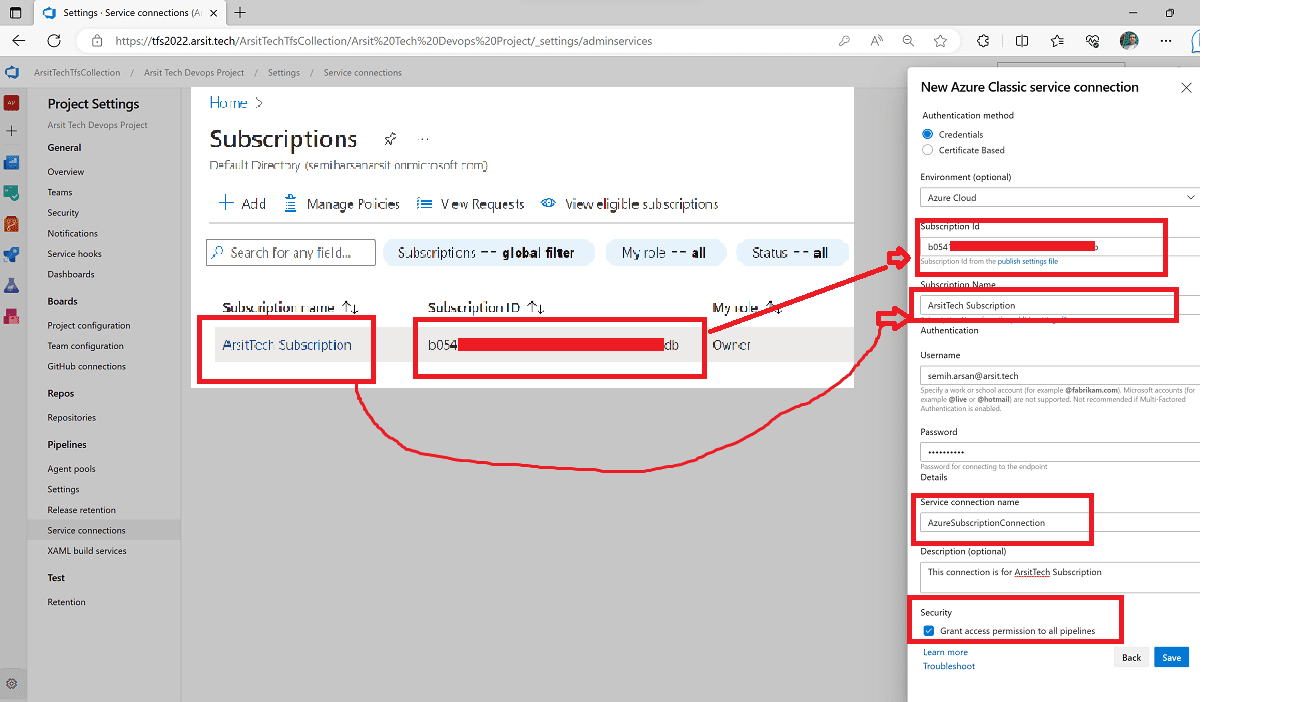
This is for classic connection. Just write your credentials and a name for connection. You can write anything as you want for Service Connection Name. But other values should be same with your azure subscription name and id. Tick on Grant access permission.
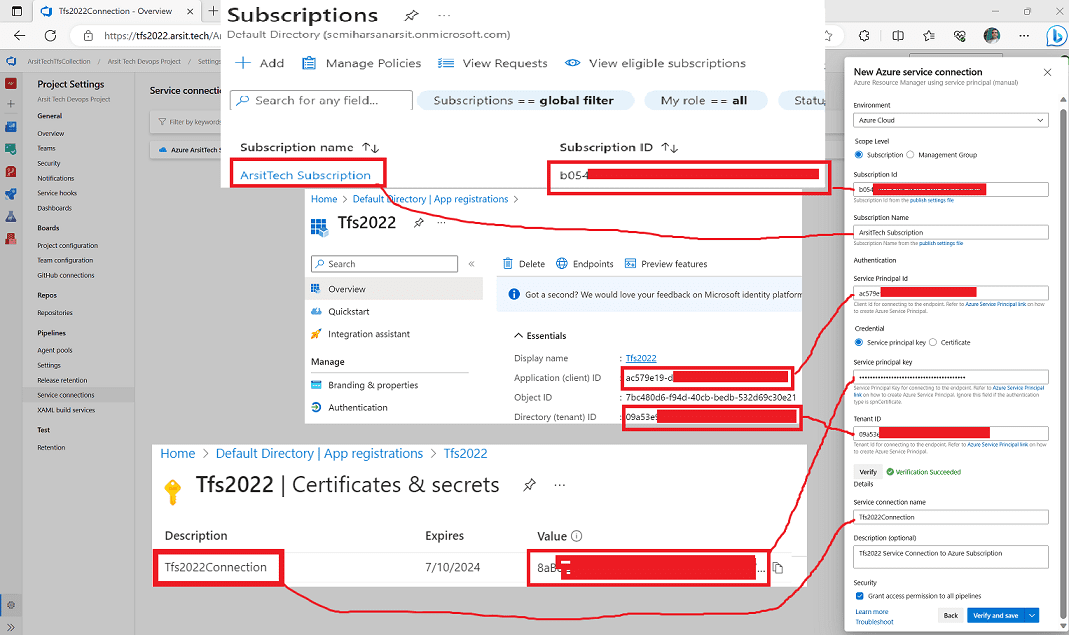
This is for Azure Resource Manager connection. Go to Azure Subscription and copy you subscription name and id, then go to App registration under Azure Active Directory and copy Application ID and Tenant ID from overview. Paste them in text fields as I showed in below second picture. After you verify you should see both service connections.

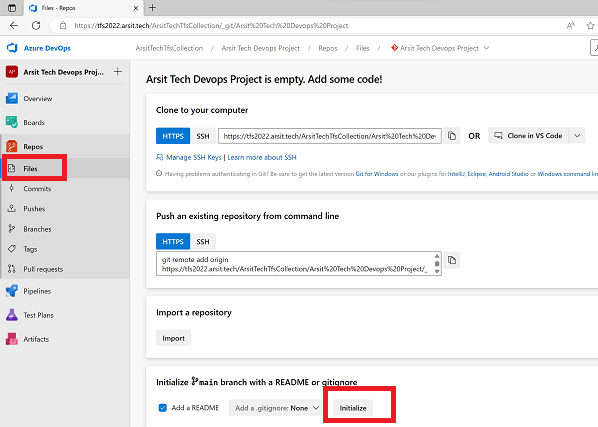
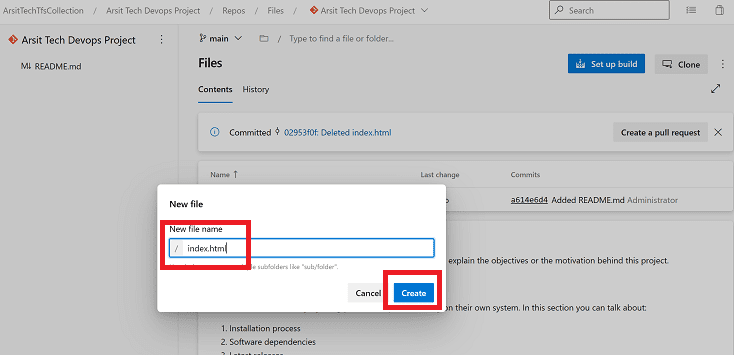
Before we create pipeline, we need to create repository and write some codes in there, because pipeline will ask where is your branch when you want to create it 😊 Go to Files under Repos and click on “Initilaize” at the end of page. Write a filename in your project and click on create, then after you write somethings in your file and click on Commit to save it in your repository. I have done these steps for test. You of course can upload your repository via git or vscode by using https or ssh link of your project as you can see in the Repos page.

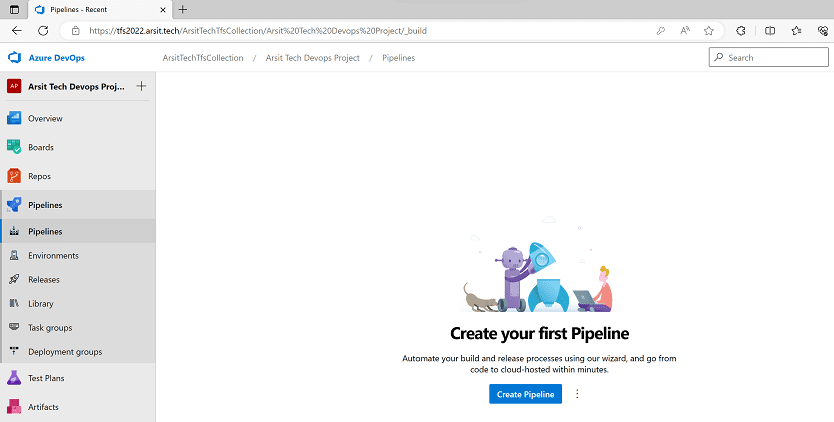
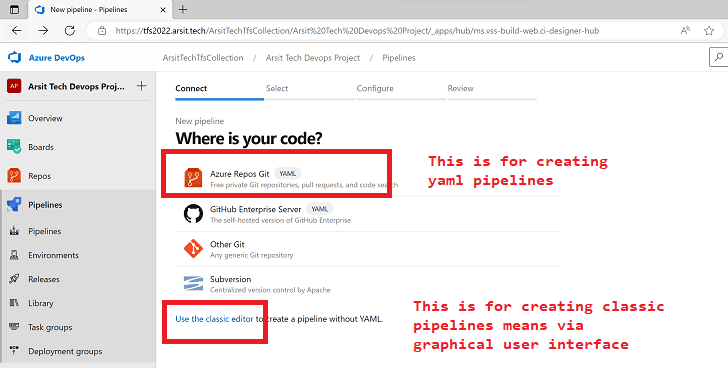
Now, we are ready to create a pipeline to deploy anything to azure subscription. Let us create a pipeline in our tfs project to see whether pipeline is able to connect to azure subscription. Go to pipeline of project and click on Create. If you want to write yaml codes for all pipelines that you will create to deploy your apps, then you need to choose Azure Repos Git. If you want to use graphical interface to create tasks to deploy your apps, then you need to click on “Use classic editor” link underneath of options. We will use classic editor in our test environment. I don’t like to bother myself with writing codes for pipelines as I am not a software developer 😊
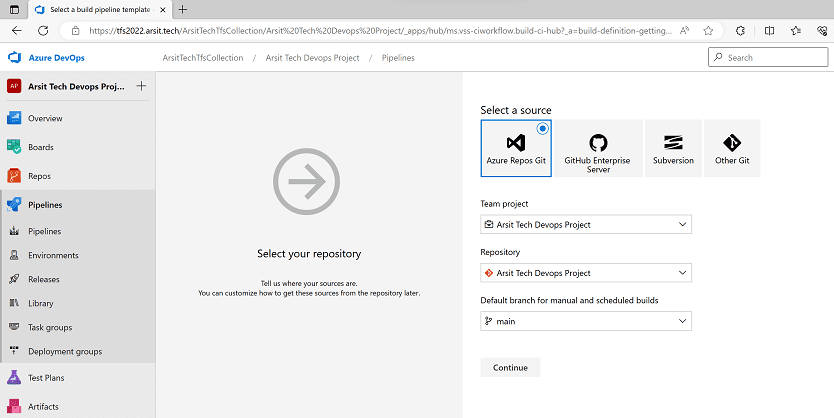
Next secreen you need to choose code repository to pull your codes. Tfs has ability to work with other repositories as well. For example you can save your codes in Github and use Tfs pipelines to deploy your apps to anywhere.
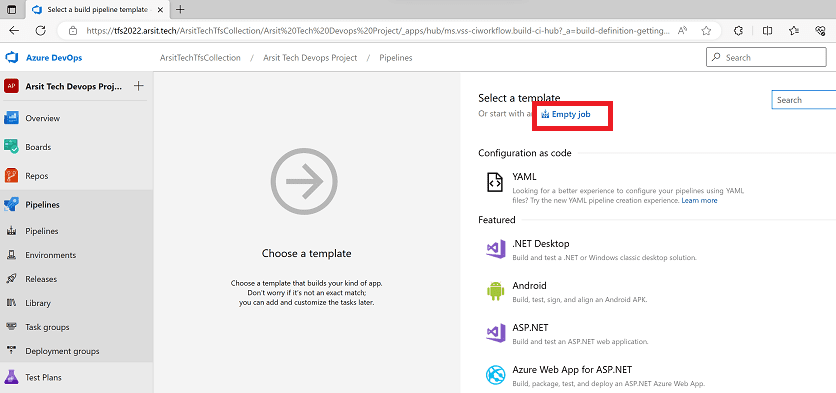
Click on Empty Job to create tasks according to your need. You can create any job task according to your application. Just find in job list and click on it to create its CI pipeline.
 #
#
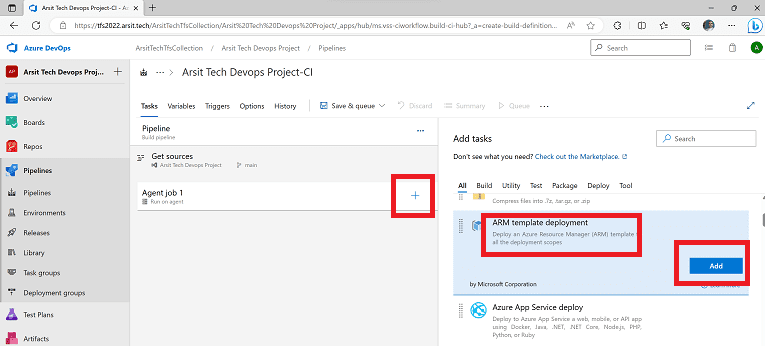
Click on “+” to add task to the CI pipeline job. I choosed to ARM template to show you that on-premise tfs 2022 can see azure subscription connection.
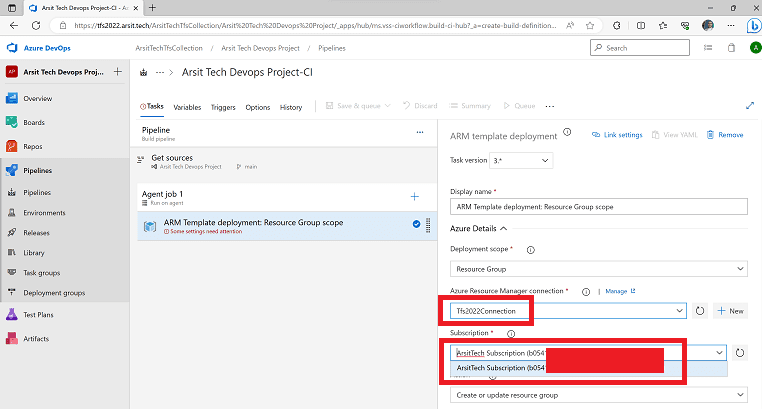
Well done guys. We have connected our on-premise azure devops 2022 to azure subscription. We can deploy anything via ci/cd pipelines to azure resources. No worries, the data transfer will be encrypted between tfs 2022 and azure cloud.
<< GO TO SETUP AZURE AKS CLUSTER WITH TERRAFORM CODE >>
<< GO TO SETUP AZURE DEVOPS 2022 ON A WINDOWS 2022 SERVER VIRTUAL MACHINE >>
<< GO TO HOW TO DEPLOY PYTHON APP MAIN POST >>